How to Prepare a Wall or Floor for Tiling, these are the 10 most common methods
It’s always important to prepare walls and floors before tiling. There are several ways to prepare a bumpy or uneven surface for tiling. The most common methods include plastering, installing backer boards, and using self-leveling compounds.
The best way to prepare an uneven wall for tiling is plastering, however, plastering a surface perfectly flat and even is not easy. A way around this is using a floor leveler. You must make sure that the concrete surface is clean before using the leveler.
A concrete backer board can also be used to overcome the problems of uneven walls and floors. Backer boards are moisture-resistant and provide a flat and even surface. These boards can be screwed into the walls or wooden floors with the help of specific backer board screws. These boards are easy to install and prepare walls and floors instantly for tiling.
This article will provide information about the 10 most common methods of preparing different types of walls and floors for tiling. It will also give you a step-by-step guide to install tiles on walls and floors.
Contents
- 1 Preparing Fresh Drywall for Tiling
- 2 Preparing Textured or Painted Wall for Tiling
- 3 Tiling on Existing Tiles
- 4 Preparing a Plywood Wall Surface for Tiling
- 5 Preparing Wallpapered Wall for Tiling
- 6 Tiling Floors
- 7 Preparing Wooden Subfloors for Tiling
- 8 Preparing Concrete Subfloors for Tiling
- 9 Step by Step Guide to Tiling a Wall
- 10 Step by Step Guide to Tiling a Floor
- 11 Final Word
Preparing Fresh Drywall for Tiling
Plastering walls require up to a month to dry. This enables the material to set correctly. There is no need to tape the joints in the drywall once it is ready for tiling. Apply a final layer of skim coat and let it dry thoroughly.
For the adhesive to bond well, use medium-grit sandpaper to rough the wall texture, creating a uniform surface. This is necessary as it gives the adhesive something to grab onto.
Before tiling, make sure that the wall is dust-free. Before applying the adhesive, wipe the wall with a cloth and make sure it is completely dry. To avoid moisture, especially in bathrooms and wet rooms, plasterboards can be used.
Preparing Textured or Painted Wall for Tiling
For tiling a painted or textured wall, first remove the peeling paint and scrape the wall. You can use a scraper to remove the paint on the wall. Create diagonal lines on the painted wall by using the edge of the scraper. This will make scraping the paint easier. Fill all the cracks and holes in the wall. Then fix the uneven areas in the wall with the sandpaper. It’s important to remove as much paint as you can before tiling a wall.
Move the wide side of the scraper over the painted wall to remove as much paint as you can. After removing the paint with a scraper, you can use a paint remover to get rid of any remaining paint. After the paint removal process, use medium-grit sandpaper to sand the wall and create a rough surface for the adhesive to bond properly.
Ensure the wall is dry and there are no heavy particles present on the wall using a vacuum. Use an ammonia-based cleaner or tri-sodium phosphate to remove any remaining dust, grease, and oils from the wall.
Tiling on Existing Tiles
To install tiles on an already tiled wall, you need to create a rough surface for the adhesive to bond well. You can use a grinding disc or a chisel for this purpose.
If you have an already tiled wall, there are two choices. You can either remove the old tiles and prepare the wall for the new tiles. Or you can tile over the old tiles. But most tiles are too smooth for the adhesive to hold correctly. Therefore, you need to create a rough surface for the adhesive to bond properly. You can use a hammer and a chisel to create a rough surface on the tiled wall. However, this can be quite laborious if the wall is large. Therefore, you can use a grinding disk to create arbitrary lines on the wall.
It’s also important to check for hollow tiles before installing new tiles, knocking each tile, and listening for hollow sounds. The hollow tiles must be removed, and the vacant space must be filled before installing new tiles. If the old tiles are too damaged, you must remove the old tiles before installing new ones.
If you want to reuse the old tiles, be careful while removing them and making the floor padded for when they’re taken off.
Preparing a Plywood Wall Surface for Tiling
Plywood is suitable for tiling the floors, but it’s not recommended for wall tiling. For wall tiling on plywood, use a backer board. This makes the wall much more crack-resistant.
Plywood is made up of compressed wood which is mixed with different oils. The plywood material gets affected by the heat. When exposed to drastic temperature changes, the tiles installed on the plywood are more likely to crack.
If you have a plywood wall, you can first install a backer board before placing tiles. The backer board is screwed down on the wooden subfloor using backer board screws. Then it’s mortared down with tile adhesive.
Preparing Wallpapered Wall for Tiling
Tiles offer more longevity and durability than wallpapers. The best option is to remove the wallpaper before tiling by wetting it with a sponge. Use a wallpaper scraper or a putty knife to remove the wallpaper effectively from the wall.
There is an overwhelming consensus from tiling companies and home decorating centers that you should not tile over wallpaper. Tiling over wallpaper can be problematic because you’re risking your expensive tiling job over a wall that is unlikely to hold the tiles in the long run.
If you want the longevity and durability of the tiles you are installing, you must ensure you properly remove the wallpaper first, so it’s adequately ready for tiling. To remove the wallpaper from the wall, apply warm water on the wallpaper and let it soak in. People also use steamers for this purpose, but most experts don’t recommend steamers because they can force more steam deeper into the drywall than intended, which may cause adhesion issues.
After applying warm water to the wallpaper, start scraping the putty knife from the edges, and once there is enough to hold, you can start pulling it by hand. After removing the wallpaper, let the wall dry. Once it’s dry, sand the wall with sandpaper and create a rough surface on the wall.
Tiling Floors
Tiling floors are slightly different than tiling walls. It’s important to mark the center of the floor first, especially if the floor is not symmetrical. Then measure the distance from the center to the side walls in order to maintain balance on the floor.
If the room isn’t square, you can also use one wall as a baseline and start tiling from there to maintain balance on the floor. After identifying the baseline, which can either be the center of the floor, the wall, or the straight line on the top of the wall, you need to make equal quadrants on the surface. Then you need to mix the thin-set and apply it to the back of the tiles.
A PEI rating of 0 means that the tile is suitable for applying on the wall but not on the floor. As the rating increases, so does the resistance of the tile. A PEI rating of 5 means that the tile is suitable for the floor as it can bear more weight and pressure.
Preparing Wooden Subfloors for Tiling
Before tiling on top of a wooden floor, you must remove or drive down any nails or screws sticking up. Install a cement backer board to create a flat surface to avoid cracking the tiles or grout.
The backer board is screwed down on the wooden subfloor. It’s done using specific backer board screws. Then it’s mortared down with tile adhesive. The joints between the pieces of the backer board must be tapped and mortared.
You may install a crack prevention membrane on both surfaces. This membrane not only prevents cracks but also acts as a waterproof membrane. Therefore, it’s helpful in wet areas or plywood subfloor applications. Spread the mortar at an angle of 45 degrees to the wooden subfloor with a notched trowel.
Preparing Concrete Subfloors for Tiling
Tiling on top of a concrete subfloor is easy compared to a wooden subfloor, as the tiles can be installed directly on the concrete. Before tiling, remove any old adhesive from the floor and fill any cracks in the floor with the appropriate product.
Remove the loose debris from the concrete floor using a floor scraper. It may be tough to use a grinder to remove any old adhesive or mortar from the subfloor, but it must be done. This will allow the new adhesive to bond properly.
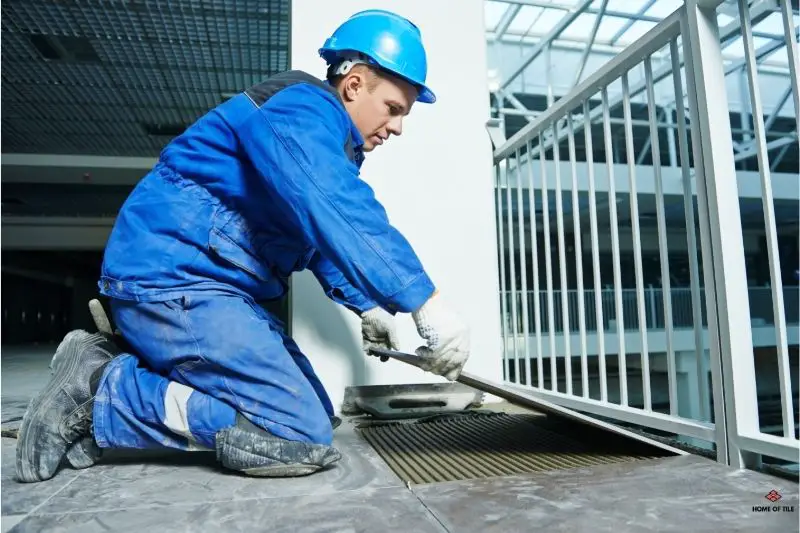
Step by Step Guide to Tiling a Wall
Installing new tiles isn’t a very complex task that requires professional assistance. You can install your new tiles easily if you follow these steps. You have to be patient and work carefully while taking measurements and placing the tiles.
- Step 1: Horizontally fix the baton to the datum point and check with the level.
- Step 2: Spread the adhesive evenly, starting from the center of the wall on a vertical datum point, installing the first tile onto it, and working your way along the wall.
- Step 3: Use tile spacers to make sure that the tiles are evenly spaced.
- Step 4: Cut the tiles to fit the edges where necessary.
- Step 5: Once you have finished the first row of the tiles, remove the baton and move onto the next row of tiles.
- Step 6: You may use an edging strip to conceal raw edges. Place the edging strip in position with the bottom edge under the end tile of the first row and as you progress up the wall, continue to place tiles on top of it.
- Step 7: Remove sticking out spacers as well as any excess adhesive once the adhesive is dry.
- Step 8: Use a grout float to grout the tiles by pushing them in the spaces between them. Allow the grout to dry to a point where it leaves a nice finish.
- Step 9: Then, use a sponge to remove any excess grout from the tiles.
- Step 10: Clean the tiles with a dry cloth after a couple of hours of installation.
Step by Step Guide to Tiling a Floor
The procedure for tiling walls and floors is almost the same, the only difference being the PEI ratings of the tiles. Floor tiles need to be more durable and have the ability to bear more weight than wall tiles. Here is a step-by-step guide to install tiles on the floor.
- Step 1: Ensure that the floor is solid. If you have wooden floors, you must have a 6mm cement backer board bonded to the floor with adhesive and screws before tiling.
- Step 2: Pick the easiest point to start. In a square room, the easiest point to start with is the center rather than the edges.
- Step 3: Install the first row of the tiles and make sure it is straight.
- Step 4: Follow the first row to the edges of the surface by applying adhesive to the areas and placing the tiles on them.
- Step 5: Ensure that the tile’s underside is not hollow as it could lead to cracking.
- Step 6: To ensure even spacing between the tiles, use spacers between the tiles. If the tiles are larger in size, then using a lash clip system to ensure spacing and leveling are correct.
- Step 7: Once the adhesive is dry, grout the tiles as described in the wall tile section above.
Final Word
Preparing walls or floors for tile installation is simple if you follow the steps outlined in this article. You can easily install tiles on any surface as long as your wall or floor is prepared appropriately. Different types of walls and floors require other preparation techniques, as explained in the article. But the common aspect of the preparation of surfaces is to make sure that the surface is level, moisture-free, and dust-free. When your surface is completely prepared, you can apply the adhesive and install the new tiles on the surface.