Where to start tiling: 12 things you should know
Everyone wants to give their tiles a more aesthetic look. The starting point of your project plays a very important role in this. Before tiling any surface, you must establish a complete layout. This way, you know where your cuts are, and you know your tiling pattern. Before tiling, consider the starting point where you will place the first tile. And lay your tiles following your first tile.
At the end of this article, you will understand the importance of the starting point. And you will learn where to start tiling your floor and wall.
Contents
- 1 Where to start tiling a floor, some helpful tips:
- 2 Where to start tiling a backsplash, some helpful tips:
- 3 Where to start tiling around a bath, some helpful tips:
- 4 Where to start tiling, some helpful tips:
- 5 Wall tiling, where to start. Some helpful tips:
- 6 Do you start in the middle when tiling?
- 7 Can you start tiling in a corner?
- 8 Where to start tiling a wall with a window, some helpful tips:
Where to start tiling a floor, some helpful tips:
In general, when tiling a floor, start from the center of the room. This will make your job easier, and the tiling pattern will be symmetrical. If you want to tile your room diagonally, this technique offers a logical area to begin. But there are situations where the center is not the best starting point.
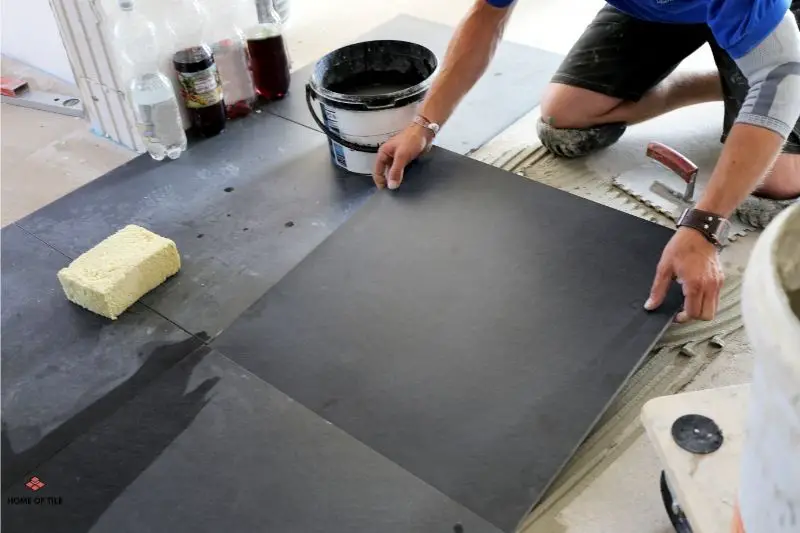
It is one of the most frequently asked questions, where to start tiling a floor. You could begin tiling your floor at any point. But starting at the wrong point can lead to unbalanced tile installation and unequal joints. The starting point when tiling a floor depends upon the tiling pattern that you are going to follow. There are specific techniques that can be used to tile effectively.
● Using different tile sizes
In recent years, a lot of tiling designs use more than one size of tiles. The design is such that there are two or three different sizes and shapes laid over the floor in a sequence.
If you follow this pattern, the starting point should be the leftmost corner of the room. Standing at the main door. The advantage of fixing tiles from the corner is that it will be easier to cut the tiles to fit them at the edges. Starting at the corner will also allow you to lay tiles according to your desired pattern. If you begin laying tiles from the center, it will be harder to get the pattern moving evenly at the edges.
● Tiling in a Diagonal Pattern
If you want to tile your floor in a diagonal pattern, you must start from the center of the room and then move towards the corners diagonally. The first step in a diagonal tile layout is to find the center point of the floor.
To do this, draw a straight line from one corner of the room to the opposite corner. Measure the length of this line and divide it in half. Mark this halfway point and then snap a second line 90 degrees to the first one at this halfway point. This will divide your room into four equal quadrants. Now you can lay tiles on the floor starting from the center and then moving towards the sides, completing each quadrant one by one.
● Straight tiling pattern
If you are a beginner, you should follow this tiling pattern to avoid any errors. To lay tiles in a straight line, two techniques can be followed to decide the starting point.
The first method is finding the center point of the wall opposite to the main door. This will provide a more finished look to your tiles because there will be a complete row of tiles in front of you as you enter the room. You can cut the tiles at the edges and then lay them around the rest of the room’s perimeter. I recommend first to dry lay the tiles. Suppose you see that at one end, you need a small tile piece. Shift the starting point a little bit. So you have sort of equal sizes on ends.
The other technique you can follow as a beginner is dividing the room into four equal quadrants. For this purpose, you need to find the center point of the floor. Measure the length of any wall in the room and divide it in half. Draw a straight line on the floor from the halfway point towards the opposite side. Find the center point of the opposite wall in the same way. The point where both the lines will intersect each other is the center point.
Where to start tiling a backsplash, some helpful tips:
In general, when tiling a backsplash, the starting point is the center. No matter if you are going up, down, or sideways. However, if you are tiling an intricate pattern, find the backsplash surface’s focal point and start fixing tiles from that point.
● Tiling a Backsplash From the Center:
When tiling a backslash, always start from the center of the wall. This gives your backsplash a more aesthetic look, and it keeps all the tiles even and symmetrical. To find the center of the wall, measure the length of the wall and divide it in half. Draw a straight line at this halfway point and then measure the height of the wall and divide it in half as well. Snap a line at the point where both of the lines intersect. This is the center and the starting point to tile over the backsplash.
● Tiling a Backsplash From a Focal Point:
If you are planning to tile a complex pattern, find the focal point that catches the eye. Start laying the tiles from that focal point towards the sides.
● Tiling a Backsplash, were not to start:
When tiling a backsplash, never start from the corners or sides. If you do, all of the cut tiles will be fitted at one side and will make your tiling project uneven and sloppy. So in the case of a backsplash, you should always start from the center or focal point to place the tiles properly and provide a professional look to your tiling.
Where to start tiling around a bath, some helpful tips:
In order to lay tiles around a bath, you again need to find the starting point where you will fix your first tile. Around a bath, tiles can be laid both on the floor and the wall. The key factor in both cases is to find the starting point to tile effectively.
● Where to start tiling around a bath: the wall
When tiling the wall around a bath, start from the bottom and then move towards the top. Cut tiles will be less visible at the top. Also, if you start tiling from the top of the wall, tiles may slip and fall because of the weight. If you don’t tile from floor to the ceiling, it is easy to end with a full tile.
● Where to start tiling around a bath: the floor
When tiling the floor around a bath, start laying tiles from the most visible point. Then lay tile towards the other side. It will give your floor a more aesthetic look as the whole tiles will be more in view. And the cut tiles will be at the edges or less visible areas.
Where to start tiling, some helpful tips:
In general, the most recommended starting point to lay tile is to start from the center. Find the center point of the surface. To do this, measure the length of the surface and divide the number in half. Draw a straight line at this point. Similarly, measure the width of the surface and divide it in half as well. Draw a straight line at each measurement, and the point where both lines intersect is the center point of the surface.
Before fixing tiles on the surface, dry test. That way, you test the complete layout and minimize any errors. Place the first tile at the starting point. Make sure to put spacers between the tiles and mark the tiles that need cutting. Using chalk or a pencil, draw a line on the tile using a ruler and mark where it needs to be cut. Keep placing all the tiles with spacers between them to establish a perfect layout and mark all the tiles that need cutting. If you notice that at one end you need really small tiles, shift the layout. So you end with more equal sizes on both ends of the room.
Cut the tiles that you marked using a tile cutter. Make sure you mark their order on the back. So you know where a particular tile will go.
Wall tiling, where to start. Some helpful tips:
In general, always tile from bottom to the top. And start from the center. Tiling the wall from top to bottom is a precarious process and is not recommended. There is a chance that tiles may slip if the thin-set used is not top quality or the tiles are heavy.
● Wall tiling from top to bottom:
If you want to tile your wall from top to bottom, you need to use organic mastic because it is very sticky, and tiles stick to it immediately. Along with that, you should use painter’s tape to reduce the risk of tiles slipping from top to bottom. You could also use a baton under the tiles to support them and complete each row one by one.
● Wall tiling from the bottom up:
When tiling from the bottom, there is no need for a baton, and you can lay tiles from bottom to top.
If you choose the center of the wall as your starting point, first place the tiles and do a dry test to find the size of the tiles that you need to cut at the edges to fit them.
When tiling from the bottom, there is one thing you should check. If the floor of the room you are tiling is not straight or has a slight slope. The joints of the wall tiles become uneven and look bad. You can solve this problem by tiling the wall starting from the highest point and then using the same starting height for all the other walls.
● Wall tiling starting at the center point:
You can also start tiling the wall by finding the center point. And lay the first tile at the center. From there, move towards the sides of the wall. To do this, you must measure the distance from the center to the wall sides, as discussed earlier. After measuring, place the tiles vertically for the dry test and draw the complete layout by marking each tile before mixing the thin-set. This will help you find the number of tiles you need and the half tiles you may need at the end of each row. This will keep the wall looking good by making the pattern symmetrical. Repeat the same procedure horizontally as well. Be sure to use a suitable strong thin-set
Do you start in the middle when tiling?
Generally, I recommend start tiling from the middle of the wall or floor. This helps to achieve even tile cuts on both sides end and a symetrical. When you tile more complex layouts, it is often better to start from where the eye first looks.
If you are tiling a shower, you should start from the center of the surface as well. However, this process is time-consuming, and it can take longer than you expect to complete the whole surface. If you plan to tile the floor and have a time constraint. Start at one well and lay tile to the other. This will minimize the number of cuts but does not always give the best result.
Can you start tiling in a corner?
You can start tiling a floor from the corner, but I do not recommend it. Only when the corner is the main viewpoint of the room would I start there. For a wall, this is different. If the corner is clearly visible, it could be a good starting point. Depending on the layout, start with a whole and a half tile repeating after each other.
Always dry test the design so you know how it will look in different parts of the room. Adjust where needed.
Where to start tiling a wall with a window, some helpful tips:
In general, start by placing the first tile at the bottom corner of the window. Then move towards the left side of the window. Cut the tiles where necessary to fit them around the window. Move towards the top of the window and fix the tiles in a row right above the window to establish a straight pattern before moving up. When placing the tiles, make sure that tile joints align with each other and maintain equidistance between all the tiles.
Before installing tiles, prepare the surface by filling any holes and cracks with a filler and remove any loose paint or wallpaper. Then smooth the surface using sandpaper and clean any dust and debris with a wet sponge. Wait until the surface is dry and apply painter’s tape at the edges of the window. This is done to prevent the mortar from affecting the neighboring surface.