25 Pro Tips for Perfectly Applying Tile Adhesive
Are you planning to revitalize your space with a stunning tile design? Look no further! Our step-by-step guide on ‘how to apply tile adhesive’ will help you achieve a perfect finish, whether you’re a DIY enthusiast or a seasoned pro. With the right technique and know-how, your walls or floors will look like a masterpiece in no time.
How to apply tile adhesive:
Applying tile adhesive is essential for a professional and long-lasting tile installation. Choosing between ready-mixed or powdered adhesive depends on the tile type, surface, and project size. Prepare the surface, mix powdered adhesive with water, and use a notched trowel to spread the adhesive onto a clean, level surface.
Press tiles firmly, using spacers for alignment. Wipe away excess adhesive and let it dry for at least 24 hours before applying grout. With proper application and patience, you can achieve professional results.
Discover the secret to perfect tile application by mastering the art of tile adhesive. Our step-by-step guide will teach you the key techniques and essential tools to ensure a smooth, long-lasting finish. Say goodbye to uneven tiles and hello to stunning surfaces.
Contents
- 1 Instructions for Applying Tile Adhesive: A Comprehensive Guide
- 2 What is the Appropriate Thickness for Spreading Tile Adhesive?
- 3 What is the process for applying tile adhesive?
- 4 What is the Proper Method: Applying Tile Adhesive to the Tile or the Floor?
- 5 Which Instrument Do You Utilize for the Application of Tile Adhesive?
Instructions for Applying Tile Adhesive: A Comprehensive Guide
Applying tile adhesive is a crucial step during the installation of tiles, ensuring that they remain in place for years to come. You can achieve professional and long-lasting results with the right knowledge and preparation. I will provide you with a comprehensive step-by-step guide on how to apply tile adhesive properly.
• Choosing the Right Tile Adhesive
Before diving into the application process, choosing the right type of adhesive for your project is essential. There are two main types of tile adhesive: ready-mixed and powdered. The one you choose will depend on the type of tile you’re installing, the surface you’re applying it to, and your experience level.
– Ready-Mixed Adhesive
This type of adhesive comes in a tub and is ideal for small to medium-sized projects. It’s perfect for use with ceramic tiles and is generally easier to work with than powdered adhesive. However, it is unsuitable for use with large tiles or tiles made from natural stone.
– Powdered Adhesive
Powdered adhesive comes in a bag and must be mixed with water before use. This type of adhesive is suitable for larger projects and works well with natural stone tiles. It also offers a stronger bond than ready-mixed adhesive, making it a better choice for heavy tiles or those subject to frequent movement.
• Tools and Materials Needed
Before you begin applying the tile adhesive, gather the following tools and materials:
- Tile adhesive
- Notched trowel
- Mixing bucket (for powdered adhesive)
- Electric drill with paddle mixer attachment (for powdered adhesive)
- Spirit level
- Tile spacers
- Clean cloth
- Clean water (for powdered adhesive)
• Mixing the Tile Adhesive (Powdered Adhesive Only)
If you’re using powdered adhesive, you’ll need to mix it with water before use. Follow the manufacturer’s instructions to determine the correct ratio of water to adhesive. Pour the water into the mixing bucket first, followed by the adhesive.
Mix thoroughly using an electric drill with a paddle mixer attachment until you achieve a smooth, lump-free consistency. Allow the adhesive to stand for a few minutes to activate the bonding agents, per the manufacturer’s instructions.
• Preparing the Surface
Before applying the adhesive, ensure the surface you’re working on is clean, dry, and free from any loose debris. If you’re applying tiles to a wall, ensure the area is level using a spirit level. For floors, ensure the surface is flat and even.
• Applying the Tile Adhesive
– Step 1: Spread the Adhesive
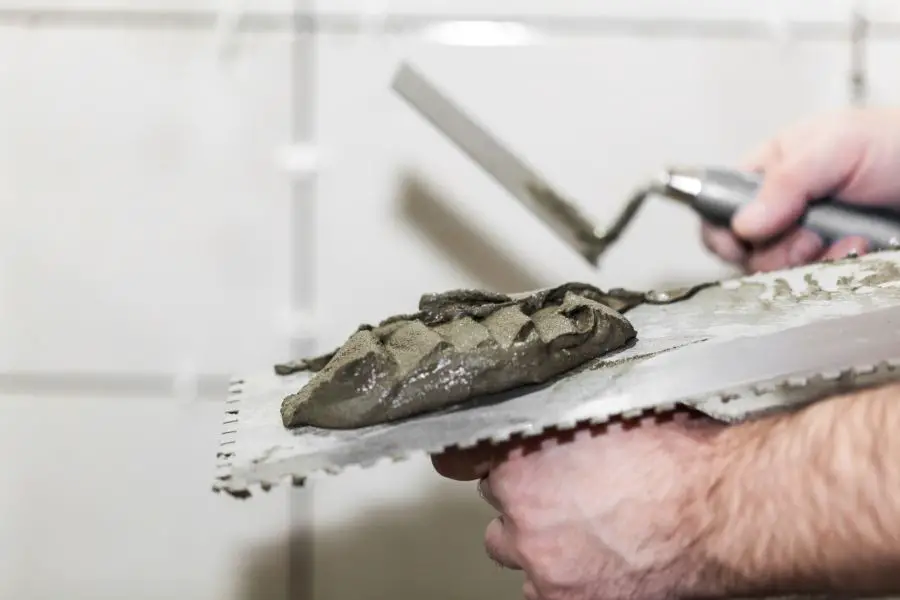
Starting from one corner of the surface, use the notched trowel to spread an adhesive layer. Hold the trowel at a 45-degree angle and use the notched edge to create ridges in the adhesive. These ridges help the tiles to grip the surface more effectively.
Applying enough adhesive to cover a small working area of around 1 square meter is a good starting point.
– Step 2: Apply Adhesive to the Tile
Sometimes, you may also need to apply a thin adhesive layer to the back of the tile. This is called “back-buttering” and is particularly recommended for larger tiles or tiles with an uneven surface, such as natural stone tiles.
Using the notched trowel to spread a thin adhesive layer evenly across the tile’s surface to back-butter.
– Step 3: Position the Tile
Press the tile firmly into the adhesive, using a slight twisting motion to ensure it makes full contact. Ensure the tile is level by pressing a spirit level against it. If necessary, adjust the tile by tapping it gently with your hand or the handle of the trowel.
– Step 4: Repeat with the Remaining Tiles
Apply adhesive and position the tiles until you have covered the entire surface. Use tile spacers between each tile to maintain uniform spacing and alignment.
– Step 5: Clean Tiles
You may notice adhesive bleeding out from between the tiles as you work. Use a clean cloth to wipe away excess adhesive before it dries. Removing dried adhesive can be much more difficult, so cleaning up as you go is best.
• Final Thoughts and Recommendations
Allow the tile adhesive to dry for at least 24 hours before walking on the tiled floor or applying grout to the seams between the tiles. Following the manufacturer’s instructions regarding the recommended drying time is important.
Remember to choose the right type of adhesive for your project and ensure the surface is adequately prepared before application. Applying tile adhesive may seem challenging initially, but you can achieve a professional-looking result with practice and patience.
Step | Description |
|---|---|
1 | Choose the right type of adhesive based on the tile type, the surface, and the environmental conditions. |
2 | Prepare the surface by cleaning it thoroughly and ensuring it is flat and free from dust, grease, and debris. |
3 | Mix the adhesive according to the manufacturer’s instructions until it reaches a thick, creamy consistency. |
4 | Using a notched trowel, spread a layer of adhesive on the surface, holding the trowel at a 45-degree angle. Only apply enough adhesive for a few tiles at a time. |
5 | Press the tile into the adhesive with a slight twisting motion, ensuring that it is properly embedded and aligned with the surrounding tiles. |
6 | Use tile spacers if necessary to maintain consistent spacing between the tiles. |
7 | Repeat steps 4-6 for each tile, ensuring the adhesive does not dry out before placing the tiles. |
8 | Allow the adhesive to dry according to the manufacturer’s recommended time before applying grout or applying any load to the tiles. |
What is the Appropriate Thickness for Spreading Tile Adhesive?
Installing tiles is a great way to add a touch of elegance and style to any space. Whether you are working on a bathroom renovation or updating a kitchen backsplash, the choice of tile adhesive plays a crucial role in the overall success of your tiling project.
The thickness of tile adhesive determines the final look and longevity of your tiled surface. We will delve into the appropriate thickness for tile adhesive, how to choose the right adhesive for your project, and expert tips to ensure a professional finish.
• Tile Adhesive Thickness: The Proper Measurement
Tile adhesive thickness is an essential aspect of a successful tiling project. The correct thickness ensures the tiles have a uniform and secure bond with the substrate, providing a stable and durable surface.
The general rule is that tile adhesive should be spread 0.1 to just over 0.2 inches (3-6mm) thick. However, this can vary depending on the tile type, size, and substrate used.
– Small Tiles
A just over 0.2 inch (3mm) adhesive thickness is often sufficient for smaller tiles, such as mosaic or subway tiles. Small tiles adhere well to the substrate with a thinner adhesive layer, ensuring a smooth surface.
– Large Tiles
Larger tiles, such as porcelain or ceramic tiles, typically require a thicker adhesive layer. A 6mm thickness is usually recommended, ensuring proper coverage and adhesion for the larger surface area. A notched trowel can aid in the even distribution of adhesive.
– Natural Stone Tiles
Due to their unique characteristics and vulnerabilities, natural stone tiles, such as marble, granite, or travertine, may require a slightly thicker adhesive layer. In this case, a 6-8mm thickness is usually ideal to ensure strong adhesion and support for the natural stone.
• Choosing the Right Adhesive for Your Project
The choice of tile adhesive is critical in determining the thickness and performance of your tiling project. Several types of adhesive are available, each with its advantages and recommended uses.
– Pre-Mixed Adhesive
Pre-mixed tile adhesive is a convenient and time-saving option, as it requires no mixing and can be applied directly from the container. This type of adhesive is suitable for small to medium-sized tiles and is best used for interior, low-moisture areas such as kitchen backsplashes or bathroom walls.
– Powdered Adhesive
Powdered tile adhesive offers more flexibility, as it can be mixed to the desired consistency and thickness. This type of adhesive is suitable for a wide range of tile sizes and types, as well as interior and exterior applications.
Powdered adhesive typically offers stronger adhesion and is often recommended for larger tiles or areas with high levels of moisture or movement.
• Expert Tips for Proper Tile Adhesive Application
A professional-looking tile installation starts with the correct application of tile adhesive. Here are some expert tips to ensure the best results.
– Surface Preparation
Before applying tile adhesive, the substrate should be clean, dry, and dust-free. This will ensure a strong bond between the tile and the substrate.
– Correct Trowel Selection
Using the right trowel is crucial for achieving the desired adhesive thickness. A notched trowel will help spread the adhesive evenly and create a uniform layer. The size of the notches should be considered in relation to the tile size and adhesive thickness requirement.
– Applying The Adhesive
When applying tile adhesive, hold the trowel at a 45-degree angle, and use a sweeping motion to spread the adhesive across the substrate. Be sure to cover the entire surface with a consistent layer of adhesive.
– Comb The Adhesive
After spreading the adhesive, use the notched edge of the trowel to comb through the adhesive, creating ridges that will help with proper adhesion and leveling of the tiles.
– Apply Tiles With Even Pressure
Press the tile firmly into the adhesive, using even pressure to ensure the tile is well seated and level. Be sure to adjust the tile before the adhesive begins to set.
• Conclusion
The thickness of tile adhesive plays a crucial role in the success and durability of your tiling project. By following the guidelines outlined above and paying close attention to the substrate, tile size, and type, you can ensure a professional finish that will stand the test of time.
With the proper tile adhesive thickness, your new tiled surfaces will look beautiful and continue to perform and add value to your space for years.
What is the process for applying tile adhesive?
Laying tile adhesive is crucial in any tiling project, whether in a bathroom, kitchen, or any other area requiring a durable and appealing flooring or wall solution. I will explain how to lay tile adhesive properly, ensuring that your tiles remain in place and the finished surface is attractive and functional.
• Choosing the Right Adhesive for Your Project
Before embarking on your tiling project, it’s essential to select the appropriate adhesive for the type of tiles and substrate you will be using. There are three main types of tile adhesives:
- Ready-mixed: This type of adhesive is pre-mixed and comes in tubs, making it convenient for smaller projects. It’s ideal for ceramic tiles and is suitable for walls but not recommended for floor installations or large-format tiles.
- Powdered: Powdered adhesive comes in bags and requires mixing with water. It’s more versatile than ready-mixed, suitable for various tile types and floor and wall installations, and better suited for larger projects.
- Flexible: Flexible adhesive is a powdered product designed for substrates that may experience movements, such as underfloor heating systems, wooden floors, or freshly-laid concrete. It is also ideal for heavy tiles such as porcelain or natural stone.
Once you’ve chosen the right adhesive for your project, follow the manufacturer’s instructions for mixing and applying the product. Remember that proper adhesive preparation ensures a successful and long-lasting tile installation.
• Preparing the Substrate
Before applying tile adhesive, it’s important to ensure the substrate is clean, dry, and free from dust or debris. Loose paint, wallpaper, or old adhesive should be removed. For floor installations, ensure the surface is level and free from irregularities.
For wall installations, ensure that the wall is plumb (vertically straight), as uneven walls can lead to difficulty properly aligning your tiles. Both walls and floors must be thoroughly clean and free from moisture or dampness.
• Applying Tile Adhesive
Before starting, gather the necessary tools and materials, such as:
- Tile adhesive
- Notched trowel (with appropriate notch size for your tiles)
- Spirit level
- Tile spacers (if required)
- Bucket and water for mixing
- Mixing paddle attachment (for a drill) or a manual mixer (if required)
– Step 1: Mixing the Adhesive
Mix powdered adhesive with water according to the manufacturer’s instructions, ensuring a smooth, creamy consistency. It’s essential to avoid over-mixing, as this can introduce air bubbles and weaken the adhesive. Do not use expired or partially-set adhesives, as these may compromise the bond with your tiles.
– Step 2: Applying the Adhesive
Using a notched trowel, apply adhesive to a manageable section of the floor or wall, starting in one corner of the room or space. Hold the trowel at a 45-degree angle and spread the adhesive in straight lines, creating ridges or “channels” for the tiles.
Be diligent in maintaining a consistent adhesive thickness, as variations may cause the tiles to sit unevenly.
– Step 3: Laying the Tiles
Carefully position the first tile in the adhesive, applying even pressure and ensuring full contact with the underlying adhesive. The notched trowel’s ridges will help maintain an even adhesive layer beneath the tiles. Tile spacers can be used to maintain consistent spacing and alignment.
– Step 4: Checking for Adhesive Coverage
Occasionally, lift a tile to check the adhesive coverage underneath the back of the tile should be fully covered. If there are gaps, this can lead to a weak bond and potential problems. Adjust the amount of adhesive or trowel angle, if required, to ensure adequate coverage.
– Step 5: Continuing the Process
Repeat applying adhesive and laying tiles, ensuring that the tiles are evenly spaced, level, and properly aligned. Use a spirit level to check for consistency in tile levels and adjust as required. Once each section is complete, clean any excess adhesive from the surface of the tiles before it sets.
• Final Thoughts
Laying tile adhesive may seem daunting, but you can achieve a professional-looking result with the right tools, materials, and patience. Proper substrate preparation, adhesive choice, and application techniques are critical to a long-lasting and functional tile installation.
Always refer to the manufacturer’s guidelines and recommendations when using tile adhesives to ensure the best results for your specific project.
Step | Instructions |
|---|---|
1. | Mix the adhesive: Follow the manufacturer’s instructions for mixing the tile adhesive. Typically, you add water to a dry mix until it achieves the desired consistency. |
2. | Position the tile: Press the tile firmly onto the adhesive, ensuring the edges are aligned and even with the surrounding tiles. You can use tile spacers to help maintain consistent spacing between tiles. |
3. | Apply the adhesive: Spread an even layer of adhesive on the surface using a notched trowel. Hold the trowel at a 45-degree angle and make grooves in the adhesive to create an even pattern. |
4. | Position the tile: Press the tile firmly onto the adhesive, making sure the edges are aligned and even with the surrounding tiles. You can use tile spacers to help maintain consistent spacing between tiles. |
5. | Adjust as needed: Before the adhesive dries, adjust the position and alignment of the tile if necessary. You may need to add or remove adhesive to ensure a level and well-adhered installation. |
6. | Allow to dry: Allow the adhesive to set and dry according to the manufacturer’s instructions, usually 24-48 hours before applying grout and finishing the tile installation. |
What is the Proper Method: Applying Tile Adhesive to the Tile or the Floor?
The process of installing tiles can be a daunting task for many homeowners. With many factors to consider, one common question is whether to apply tile adhesive to the tile or the floor.
I will discuss the correct approach for applying tile adhesive, including various techniques depending on the type of tile and project at hand. We’ll also dive into some helpful tips to complete the job efficiently and effectively.
• Understanding Tile Adhesive
Before diving into the application process, it’s essential to understand tile adhesive and its role in installing tiles. Tile adhesive is used to bond tiles to the surface they are attached to, typically a wall or floor.
The adhesive ensures tiles remain in place and creates a secure bond between the tile and the substrate. The type of adhesive needed will vary depending on the type of tile being used, the backing material on the tile, and the surface on which it is being installed.
• Applying Adhesive to the Floor: The Standard Method
When applying tile adhesive, the most common method is to apply it directly to the floor. This is the standard approach for most floor tile installations and is beneficial for a few reasons:
- It ensures an even layer of adhesive on the floor, providing better support and stability for the tiles.
- It minimizes the chances of tiles moving or slipping during installation.
- Applying adhesive to the floor allows for easier adjustments and positioning of tiles.
Here are the steps for applying adhesive to the floor:
– Prepare the Surface
Before applying any adhesive, it’s essential to prepare the surface. Ensure the floor is clean and free of dust, debris, and any previous adhesive or grout. If the surface is uneven, use a leveling compound to create a smooth, level base for tile installation.
– Choose the Right Adhesive
Selecting the right adhesive for your project is vital for a successful tile installation. The type of tile, the backing material, and the surface being tiled will dictate the adhesive needed. Consult the tile manufacturer’s recommendations for guidance on the appropriate adhesive.
– Mix and Apply the Adhesive
Following the adhesive manufacturer’s instructions, mix the adhesive according to the guidelines provided. Using a notched trowel, spread the adhesive onto the floor, holding the trowel at a 45-degree angle to create even ridges.
Start at a corner and work your way outward, applying adhesive to small sections at a time to prevent it from drying out before you can place the tiles.
– Lay the Tiles
Carefully place your tiles onto the adhesive, applying slight pressure to ensure a strong bond. Use tile spacers to maintain consistent gaps for grouting later. Periodically check your tiles for level and adjust as needed.
• Applying Adhesive to Tile: The Back Buttering Method
Applying adhesive directly to the tile instead of the floor is beneficial in some cases. This technique, known as “back buttering,” is particularly useful when working with large-format tiles or tiles with irregular surfaces.
Back buttering helps ensure full adhesive coverage on the tile, improving adhesion and reducing the risk of tiles cracking under pressure.
Here’s how to perform the back buttering method:
– Prepare the Tile
Ensure your tile is clean and free of dust or debris. If you’re working with mesh-backed tiles, ensure no mesh is visible after applying the adhesive.
– Apply Adhesive to the Tile
Using a notched trowel, spread the adhesive onto the back of the tile, ensuring full coverage. Hold the trowel at a 45-degree angle to create even ridges. You may also need to apply adhesive to the floor using the standard method outlined above for large-format tiles.
– Lay the Tile
Carefully place your back-buttered tile onto the prepared surface, applying slight pressure to ensure good contact with the adhesive. Use tile spacers to maintain consistent gaps, and check for level as you proceed.
• Which Method Should You Choose?
Ultimately, the choice between applying adhesive to the floor or the tile will depend on factors such as the tile type, the tile surface, and your preference.
Generally, applying adhesive to the floor is the standard method for most projects. However, back buttering can be beneficial in certain cases, and evaluating your project is essential to determine the best approach.
• Tips for a Successful Tile Installation
Here are some additional recommendations for a successful tile installation:
- Always use a notched trowel appropriate for the size of the tile and the type of adhesive you’re using.
- Follow the manufacturer’s instructions for mixing and applying the adhesive. Adhering to these guidelines ensures that your tile installation will have the best possible bond.
- Be patient and allow the adhesive to dry completely before grouting or adding weight to the tiles.
By understanding the correct techniques for applying tile adhesive, you can ensure a professional-looking and long-lasting result. Whether you apply adhesive to the floor or the tile, the key is to be thorough and consistent to create a strong bond between the tile and the surface.
Now that you have the needed knowledge get out there and bring your tile project to life.
| Do you apply tile adhesive to the tile or the floor? |
|---|
| Apply adhesive to the floor and then place the tile on top of the adhesive. Trowel the adhesive onto the floor, spreading it evenly across the area where the tile will be installed. Then, place the tile in the desired position and press down firmly, ensuring proper adhesion between the tile and the floor. |
Which Instrument Do You Utilize for the Application of Tile Adhesive?
When it comes to tiling projects, whether it’s a bathroom renovation, kitchen backsplash, or floor upgrade, selecting the right tools for the job is just as important as choosing the right tiles. One such essential tool is the one used to apply tile adhesive.
Knowing which type of tool to use and how to use it properly can greatly impact your tiling job’s final result and longevity. I will provide a comprehensive overview of the various tools used for applying tile adhesive, along with their advantages and best practices.
• Notched Trowels
Notched trowels are the most popular and widely used tools for applying tile adhesive. These trowels consist of a flat metal plate with a handle, and they have notches of varying sizes cut into one or more of their sides.
The primary purpose of these notches is to help evenly spread the adhesive, ensuring that the entire surface area of the tile has proper contact and bond with the adhesive.
– Square-Notch Trowels
The square-notch trowel is the go-to trowel for most tiling projects. It is versatile, easy to use, and recommended when working with medium to large-sized tiles. These trowels typically come in various sizes, and the notches should be chosen based on the size and thickness of the installed tiles.
Generally, the larger the tile, the larger the notches should be.
For instance, a trowel with 1/4-inch square notches is suitable for tiles up to 12 inches square, while a trowel with 3/8-inch or 1/2-inch square notches is better for larger tiles.
– V-Notch Trowels
V-notch trowels are often preferred for smaller tiles or delicate materials such as glass or metal mosaic tiles. The V-shaped notches are gentler, minimizing the risk of puncturing or scratching the delicate backing that glass or metal tiles often have.
V-notch trowels typically come in sizes ranging from 3/16-inch to 1/4-inch, with smaller sizes recommended for thinner, smaller, and larger ones for thicker, larger tiles.
– U-Notch Trowels
U-notch trowels are less commonly used but are appreciated for their ability to create a more uniform adhesive bed on the surface. They are often used for floor tiling or when working with heavy, large-format tiles that require additional support.
The adhesive ridges created by a U-notch trowel tend to collapse into the valleys more efficiently, creating better contact between the tile and the adhesive.
• Margin Trowels
Margin trowels are versatile, hand-held tools used for various purposes in a tiling job, including applying adhesive to the backs of tiles (also known as back-buttering) or mixing small amounts of adhesive or grout.
These trowels are typically smaller with rectangular or square-shaped blades and do not have notches.
While a margin trowel can be used for applying adhesive, especially in tight or awkward spaces where a notched trowel may not fit, it’s essential to ensure that the adhesive is spread evenly and consistently across the back of the tile.
This may require more effort and attention to detail than a notched trowel.
• Tile Adhesive Spreaders
Tile adhesive spreaders are specialized tools designed specifically for spreading tile adhesive. They are flat, stiff rubber or plastic blades with a handle, allowing for even adhesive spreading without notches.
These spreaders are often used for thin-set adhesives or mastic applications and are particularly suitable for small tiling projects, repairs, or working with small mosaic tiles.
When using an adhesive spreader, it’s important to maintain a consistent angle and pressure while spreading the adhesive to ensure even coverage and proper bonding between the tile and substrate.
• Final Thoughts
Selecting the right tool for applying tile adhesive is essential to ensure proper adhesion, a visually appealing result, and the durability of the tiled surface. The notched trowel is the most versatile and widely used tool, particularly the square-notch type.
The V-notch and U-notch varieties offer advantages for specific projects or tile types. Margin trowels and adhesive spreaders are also useful tools in your arsenal but may require more attention to detail when applying adhesive evenly.
Whatever tool you choose, practice proper technique and follow the manufacturer’s recommendations for tile adhesive application.