How Long Does Thinset Take To Dry, 25 things you should know
Have you ever questioned how long it takes for the thinset to dry after laying your beautiful new tiles? Fret not, as we dive into the essential factors affecting the drying time of this commonly used adhesive, so you can plan your next tile installation project effectively.
How long does the thinset take to dry:
The general drying time for thinset mortar used in tile installation is 24 hours, but this may be affected by environmental conditions, substrate type, tile material, and thinset thickness. To ensure proper drying, follow manufacturer guidelines, maintain appropriate temperature and humidity levels, properly prepare the substrate, and adhere to tile material and thinset consistency recommendations. Protect the installation area and exercise patience for a successful, long-lasting tile installation.

Thinset drying time varies depending on temperature, humidity, and product choice. Dive into this blog post to understand the importance of drying times, learn how to select the right thinset, and get expert advice for a successful installation.
Contents
- 1 What is the Drying Time for Thinset Mortar?
- 2 How Quickly Can You Walk on Tile Flooring After Thinset Application?
- 3 What are the methods to accelerate the drying process of thinset?
- 4 Can a fan assist in the drying process of thinset mortar?
- 5 Does Thinset Mortar Experience Shrinkage During the Drying Process?
- 6 What is the duration required for the thinset to achieve complete hardening?
What is the Drying Time for Thinset Mortar?
As a professional in the construction industry with years of experience, I often get asked about the drying time necessary for thinset mortar. This is essential when working with ceramic or porcelain tiles since it directly impacts the project’s success.
I will discuss the drying time for thinset, key factors that may affect the drying time, and some recommendations to ensure a durable and long-lasting tile installation.
• The Basics: Understanding Thinset Mortar
Thinset mortar is a blend of cement, fine sand, and a water-retaining compound that allows the cement to hydrate properly when mixed with water. It is typically used to adhere ceramic or porcelain tiles to surfaces such as walls, floors, or countertops.
One of the most critical aspects of working with thinset mortar is allowing it to dry properly to ensure a robust and lasting bond between the tiles and the surface.
• General Drying Time for Thinset Mortar
While thinset mortar can vary depending on the specific product and manufacturer, a general rule of thumb is that it takes approximately 24 hours for the thinset to dry before grouting. However, it’s crucial to acknowledge that the actual drying time can be affected by various factors.
As a seasoned professional, I recommend adhering to the manufacturer’s drying time indications on the product packaging to ensure optimum results.
• Factors Affecting Thinset Drying Time
1. Environmental Conditions
Environmental conditions such as temperature, humidity, and air circulation can significantly impact the drying time for thinset mortar. Higher temperatures and lower humidity levels can accelerate drying, while colder temperatures or higher humidity levels can prolong it.
Recommendation: Maintain the project area’s temperature between 50F (10C) to 100F (38C) and a relative humidity level lower than 70% to ensure proper drying of the thinset mortar.
2. Type of Substrate
The substrate, or the surface to which the tiles are being adhered, can also impact the thinset drying time. Highly porous surfaces like concrete or plywood can absorb moisture from the thinset more rapidly, decreasing the time it takes to dry.
On the other hand, non-porous surfaces like waterproofing membranes or already installed tiles may increase drying time.
Recommendation: To prevent issues related to the substrate, ensure it is clean, dry, and properly prepared before applying thinset.
3. Tile Thickness and Material
The thickness and material of the installed tiles can influence the drying time of thinset mortar. Thicker and denser tiles can take longer to dry, as the mortar may struggle to release moisture through the tile.
Additionally, tiles with a reduced moisture absorption property, like porcelain or glass tiles, may lead to extended drying times.
Recommendation: Refer to the tile manufacturer’s guidelines and recommendations when choosing the proper thinset mortar and installation methods for the specific tile.
4. Thinset Mortar Consistency and Thickness
The consistency of the mixed thinset mortar and the thickness applied to the substrate can directly impact the drying time. A thicker layer of thinset may require additional drying time due to the increased volume of moisture that needs to evaporate.
Recommendation: Follow the thinset mortar manufacturer’s guidelines for mixing and application to achieve the appropriate consistency and thickness.
• Ensuring Proper Thinset Drying Time
To ensure a successful tile installation, keeping these factors in mind and allowing the thinset to dry completely before moving to the next step is crucial.
– Test the Thinset
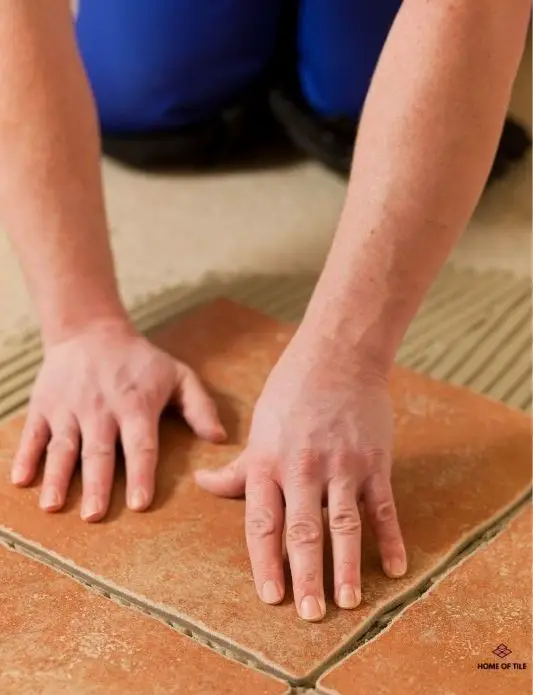
After allowing ample time for drying, it’s essential to test an area of the thinset to ensure that it has hardened properly. This can usually be done by gently pressing onto the tile or tapping it with a small tool. The thinset should feel solid and should not yield to force.
– Protect the Installation Area
While the thinset is drying, protecting the tile installation area from any external factors affecting the drying process is crucial. Keep doors and windows closed to avoid drafts or temperature fluctuations, and avoid walking on freshly installed tiles.
– Be Patient
Lastly, patience is key when waiting for the thinset to dry. Rushing the process and moving on to grouting or other tasks too soon can harm the tile installation’s quality and durability.
In conclusion, while the general drying time for thinset mortar is 24 hours, environmental conditions, substrate type, tile material, and thinset thickness can impact the actual time.
By following the recommendations and guidelines in this comprehensive guide, you will be on your way to a successful and long-lasting tile installation. Remember, patience is essential to achieving the best results.
Type of Thinset | Estimated Drying Time |
|---|---|
Standard | 24 to 48 hours |
Fast-setting | 2 to 4 hours |
Slow-setting | 48 to 72 hours |
How Quickly Can You Walk on Tile Flooring After Thinset Application?
Installing new tile flooring can be a rewarding home improvement project but requires patience and careful planning. One of the most critical steps in the process is allowing the thinset mortar to properly cure before walking on the tile.
I will discuss how soon you can walk on the tile after applying the thinset, factors influencing curing time, and tips for ensuring a successful installation.
• Understanding Thinset Mortar and Its Role in Tile Installation
Thinset mortar is a cement-based adhesive commonly bonds tiles to a substrate, such as a subfloor or a wall. The mortar provides a strong bond that can resist movement and support the weight of the tile. It also helps ensure the tile remains level and uniform throughout the installation.
Once the thinset is applied and the tile is set in place, it’s essential to give the mortar time to cure before walking on the tile or applying grout. If the mortar has not had enough time to cure, it can be damaged or weakened, leading to potential issues with the installation down the road.
• Minimum Curing Time: 24 Hours
Generally, you should wait at least 24 hours after laying the tile before walking on it. This allows the thinset to begin setting up and gaining strength. While the tile may appear stable and secure after only a few hours, walking on it too soon can cause it to shift or sink, compromising the bond between the tile and the substrate.
Sometimes, you may notice that the thinset has become relatively hard after just 12 hours. While this is an encouraging sign that the mortar is curing, walking on the tile is still not advisable until the full 24-hour window has passed.
• Factors That Can Affect Curing Time
In some cases, the curing process of the thinset may take longer than the standard 24 hours. Several factors can influence the curing time of thinset mortar, including:
– Temperature and Humidity
Temperature and humidity play a significant role in the curing time of thinset mortar. Ideally, the ambient temperature should be between 50F (10C) and 100F (38C) for proper curing. If the temperature falls below this range, the curing process will be slowed, potentially requiring additional time before walking on the tile.
Similarly, high humidity can slow the curing process, as the mortar takes longer to dry. In these conditions, it’s essential to provide adequate ventilation or employ a dehumidifier to help speed up the process.
– Type of Thinset
There are numerous types of thinset mortar on the market, and the curing time can vary based on the specific product used. Some fast-setting thinset products may have an accelerated curing time of as little as a few hours.
However, following the manufacturer’s specific recommendations for each product is essential.
– Tile Type
The type of tile you use can also impact the curing time. For example, large-format tiles or tiles made of dense materials, like porcelain, can take longer to cure, as the mortar may require more time to fully dry and become stable.
• Tips for Successful Tile Installation
To ensure a successful tile installation with an optimal curing time for the thinset, consider the following tips:
- Follow manufacturer’s guidelines: Use the recommended type of thinset for your specific tile and substrate, and follow the instructions for mixing, application, and curing time.
- Apply even pressure: Use a rubber mallet or a grout float to press the tiles evenly into the thinset, ensuring proper adhesion and preventing air pockets.
- Maintain consistent drying conditions: Try to control temperature and humidity levels, ensuring they stay within the recommended range for the thinset mortar you use.
- Plan your workspace: Lay out your tiles in advance to minimize the time spent walking on recently laid tiles, and consider working in small sections to avoid disrupting the curing process.
- Be patient: Resist the temptation to walk on the tile before the recommended curing time has passed to ensure your installation’s best possible bond and longevity.
• Conclusion
While it can be tempting to walk on your newly laid tile as soon as possible, giving the thinset mortar adequate time to cure is essential. This usually means waiting at least 24 hours before walking on the tile.
By considering factors such as temperature, humidity, the type of thinset, and tile used, as well as following best practices for installation, you can ensure a successful tile project with a long-lasting and secure bond.
| How soon can you walk on tile after thinset? |
|---|
| It is generally recommended to wait at least 24 hours before walking on the newly installed tile. However, the exact waiting period might depend on the type of thinset and tile used, environmental factors such as temperature and humidity, and the specific instructions provided by the thinset manufacturer. It is crucial to allow the thinset to cure properly to ensure a strong bond between the tile and the substrate. |
What are the methods to accelerate the drying process of thinset?
Sometimes, a tiling project must be finished quickly, and the standard drying time for thinset mortar will not suffice. In this comprehensive guide, I will discuss ways to make thinset dry faster and considerations for each method.
As an experienced tile setter, I will provide recommendations to ensure your project’s success.
• Use Rapid-Setting Thinset
One of the best ways to shorten the drying time of thinset is to use a rapid-setting mortar. Available from most tile supply stores, this specially formulated product can significantly speed up drying time.
Rapid-setting thinset typically dries in as little as 2-4 hours, enabling you to grout the tiles and complete the project more quickly. I highly recommend using a rapid-setting thinset during a time crunch.
– Tips for Using Rapid-Setting Thinset
When using a rapid-setting thinset, it’s important to keep a few key factors in mind:
- Work quickly: Rapid-setting thinset begins to harden quickly, so apply and set your tiles promptly to avoid waste.
- Mix small batches: Since it dries quickly, it’s best to mix them to ensure you can apply each batch before it hardens.
- Use cool water: Rapid-setting thinset will harden even more quickly in warm temperatures, so using cool water when mixing the mortar can help manage the setting time.
• Enhance Air Circulation
Improving air circulation in the work area is another effective method for speeding up the drying process. Here are some ways to enhance air circulation:
– Use Fans
Install fans around the tiled area to increase air circulation. Ensure the fans are directed towards the tiles and not blowing directly on the surface, which can cause the thinset to dry unevenly. If possible, use fans with adjustable speed settings to control the airflow.
– Open Windows and Doors
If working indoors, opening windows and doors can improve ventilation and help remove excess moisture from the air. In addition, keeping the work area well-ventilated can reduce risks associated with inhaling fumes from thinset and other materials.
• Control Temperature and Humidity
Temperature and humidity play a significant role in the drying process of thinset mortar. By controlling these factors, you can help the thinset to dry faster.
– Maintain Optimal Temperature
Thinset generally dries faster in warmer temperatures; however, extremely high temperatures can cause the product to dry too quickly, leading to cracking and other issues.
Aim to maintain a consistent temperature around 70F (21C) in the work area to promote faster drying times without risking damage to the thinset.
– Use a Dehumidifier
High humidity can significantly slow down thinset drying times. If you work in a humid environment, using a dehumidifier can help remove excess moisture from the air and speed up the drying process.
Be sure to closely monitor the humidity and adjust the dehumidifier settings as needed.
• Use a Warm Towel or Heating Mat
In some situations, you may consider using a warm towel or heating mat to facilitate faster drying. Gently place the towel or mat over the tiled area, ensuring no direct contact with the thinset.
This method should only be used as a last resort and with great caution, as excessive heat can cause the thinset to dry too quickly and lead to damage.
• When to Avoid Rushing the Drying Process
While certain circumstances may require you to speed up the drying process, it’s important to remember that thinset mortar is designed to cure over a specific period. Rushing the drying process can compromise the integrity of the installation and lead to problems down the road.
Here are some cases when it is best to allow the thinset to dry according to the manufacturer’s recommendations:
- Large-format tiles: These tiles require a longer curing time to ensure a strong bond between the tile and the substrate.
- Heavy-traffic areas: In areas with high foot traffic or heavy loads, allowing the thinset to dry and cure properly for maximum strength is essential.
- Setting tiles on a vertical surface: Adequate curing time is crucial for installations on vertical surfaces to avoid potential issues such as tile slippage or loss of bond.
In summary, making thinset dry faster is possible with the right techniques and materials. As an experienced professional, I recommend evaluating each project’s requirements and considering potential risks before speeding up the drying process.
By following the recommendations in this guide, you can ensure your tiling project’s successful and timely completion.
Step | Description |
|---|---|
1 | Use a fast-setting thinset to accelerate the drying process. |
2 | Ensure proper room temperature, ideally between 50F and 100F (10C and 38C). |
3 | Increase room air circulation using fans to aid with evaporation. |
4 | Apply thinset in a thinner layer, following manufacturer recommendations. |
5 | Avoid applying thinset over non-porous or sealed surfaces, as this will slow down drying. |
Can a fan assist in the drying process of thinset mortar?
• Understanding Thinset Mortar
Thinset mortar is essential in tile installation projects, acting as an adhesive to join the tile surface with the substrate (such as a floor, wall, or countertop). This cement-based material is made by mixing sand, cement, and additives that enhance its performance, such as water retention agents and polymers.
Understanding how thinset mortar dries and cures ensures a strong bond between the tile and substrate. While it may be tempting to try accelerating the drying process by using a fan or other methods, it is essential to consider the potential consequences of such actions.
• The Importance of Proper Drying and Curing
The process of drying and curing is a chemical reaction in which water reacts with cement particles to form new compounds, leading to the hardening and bonding of the mortar. This chemical reaction, called hydration, is an essential aspect of the curing process, and adequate drying time is necessary for this reaction to occur.
Correct drying and curing are critical for several reasons:
- Bond Strength: Proper drying and curing lead to optimal bond strength between the tile and the substrate, ensuring a durable and long-lasting installation.
- Resistance to Moisture and Temperature Changes: When properly cured, thinset mortar exhibits enhanced resistance to moisture penetration and temperature fluctuations, preventing mold growth and tile detachment over time.
- Load-Bearing Capacity: Adequate curing allows the thinset to reach its full load-bearing capacity, ensuring it can handle the stresses exerted by the tile and the weight placed upon it.
• Factors Affecting the Drying Time of Thinset Mortar
Various factors impact the drying time of thinset mortar, including:
- Mortar Composition: The type of thinset mortar can affect the drying time. For example, rapid-setting thinset mortars are designed to dry and cure quicker than standard thinset.
- Temperature: Higher temperatures can accelerate the drying process, while lower temperatures can slow it down. The ideal working temperature for thinset mortar to cure is between 50F (10C) and 100F (38C).
- Humidity: High humidity levels can prolong the drying process, as the excess moisture in the air makes it difficult for the water in the thinset mortar to evaporate.
- Substrate Porosity: More porous substrates, such as gypsum or cement backer boards, can absorb moisture from the thinset more quickly than less porous options, such as concrete slabs.
• Will a Fan Help Thinset Dry Faster?
Using a fan to help thinset dry faster is not recommended for several reasons:
- Uneven Air Flow: A fan can create uneven air circulation, leading to differential drying rates across the tiled surface. This can cause issues such as uneven tile alignment or potential cracking of the thinset.
- Risk of Overspeeding the Drying Process: Rapid drying can lead to incomplete hydration of the cement particles, resulting in a weaker bond between the tile and substrate.
- Loss of Workability: Thinset mortar has a limited working time, known as pot life, during which it remains workable and can successfully bond the tile to the substrate. Using a fan can reduce the pot life, making it more difficult to apply the thinset and set the tiles correctly.
While using a fan might seem appealing to speed up a tile installation project, the potential risks and negative impacts on the overall project quality outweigh the benefits.
• Recommended Drying Times and Best Practices
Following the manufacturer’s recommendations for drying and curing times is crucial, as these guidelines are specifically developed to ensure proper bonding and performance of the thinset mortar. In general, thinset mortar requires:
- 24 hours: The minimum time it needs to support the weight of the tile and resist the weight of the grout being applied.
- 72 hours: The average time it takes to reach approximately 80% of its final cure strength.
- 28 days: The time needed for full curing, during which it reaches its maximum strength.
Following these general guidelines, manufacturer recommendations, and proper environmental conditions (temperature and humidity) will ensure reliable and long-lasting tile installations.
In conclusion, while using a fan might seem like an effective method to speed up the drying process of thinset mortar, it can negatively impact the quality of the tile installation. Therefore, following recommended drying times and best practices is essential to ensure optimal tile surface bonding, strength, and longevity.
Patience during the drying process is crucial for a successful tile installation project.
Does Thinset Mortar Experience Shrinkage During the Drying Process?
• What is Thinset Mortar?
Before we delve into thinset shrinking during drying, let’s first understand what thinset mortar is. Thinset mortar is an adhesive substance used to install ceramic, porcelain, and natural stone tiles.
It’s a blend of cement, sand, and a water-retaining agent that bonds tiles to surfaces, usually floors or walls. Its primary purpose is to provide a strong, long-lasting, and water-resistant bond between the tile and the surface it’s installed on.
• Causes of Thinset Shrinkage
Now that we have a basic understanding of thinset mortar let’s discuss the factors that cause it to shrink when it dries.
1. Water Content
The water content is a significant factor when it comes to thinset shrinkage. When you mix thinset mortar, the water in the mixture is absorbed by the cement particles, causing them to expand.
As the thinset dries and the water evaporates, the cement particles return to their original size. This process results in the overall reduction in the volume of the thinset, thus causing it to shrink.
2. Cement Type
The type of cement used in the thinset mortar can also impact the degree of shrinkage. Some cement types, like Rapid-setting cement, experience more shrinkage due to the accelerated hydration process that causes the cement to harden quickly.
On the other hand, calcium aluminate cement, commonly used in specialized thinsets, exhibits lower shrinkage.
3. Curing Conditions
The environmental conditions under which the thinset cures can also influence its shrinkage rate. Factors like temperature, humidity, and air circulation can affect the water evaporation rate from the mixture and the hydration process of the cement.
For example, high temperatures can accelerate the evaporation of water, potentially leading to increased shrinkage. Similarly, low humidity can hasten to dry, increasing the risk of shrinkage.
• Effects of Shrinkage on Tile Installation
Shrinkage in thinset mortar can lead to many issues during and after the tile installation process. Some of these problems include:
1. Loss of Bond Strength
As the thinset shrinks, its bond with the tile and the substrate may become compromised, leading to a weaker overall connection. The loss of bond strength between the two surfaces can cause the tiles to become loose or shift over time, potentially leading to cracks or other damage.
2. Tile Warping or Tenting
When the thinset mortar shrinks, it can exert pressure on the tile, causing it to warp or lift from the substrate. This phenomenon, known as tenting, can result in an uneven tile surface and even lead to tile breakage if enough pressure is exerted on the tile.
3. Grout Cracking
Shrinkage in the thinset mortar can also impact the grout lines between tiles. As the thinset contracts, it can cause movement or shifting in the tile, leading to cracking or deterioration of the grout.
• Tips for Minimizing Thinset Shrinkage
1. Proper Mixing
Carefully follow the manufacturer’s instructions for mixing the thinset mortar, paying close attention to the recommended water-to-powder ratio. Adding too much water to the mixture can cause excessive shrinkage, while insufficient water can result in a weak bond.
2. Use of Additives
Some manufacturers offer additives that can be mixed with thinset mortar to help reduce shrinkage. These products work by altering the chemistry of the thinset, which in turn can minimize volume reduction during the drying process.
Be sure to follow the manufacturer’s instructions when using these additives.
3. Proper Curing Conditions
Consider the environmental conditions in which the thinset will cure, and try to maintain a stable temperature, humidity, and air circulation in the area. This can help ensure a more consistent drying process, reducing the risk of shrinkage.
4. Use of Modified Thinset Mortar
Modified thinset mortars, which contain polymers, can also help minimize shrinkage. The polymers within these products help retain moisture in the mixture, allowing it to dry more slowly and evenly.
• Conclusion
While it’s true that thinset mortar can shrink as it dries, understanding the factors that contribute to this shrinkage and taking the necessary precautions can help reduce its impact on tile installations.
Best practices for mixing and curing thinset mortar and using additives or modified products when appropriate can help ensure a strong, long-lasting bond between your tiles and the installation surface.
What is the duration required for the thinset to achieve complete hardening?
Understanding the timeframe for the thinset to harden is crucial in any tiling project, whether it’s a professional job or a DIY home improvement. I will discuss the factors affecting the thinset’s hardening process, knowing when it’s ready for grouting, and tips for a successful tiling job.
I will also cover the importance of curing the thinset properly to ensure durable, long-lasting, and aesthetically pleasing results.
• The Basics of Thinset Mortar
Thinset is a cement-based adhesive used in various tile applications, such as floor and wall tiling jobs. It blends cement, sand, and chemical additives mixed with water to create a spreadable paste, perfect for bonding tiles to surfaces like concrete, cement boards, or drywall.
The adhesive properties of the thinset ensure a secure bond between the tiles and substrate, providing a durable and long-lasting installation.
• Factors Affecting Thinset’s Hardening Time
Several factors can influence how long it takes for the thinset to harden. These factors can vary greatly, depending on the specific product, environmental conditions, and the project’s size and complexity.
– Type of Thinset Mortar
Different types of thinset mortar are available, including standard, modified, and rapid-setting varieties. Modified thinset mortars contain an additional polymer, which enhances the adhesive properties of the mixture.
Rapid-setting thinset mortars are designed to harden faster than standard varieties, ideal for projects with tight deadlines.
– Temperature and Humidity
Temperature and humidity significantly affect how long the thinset hardens. The thinset will cure more quickly in warmer temperatures, while colder temperatures can slow the hardening process.
Similarly, higher humidity levels may extend the thin-set’s drying time, causing it to take longer to harden.
– Thickness of the Thinset Layer
The thickness of the thinset layer can also significantly impact the hardening time. Thicker layers of thinset will generally take longer to harden than thin layers. When installing tiles, follow the manufacturer’s guidelines for the recommended trowel size and thickness.
• The Typical Hardening Time for Thinset
In general, thinset mortar requires 24 to 48 hours to harden before grouting can begin. However, this is merely a guideline, and the specific drying time may vary based on the abovementioned factors.
For standard thinset mortars, 24 hours might be sufficient, while modified or rapid-setting thinset mortars may require less time. Nevertheless, it is crucial to accurately follow the manufacturer’s recommendations for the specific product being used.
• Applying Thinset Correctly for Optimal Hardening
Accurately applying thinset is essential to ensure proper hardening and bond strength. Here are some essential tips for successful thinset application:
– Prepare the Substrate
Ensure the substrate is clean, dry, and free from any substances impeding the thinset’s bonding ability, such as dust, oil, or moisture.
– Mix the Thinset Properly
Follow the manufacturer’s guidelines for mixing the thinset mortar, adding the appropriate amount of water and mixing it to the correct consistency. Avoid overmixing the thinset, leading to air pockets and weakening the bond strength.
– Use the Correct Trowel Size
Select the right trowel size for the specific tile and thinset being used. The trowel size will determine the thickness of the thinset layer, directly affecting the drying and hardening time.
– Apply Thinset Evenly and Consistently
Even distribution of the thinset is crucial to ensure proper hardening and bonding. Use the trowel’s notched edge to create uniform grooves in the thinset before placing the tiles. This technique helps maintain consistent mortar thickness across the entire tiling area.
– Allow Adequate Time for Hardening
As mentioned earlier, giving the thinset the necessary time to harden before moving on to the grouting stage is essential. Rushing the process can lead to inadequate bonding, which can cause problems like tile movement and cracking.
• Final Thoughts
Understanding the factors that affect the hardening time of the thinset can help you plan your tiling project more effectively. Allow the thinset to cure properly, and follow the manufacturer’s recommendations to ensure a successful tile installation.
By paying attention to details and properly preparing for the project, you can ensure that your tiles will be securely bonded, long-lasting, and visually appealing.
Type | Initial Set Time | Final Cure Time |
|---|---|---|
Standard Thinset | 24 hours | 28 days |
Rapid-setting Thinset | 2-6 hours | 7 days |