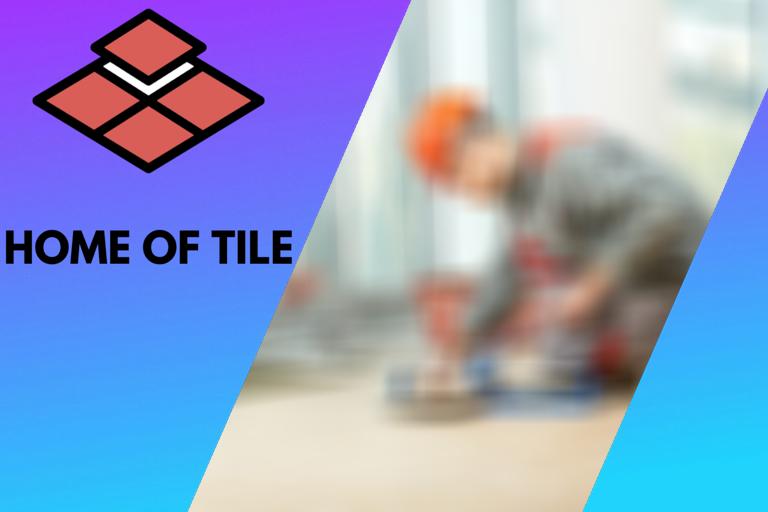
Tiling over a painted wall: this is what you need to know
Fashion, style, and looks are the factors to keep in mind when you want to charm up the appearance of your property. Keeping up to date on the latest trends of decorating your house can really bring back the sparkle that your home has lost.

The thing about fashion is that it changes, and keeping your house up to date on the latest trends can be a little challenging. In the early 1920s, tiles took over the world, and the practice of painting walls just got boring. But there are many old properties whose walls were painted back in the day, and now the owners want to tile instead.
Contents
Tiling over a painted wall:
In general, tiling over a painted wall is not recommended. Especially when the walls have a semi or high gloss finishing. The adhesive will have trouble bounding correctly and can lead to tiles falling off. Most professional tilers advise removing the paint before tiling the wall.
Removing the paint and starting from scratch may sound a little overwhelming, but the extra effort and a little precaution can save you tons of money and make your life much easier while tiling your walls.
Why not tile directly on a painted wall?
It’s a valid and reasonable question, “Why go the extra mile to remove the paint from the wall? Why not just start tiling right away?” The answer is simple: it doesn’t work. There are many technicalreasons, the most logical one is that tiles don’t stick well to painted walls.
Tiling is all about adhesion. If the adhesion to the wall is strong, then tiling lasts. Otherwise, tiles can fall off one by one over time. No matter what finish they have, all available paints have a subtle sheen layer that causes adhesion problems. This problem is much more prominent in paints with semi and high gloss finishes.
Consider it as a sticky note, where the tiles are sticky notes. If we stick one note to a rough piece of paper while we stick the other to a shiny plastic sheet, the sticky note placed on the plastic sheet will slide easily, but the one on the rough paper, not so much.
Removing paint from the wall, some helpful tips:
We know “why”, now let’s talk about “how”. There are a number of ways we can remove the paint from the wall and prepare it for tiling. Some of them are traditional and time-consuming — but cheap. Others are new, improved, and time-saving but cost you a few more dollars.
● Paint scraper:
A paint scraper is a traditional tool to remove paint or wallpaper. A flat steel blade attached to a plastic or wooden handle can manually scrape the paint off the wall. This method is, of course, time-consuming, but it is precise and cheap.
● Wire brushes:
Wire brushes more or less work like paint scrapers, but dozens of steel bristles do the job of one flat blade. This process is also time-consuming, but wire brushes can clean paint from the small bumps and holes in the wall, which is impossible with the paint scraper.
● Paint and varnish remover:
Paint and varnish removers mostly contain lacquer thinners, acetone, and methyl ketone. These paint dissolvers can help remove paint quickly and easily. Paint removers are applied on the painted walls using a brush. They are left for some time so that the paint can dissolve, then you take a scraper and remove the paint.
● Sand paper:
Sandpaper is an excellent and easy way to scrape off the paint. Sandpaper can be attached to a manual hand sander or a power sander to sand the paint off the wall. 80-grit sandpaper is often used for scraping the paint off the wall.
● Disc sander:
Another automated option available is a disc sander. Disc sanders use abrasive discs to scrape the paint off the wall. Disc sanders cost a couple of hundred bucks, but they are a perfect tool to invest in if you renovate properties for a living.
● Roto stripper drill attachments:
If you own a drill, then you can invest in a roto stripper attachment. This drill attachment is specially made for removing rust and paint. This is quite a handy tool as it does not cost much and requires a normal drill to be operated.
● Nylon disc drill attachment:
Nylon disc attachment works just like a roto stripper. It is a nylon disc pad that gets attached to a drill, and then you can scrape the paint off. This method is slower as compared to the roto stripper, but it costs much less.
● Heat gun:
Heat guns can be used to remove the paint off the walls. The heat gun melt thick layers of paint so that instead of working with dry paint, you can easily scoop off big chunks of melted paint.
● Electric paint remover:
An electric paint remover is specially made to remove old paint from walls. This machine can scrape the paint off of a wall in no time.
The electric paint remover basically works on the principle of milling. The disc that runs on the paint surface contains two indexable carbide cutters that are used to scrape or mill the paint off the wall. The height of the carbide cutters can be adjusted based on the depth of the material you want to remove.
It is a recommended tool to invest in for the contractors who have to renovate houses daily. Purchasing one for DIY-ers is probably not a viable option. Instead, they should go for less pricey equipment to get the paint off their walls or rent one.
Preparing the wall for tiling, some helpful tips:
Before tiling the wall, you should make sure your wall is prepared so that that tiling can be easier. Check your wall for these things:
● Suitable wall material:
Make sure that the wall material is suitable for tiling. If the wall is not concrete or cement, then you have to install cement backboards for tiling to work.
● Sealing the boards:
If you have to install cement boards, make sure that you seal them first. After installing the boards, first, tape the joints between adjacent boards and then apply mortar. After that, apply a coating to ensure water resistance.
● Smoothing the rough surface:
Make sure that the wall is smooth and free of any seams. You should also check the level of the wall using a spirit level.
● Filling the holes:
If there are any holes or cracks in the wall, they should be filled with mortar. Primer should be applied to make the wall water-resistant.
● Priming the wall:
Priming the wall is a crucial step in tiling because primer ensures less water absorbency and strengthens the wall’s integrity.
After following these steps and ensuring that your wall is ready and fully water-resistant, you can continue tiling the wall.
Painting and tiling, some helpful tips:
In general, tiling and painting can go great together. You can paint part of the wall and tile part of the wall. I always advise to paint first and then lay tile. Tiling over a painted wall is not a good idea. But painting over tiles is fine. Often tiles will lose their glossy finish over time. Your walls would need new tiles to make them look great again. But tiling is not cheap. Painting the tiles can be a great cost-effective alternative.
Replacing the tiles all over the house or even on a single wall can cost you hundreds of dollars. But there is a simple solution to that problem: paint over the worn-out tiles. It is pretty common nowadays, and contractors suggest this if you want to save a couple of thousand dollars.
Painting over tiling, some helpful tips:
Painting over tiles is just like painting a wall. In addition to the same tools and regular paint, one special ingredient makes this work: super grip primer. A super grip primer is a primer capable of adhering to the tiles and providing you a good and smooth surface for the paint.
Now that we know what is required, let’s cover step-by-step how you can paint the tiles:
● Step 1: Covering the surrounding area
It would be best to cover the surrounding area of the wall where you don’t want paint splashes, especially the kitchen and bathroom utensils. Super grip primer is a little hard to scrape off.
● Step 2: Priming the tiles
Now that you have covered the area, you can start priming the walls. Pour your primer into a paint bucket, and with a roller or paintbrush, apply the primer to the tiles.
● Step 3: Letting it dry
Let the primer set overnight before you start painting the tiles.
● Step 4: Applying the paint
After letting the primer set for 24 hours or overnight, you can finally start applying the paint. Use a paintbrush or roller to paint the tiles. Let the first coat of paint dry for at least 24 hours before applying a second coat.
There you have it, a nice and simple way to paint the tiles and bring the charm back to your house.
Paint before tiling, some helpful tips:
In general, I would paint first and then tile. In that case, you can not stain the tiles with paint. But do not paint the area that will be tilled. The tile adhesive will have problems bounding. Only paint a tiny part of where the tiles will start.
Designers suggest many combinations to make your walls look stunning. There are options like:
- Painting: Covering the entire wall with paint, giving the room a decent and subtle charm.
- Tiling: Going all the way with tiling and letting your guests see how charming tiling can make your house.
- Mix and match: Finally, there is the option of breaking all the rules. You can tile and paint the same wall! In this option, some areas are covered by the modern tiles and some by the traditional paint.
If you are going for the mix and match look for your wall, then you should consider what task to check off first from the list, painting or tiling. You can make up your mind about tiling or painting first by considering the following factors:
● Deciding by color matching:
If you are spending money on making your house more decorative, you want everything to be perfect. Tiling and painting can last on your wall for a long time if done correctly, at least five years or more. It is essential to choose the correct paint in that case and think about moisture.
Instead of going with the flow, you should decide on color schemes before starting. Sometimes you need visual clearance to pick the color. Therefore, most of the decorators suggest that you should decide the tile design first, and when they are installed, you should choose the paint that looks good in contrast to the tiles.
● Deciding by practicality:
If you’d rather paint first, be sure you split the wall area where you want to install the tiles and the area that is to be painted. As we discussed, you can’t paint the whole wall and then stick the tiles on top! If you want to paint first, be sure to leave the areas you want to put tiles on unpainted.
After making that decision, you can tile or paint as per your preference. It is a general misconception that tiling can work on painted walls, and clearing your mind from those doubts can help you save money, time, and effort. If you’re not tiling yourself, then you can hire a contractor. Some contractors will misguide you about tiling on painted walls to save themselves the money and effort of scraping that old paint off, but do not be fooled. Clearly state that you first want the paint to be scraped off and after that the tile installed.