How to use Spacers When Tiling?
If you are thinking of adding new tiles to your house, tile spacers play a significant role. Tile spacers are essentially plastic objects that come in a variety of shapes and sizes. When tiling your place, maintaining a constant gap between all the tiles is important for the finished look, and tile spacers are used for that purpose. After the tile spacers are removed, the distance between the tiles is then filled by grout. If the spacers are used in the right pattern, you will have a beautiful finish to your tiling project.
Contents
- 1 How to use Spacers When Tiling:
- 2 Pro Tips for Using Tile Spacers
- 2.1 ● Use High Quality Spacers
- 2.2 ● How Many Tile Spacers Do I Need?
- 2.3 ● Placing the Spacers between the Tiles
- 2.4 ● Thin-set Over Tile Spacers
- 2.5 ● When Should I Remove Tile Spacers?
- 2.6 ● Grouting Over Tile Spacers
- 2.7 ● Tile Cutting for Proper Spacing
- 2.8 ● How Much Space Is Needed For The Tile Spacers
- 3 Do you have to use Spacers when Tiling?
- 4 Leveling Spacers for Tiling
- 5 What Spacers to use when tiling
- 6 Final Remarks
How to use Spacers When Tiling:
In general, use good quality spacers. Calculate the number of spacers you will need and ensure you have enough. Place the first tile and put spacers at its corners. Add the second tile in line with the first tile and put spacers at the remaining two corners. Repeat the same procedure and complete the whole row. Make sure to clean the thin-set from the tile spacers before it dries off. After 24 hours, remove the tile spacers and apply grout between the tiles for the finished look.
Through this article, you will learn different tips and methods to use tile spacers effectively by providing an aesthetic and beautiful look to your tiling surface. You will also understand the reason behind using tile spacers and the advantages they provide.
Pro Tips for Using Tile Spacers
Before tiling any place, it is necessary to gather all the necessary tools and materials that will be required for tiling. Tile spacers are an important part of tiling, and in order to gain complete knowledge of how to use spacers effectively, you must follow the tips mentioned below:
● Use High Quality Spacers
When purchasing tiling tools and materials, make sure to purchase high or normal-quality tile spacers. The reason is that these spacers sometimes stick with the tiles because of thin-set during tiling, and after 24 hours when the thin-set dries off, it becomes difficult to remove the spacers from the gaps. If the spacers are of cheap quality, they might break when you try to remove them.
● How Many Tile Spacers Do I Need?
Estimating the proper number of spacers before gathering the material is essential because it can affect your project duration. If you overestimate the tile spacers and purchase more than required, you will lose some money because of extra spacers. But, if you underestimate the number of tile spacers, you can not finish your project. As they are not very costly, it is advised to purchase some more than your expected usage number.
To find the number of tile spacers, first, determine the number of tiles. Then, multiply the number of tiles you will use by 4. The result will give you the number of tile spacers required for your project. Like I mentioned before. I recommend purchasing some extra spacers in case you break or misplace any.
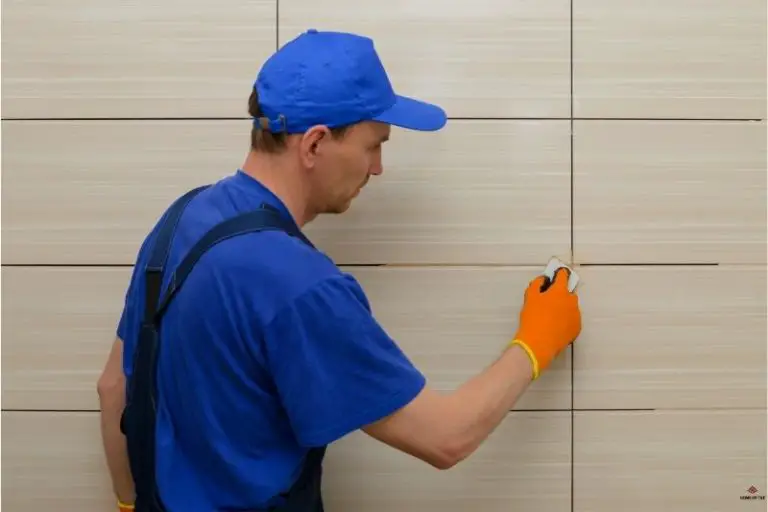
● Placing the Spacers between the Tiles
Before installing the tiles, you will first need to find the center of the surface you are tiling and draw a grid line to ensure that both the tile and spacers are aligned. Place the first tile straight at the marked point and put the spacers at the corners of the tile. Place the next tile in line with the first tile and put 2 more spacers at the remaining corners of the new tile. Now complete the whole row by placing tiles in line with each other and maintaining equal distance between all the tiles using spacers at the corners.
At the edges of the surface, use “T” shaped spacers instead of “+” shaped with the flat end against the wall. You can make this “T” shaped spacer from a “+” spacer by breaking one leg off.
● Thin-set Over Tile Spacers
The spacers that are placed between the tiles should be able to be removed after the thin-set dries off. Because of this, you should be very cautious when placing the spacers between the tiles and make sure to clean any excessive amount of thin-set from between the tiles. You should avoid putting any pressure on the tiles during the first 24 hours because thin-set takes 24 hours to dry. During that period, any unnecessary pressure on the tiles can either break the spacers or change their position, leading to uneven tile joints.
● When Should I Remove Tile Spacers?
What is the right time to remove the tile spacers? In general, for a floor, they should be removed around 30 minutes after the adhesive begins to set. Most fast-setting adhesives will be fully set in around 20-30 minutes. For wall tiles, I would wait a little bit longer. You mustn’t remove the tile spacers too early because it can cause a shift in the tiles if the thin-set has not dried completely. Similarly, leaving the tile spacers for too long is not recommended because it can lead to stuck spacers. Not all tilers agree with the last point. They leave them in much longer.
Sometimes, your spacers will get stuck between the space between the tiles because of their shape and small size. Under these conditions, pull out the spacer vertically using the needle-nose pliers by grabbing it firmly. Avoid moving the spacer back and forth because it can cause your tiles to shift from their position and lead to uneven tile joints.
● Grouting Over Tile Spacers
Sometimes, it is difficult to pull out the tile spacers because they are stuck deep in the gap between the tiles. Under this condition, most people consider leaving the spacer and grouting over them, especially if they do not protrude above the edge of the tiles. This thought should be completely avoided because it will damage your tiled area, especially if it is a floor.
Grouting over the tile spacers damages the structural integrity of the grout. After a few weeks, cracks will start appearing over the tile spacers, and grout will start wearing because of the shape and size of the spacers. So never grout without removing the tile spacers even if they are stuck. Always pull out the stuck tile spacers with a chisel and then apply the grout.
● Tile Cutting for Proper Spacing
If you are cutting the tiles yourself, you should make the cur correctly. Tile spacers are very difficult to place if the cut is not proper and straight. Ensure that you are using a high-quality cutter for cutting the tiles because using a tile spacer with uneven cuts can throw off your entire project.
I recommend you purchase a ceramic tile cutter because this high-quality cutter provides straight and reliable cuts for placing the tile spacers.
● How Much Space Is Needed For The Tile Spacers
The gap between the tiles for the spacers depends on the tile spacers’ size. It is recommended that a thin space is used between the tiles because thin grout lines are easier to maintain and last longer. The gap also depends upon the tile quality you are using in your project, as high-quality tiles have more sharp and consistent edges. For these types of tiles, 1/16th inch tile spacers are suitable. However, for ceramic tiles, 1/8th inch spacers should be used to ensure the best result. This is because these tiles do not come with a constant width, and there is always a slight variation in their thickness.
Do you have to use Spacers when Tiling?
In general, using tile spacers while tiling is not a necessity. But for a perfect result, tile spacers help make a grout joint consistent and provide a more finished look to your project. Even professionals use spacers when setting the tiles. This is because of the small variation in the tile sizes and slight differences in thickness. Not using spacers can lead to tiles not laying perfectly straight with each other in a row.
Tile spacers offer a variety of advantages to your project:
- Aesthetic Look: Not using spacers means no grouting, and the surface loses its aesthetic look even after tiling. Tiling with spacers gives a neat and clean look to your place, and it is also easy to clean the dust from the grouting joints because, without spacers, you are creating a path for the dust to gather on the tiles.
- Cracking and easy to Replace: Tiles slightly expand and contract with the temperature changes, and if you don’t have a small space between tiles, there is a risk of cracking. Cracked tiles are also easier to replace when tiled using spacers. If they are too close together, you may end up breaking the adjacent tiles when attempting to replace the cracked one.
Leveling Spacers for Tiling
Leveling spacers are essentially the leveling system that provides a perfect installation of tiles without the steps of putting spacers at the corners and then leveling the joints of each tile. The main problem when tiling your place is to keep every tile aligned with each other. Leveling spacers overcome this problem by using spacers between the tiles, and then, simply by applying some pressure on the spacers, the tiles get aligned with each other.
There are two types of leveling spacers:
- Clip and Wedge: This leveling spacer consists of a flat plastic clip with a wedge pushed between the tiles. The tiles are leveled by applying pressure on the wedge. The con is that this method is not very accurate as the amount of pressure on the wedge cannot be controlled accurately.
- Rotating Cap: This type uses a rotating cap as the external body of the spacer instead of a wedge. Pressure is applied either by hand or by a wrench to rotate the cap that helps level the tile joints. This method is more accurate because it allows for better control of pressure and gives you precise results.
What Spacers to use when tiling
The use of spacers when tiling depends upon the grout lines or the gap between the tiles. Depending upon the size of the grout line, different sizes of spacers are available in the market.
If you use 8-by-8 inch or smaller tiles, you should use the 1/16- or 1/8-inch spacers. Similarly, for normal-sized tiles like 12-by-12 to 16-by-16 inch, you can increase the spacers’ size up to 3/16 inch. For the 18-by-18 inch or larger tiles, you can choose either the 1/16-inch spacers or 1/32 inch, making a thin grout line between the tiles.
Tile size | Spacer size |
|---|---|
8 x 8 inch or smaller | 1/16 or 1/8 inch |
12 x 12 to 16 x 16 | 3/16 inch |
18 x 18 or larger | 1/16 or 1/32 inch |
Final Remarks
Tile spacers provide an aesthetically pleasing finished look to your place. You can complete the job quicker and easier, and tiles are easier to replace when spacers are used. Through this article, you have learned different tips to use tile spacers effectively in your project. We also touched on using leveling spacers instead of simple spacers for perfectly installing the tiles in line with each other.
When placing the spacers between the tiles, make sure to remove the thin-set from the spacers. Try to remove all the spacers within 24 hours, even if they are stuck. Carefully pull out the spacers vertically and avoid any horizontal movement during this process as it can disturb the position of the tiles. If you want a perfect tile installation, I recommend using spacers with a thin grout line between the tiles.