Grouting After Tiling: 5 things you should know
Grouting is a normal part of the tiling process that is done to achieve a nice finish and fill the narrow gaps between the tiles. It is the last and one of the most important steps in tiling projects. This article will provide you with information regarding grouting timings and whether you should grout the floor before or after tiling walls. It will also give you a step-by-step guide on how to grout tiles and provide you with beneficial tips to keep in mind to achieve a highly satisfying and magnificent finish on your tiles.
Contents
How long after tiling can I grout?
After tiling, you must wait at least 24 to 48 hours before grouting the tiles. The mortar used to adhere tiles to the surface needs to cure before grouting.
Mortar and adhesive used to adhere tiles to the floors or walls are made up of cement, fine sand, and water-retaining agents. It helps the tiles to stick to the surface and prevent them from falling off or cracking. During the drying process, tiles should not be walked on or disturbed as this could misalign or damage the tiles. This can cause problems that are difficult to fix, and you may end up removing and having to lay the tiles once again.
Before grouting, you need to allow the mortar to dry sufficiently. Grouting too soon may disturb the tiles and create more problems and extra work. How long it takes mortar to dry depends on the mortar solution, temperature, humidity, and how thick the mortar is applied under the tiles.
The consistency of the mortar solution is important. The manufacturer’s instructions must be followed while mixing the mortar to obtain optimal results. The thinnest should neither be soupy or extremely liquefied nor too rigid. An ideal thinnest mixture needs to hold its position on the surface where it is applied while remaining easy to spread.
The thinnest mortar needs air to cure as this will help the mortar to dry quickly. If you grout the tiles before the mortar has cured, you may disturb the tiles and seal the air mortar. Don’t be fooled by the thinnest areas proving to be dry along the grout line or edges. All areas must be set before grouting. Before grouting the newly installed tiles, you should wait at least 24 to 48 hours.
Should I grout the shower floor before or after tiling walls?
It is recommended to tile the walls first and then work on the floor. This will save you from a lot of work during the cleaning job. If you tile the floor first and then plan to tile the walls, the mortar used to adhere to the wall tiles may fall onto the finished floor, which can cause damage. However, if you can manage tiling walls after the shower floor properly, it is okay to do so.
One of the problems that arise when tiling the walls first is that the bottom row of the wall tile needs to rest on something. This problem can be solved with the use of a ledger board. Install the ledger board on the floor while taking careful measurements of how high to set the board based on floor tile size and the thinnest thickness you are going to apply. After tiling the walls, remove the ledger board, and tile the floor and the bottom rows of the wall. This technique also helps you to grout everything all at once, saving you time.
Tiling and Grouting on the Same Day
You must let the applied mortar dry before doing any grouting. It would be best if you allowed the thinnest to cure entirely before grouting so that the alignment of the tiles is not disturbed when pressure is applied on the tiles.
If you grout the tiles before the mortar has cured, you also seal the air needed by the mortar to cure. It is important to realize that the thinnest part at the edges may look dry, but the tiles’ product still may not be completely dry. Therefore, tiling and grouting on the same day is not a good practice. You will need to wait at least 24 hours before grouting to ensure the drying of the newly installed tiles.
How to Grout After Tiling, A Step-by-Step Guide
Grouting is an important job after tiling that needs to be done with a lot of care. Proper grouting helps to bring out the beauty of the tiles. On the other hand, if it is not done properly, it may ruin your great tile job. Here is a step-by-step guide that will help you grout the tiles correctly and help you finish your tiling project effectively.
● Step 1: Clean the joints
Clean the grout joints and lines with the help of a putty knife. Scrape any protruding mortar in the spaces between the tiles and vacuum the grout lines. Remove any dust or debris within the grout lines. Be careful while cleaning the joints and avoid scratching the surface of the tiles. Don’t scrape too hard, or you will chip off the tiles. You may tape off the tile surface, especially those with imprinted patterns on them, for easier cleanup.
● Step 2: Mix the grout
Generally, grout comes in powdered form. You will need to add water and mix it to get a grout solution. Mix the grout until it is powder-free. You can use a margin trowel to mix the grout until the powder is dissolved. While mixing the grout, roll the bucket frequently and scrape the bottom to make sure all the grout is mixed together.
Start by pouring grout into a bucket and add water to the bucket. Start mixing with the help of a margin trowel. Make sure there is no dry or unmixed powder left at the bottom of the bucket. Tip the bucket towards you and mix in the grout at the bottom. Keep mixing the grout until it attains the consistency of peanut butter and until all the powdered grout is incorporated.
Avoid mixing the grout with a drill or mixing paddle. These methods churn the grout, introducing air into the solution, which can hinder the curing strength of the grout and cause discoloration.
Allow the grout to slake for 10 minutes after mixing for the chemicals in the grout to set in. If you skip this step, the joints may weaken and become prone to cracks. The grout may seem a bit stiffer after slaking but do not add more water to compensate for stiffness. Just mix the grout again, and it will be ready for application.
● Step 3: Load the grout on the float
The next step is to load the prepared grout onto the float. This is rather an easy process, but it may cause an inconvenience if the grout mixture spreads over the floor while scooping it onto the float. So, to avoid any problem, tip the bucket towards you and drag some grout mixture up to the bucket and scoop it from there. This makes the scooping of the grout on the float easier. Keeping the float tight against the side of the bucket will make any excess grout fall into the bucket rather than on the floor.
● Step 4: Spread the grout over the tiles
Coat the grout over the tiles in upward strokes to avoid dropping the grout on the floor. Move the float diagonally across the tile to let the grout get deep into the joints. Always grout the walls before grouting the floor, so you do not mess up any finished flooring. Using the side of the float also helps to force the grout deep into the joints.
● Step 5: Squeegee off the excess grout
Remove any excess grout by moving the side of the float at an angle of 90 degrees with the tiles. This allows the grout to spread evenly over the joints and prevents the float from digging into the joints. You must remove as much excess grout as you can from the face of the tile. To make this step more efficient, you can squeegee off the grout by moving the float in a serpentine motion.
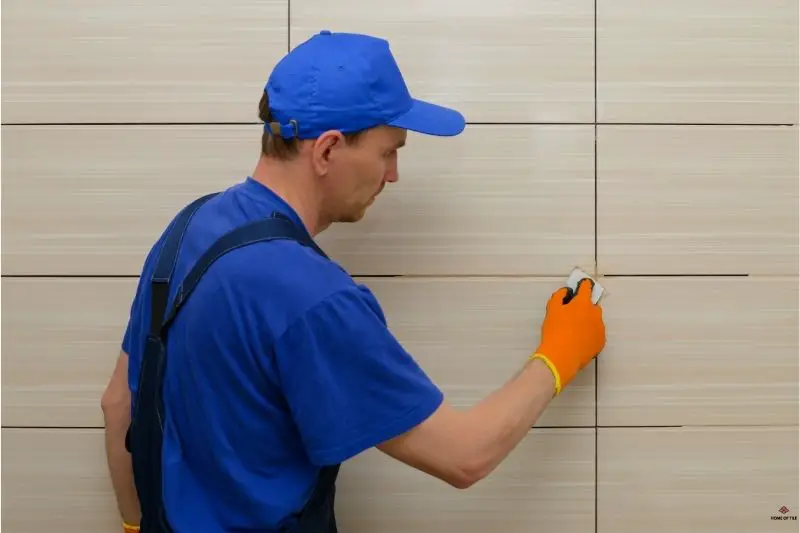
● Step 6: Clean the tile surface
After removing excess grout from the surface of the tile, it is best to clean the tile surface with the help of a damp sponge. Rinse it often and sponge diagonally across the tile. Clean the surface until you are left with only a light grout haze.
The grout will appear to spread on the tiles on the first few passes but don’t worry, rinse out the sponge with clean water and keep wiping. Eventually, the excess grout will be removed, and you will be only left with a thin grout haze.
● Step 7: Shape the grout lines
Shape the grout lines by pressing the sponge with your index finger and eliminate any uneven grout in the grout lines. Avoid pushing too hard as your goal is not to remove the grout from the lines but to make it even and at the same depth.
● Step 8: Buff out the grout haze
The last step in grouting is to buff out the thin layer of grout haze with the help of a microfiber towel or a cheesecloth. Wait for half an hour after shaping the grout and then begin buffing the haze.
When do you Seal Grout After Tiling
Wait until the grout is fully cured before applying the sealer. The exact time will depend on the type of grout you are using, but generally, I recommend waiting at least 48 hours before starting with the sealer.
Before applying the sealer, use a brush to clean the grout. This ensures that you apply the sealer on clean grout. If the grout is older, use a suitable cleaner to clean it thoroughly.
Tip: You can test if older sealer is still working well easily with some water. Add a few drops of water onto the sealed grout. If it stays as a drop and does not form a layer, the sealer is still working fine. If you notice that the water forms a layer on the grout, I recommend resealing the grout.
Generally, a grout sealer will wear down over time and will be less effective. Most grout sealers will lose their effectiveness after a year or so. I recommend testing it once every few months. If you notice it is not working like it used to, clean the sealed grout lines, and add fresh sealer.
Do’s and Don’ts of Grouting Tiles
Here are some tips that can ease the grouting process and limit any inconveniences.
- Clean first: Do-clean everything before you start grouting. Dirt, stains, and cracks must be removed before grouting.
- Slake the grouting mixture: Do slake the grouting mixture. Let the grouting mixture set for 10 to 15 minutes and then check on the thickness of the solution. Add water if needed to make the mixture thinner.
- Fill the joints: Do fill the joints properly. Use a float positioned 45 degrees to the joints to fill the joints properly.
- Start in a corner: Do start in one corner and work your way throughout the tile to ensure proper filling.
- Remove excess grout: Do remove any extra grout from the tile by scraping it off with the help of the float while holding it at 90 degrees.
- Corners: Do remove excess grout around corners before caulking. Use a utility knife to effectively remove excess grout from hard-to-reach areas such as corners, areas next to walls, and around the tub.
- Grout lines: Do clean the grout lines regularly. Grout lines often become grimy and dirty with time and can give an unflattering look. Therefore, clean them regularly with tile and grout cleaners available in hardware stores.
- Use a Sealer: Do apply the sealer before grouting. Always remember to spray sealer on porous tiles and stones before grouting. Otherwise, the grouting mixture may become very difficult to remove. To avoid any puddles, remove excess sealer and let dry completely before grouting.
- Scrub with care: Don’t scrub the tiles too hard when trying to remove grout. One of the most common mistakes people make is that they use too much water or scrub too hard to remove excess grout after its application. Before removing the grout, make sure that it has dried sufficiently.
- Damp sponge: Scrubbing the wall hard spreads the product all over the tiles instead of cleaning it. Use a damp sponge to wipe away and clean the grout. You may see grout haze a day after removing the grout but don’t worry. You can buff the haze with the help of a clean cloth.
- Don’t use too much grout: Don’t- apply too much grout at once. Apply the grout to the wall using strokes upward. Spread it over a small area to work it into the joints before it gets hard. Fill the joints properly before moving on to the next small area.
Final Word
Grouting can be a satisfying and pleasing task as it is the final step in your tiling process. Grouting helps to bring out the beauty of your tile. However, if this task is not paid enough attention to, it may ruin your entire tiling project. The most important thing to remember is to give your tiles some time to settle before grouting them. You should wait at least 24 hours after the tile installation before beginning with grouting the tiles. This step-by-step guide provided in the article will help you achieve a great finish on your tiles!