Master the Art of Wall Tiling: 25 things you should know
Are you tired of staring at your dull, lifeless wall and seeking a fresh makeover? Tiling is an amazing way to add character and transform any space in your home. I will guide you step-by-step on tiling a wall like a pro, even if you’re a DIY beginner.
How to tile a wall:
Tiling a wall can be a rewarding and cost-effective DIY project. Gather materials such as tiles, adhesives, spacers, grout, and necessary tools before preparing the wall surface. Plan the tile layout, mix the adhesive, apply it to the wall, and press tiles firmly into the adhesive.
Cut and fit tiles as needed, then allow the adhesive to dry before grouting the tiles. Finish by cleaning up the grout haze and admiring your new tiled wall.
After setting the groundwork in the introduction, let’s delve into practical tips for tiling a wall. We’ll guide you through the process, from choosing the right tiles to mastering the art of laying and grouting. Achieve professional-looking results with our comprehensive, easy-to-follow guide.
Contents
- 1 A Comprehensive Guide on Tiling a Wall
- 1.1 • Step 1: Gather Your Materials and Tools
- 1.2 • Step 2: Prepare the Surface
- 1.3 • Step 3: Plan Your Tile Layout
- 1.4 • Step 4: Mix the Tile Adhesive
- 1.5 • Step 5: Apply Tile Adhesive
- 1.6 • Step 6: Apply Tiles to the Wall
- 1.7 • Step 7: Cutting and Fitting Tiles
- 1.8 • Step 8: Allow Adhesive to Dry
- 1.9 • Step 9: Grouting the Tiles
- 1.10 • Step 10: Cleanup and Finishing
- 2 What is the Starting Point When Installing Tiles on a Wall?
- 3 Is It Possible to Install Tiles Directly Onto a Wall?
- 4 Is Tiling a Wall by Yourself a Simple and Straightforward Task?
- 5 Is it Possible to Install Tiles Directly onto the Drywall?
A Comprehensive Guide on Tiling a Wall
Tiling a wall is a rewarding and cost-effective way to breathe new life into any room in your home. It’s a project that requires precision and patience but can be successfully tackled by beginners and experienced DIYers.
I will walk you through tiling a wall, offering expert tips and advice.
• Step 1: Gather Your Materials and Tools
Before you begin, you’ll need to gather the necessary materials and tools:
- Ceramic or porcelain tiles
- Tile adhesive (also known as thinset)
- Tile spacers
- Grout
- Notched trowel
- Rubber float
- Tile saw or cutter
- Level
- Tape measure
- Pencil
- Sponge
- Bucket
• Step 2: Prepare the Surface
A smooth, clean surface is essential for proper tile adhesion. Start by removing any wallpaper or loose paint from the wall. Fill holes or cracks with a suitable filler and sand the area smoothly. Finally, ensure the wall is clean and free of dust, grease, or other contaminants.
• Step 3: Plan Your Tile Layout
Planning the layout of your tiles in advance is crucial to achieving a professional-looking result. Start by measuring the height and width of your wall to determine the center point. Using a level and a pencil, draw a vertical line through the center of the wall and a horizontal line perpendicular to it.
Next, lay out your tiles on the floor or a large, flat surface with spacers between them to simulate the spacing you’ll use on the wall. This will help you visualize the final result and determine if any adjustments are necessary.
I recommend dry-fitting your tiles to the wall before applying any adhesive, especially if you’re working with tiles that feature a pattern. Use small pieces of painter’s tape to temporarily hold the tiles in place, allowing you to make any necessary adjustments and ensure your layout is as precise as possible.
• Step 4: Mix the Tile Adhesive
Follow the manufacturer’s instructions to mix your tile adhesive (thinset) according to the recommended proportions. The consistency should be similar to peanut butter, allowing it to hold the trowel’s notches without sagging.
Be sure to mix only as much adhesive as you can use within the working time specified by the manufacturer (usually about 20 minutes).
• Step 5: Apply Tile Adhesive
Starting at the center of the wall and working your way outward, use the flat side of your notched trowel to apply a thin layer of tile adhesive to the wall. Next, use the notched side of the trowel to create grooves in the adhesive, holding the trowel at a 45-degree angle as you work.
It is crucial to work in small sections, as the adhesive can dry quickly. To ensure a secure bond, apply adhesive to an area roughly the size of three or four tiles at a time, then immediately press the tiles into place.
• Step 6: Apply Tiles to the Wall
Carefully position the first tile in the center of the wall, aligning its edges with the horizontal and vertical lines you drew earlier. Press the tile firmly into the adhesive, ensuring even coverage across its entire surface, and use your fingertips or a rubber float to apply gentle pressure.
After placing each tile, insert tile spacers at each corner to ensure consistent spacing. For the best results, use the recommended size of spacers for your specific tiles to maintain even grout lines.
• Step 7: Cutting and Fitting Tiles
You may need to cut tiles to fit along the edges, corners, or around fixtures. Measure and mark the tiles with a pencil, then use a tile saw or cutter to carefully cut them to size.
Reapply adhesive to the wall before pressing the cut tiles into place. Use caution when positioning cut tiles with sharp edges, wearing gloves if needed.
• Step 8: Allow Adhesive to Dry
As you complete wall sections, avoid disrupting the tiles as the adhesive sets. Follow the manufacturer’s recommended drying time (usually 24 hours) before removing the spacers and proceeding with grouting.
• Step 9: Grouting the Tiles
Mix the grout according to the manufacturer’s instructions, ensuring a smooth, lump-free consistency.
Using a rubber float, spread grout diagonally across the tiles, working it into the joints between them. Hold the float at a 45-degree angle and press firmly, ensuring the grout fully fills each joint.
After working the grout into a section, use the edge of the float to remove excess grout from the tile faces, holding the float at a 90-degree angle and working diagonally to avoid pulling grout out of the joints.
• Step 10: Cleanup and Finishing
Allow the grout to dry for the time specified by the manufacturer (usually about 30 minutes to an hour). The grout will leave a haze on the tile faces as it dries. Use a damp sponge to gently wipe away the haze, rinsing the sponge frequently in clean water.
After the grout has fully dried (typically 24 hours), use a soft, dry cloth to remove any remaining haze from the tile surfaces.
With these steps complete, you have successfully tiled a wall! Take a step back and admire your handiwork. Your new tiled wall will provide lasting beauty and durability to your space.
Steps | Description |
|---|---|
Step 1 | Continue tiling the wall, working your way outwards and upwards, using tile spacers, and checking for levelness and alignment regularly. |
Step 2 | Continue tiling the wall, working your way outwards and upwards, using tile spacers, and regularly check for levelness and alignment. |
Step 3 | Apply a layer of tile adhesive onto the wall using a notched trowel, starting from the bottom center and working your way up and outwards. |
Step 4 | Press the first tile firmly into the adhesive, starting at the bottom center of the wall. Ensure it is level and straight. |
Step 5 | Place tile spacers between the first tile and the adjacent tiles to maintain uniform gaps for grouting. |
Step 6 | Reinstall any fixtures or fittings on the wall, and enjoy your newly tiled wall! |
Step 7 | Leave the adhesive to dry for the recommended time (usually 24 hours) before removing the tile spacers. |
Step 8 | Mix the grout according to the manufacturer’s instructions and apply it to the joints between the tiles using a grout float. Wipe off any excess grout with a damp sponge. |
Step 9 | Allow the grout to dry for the recommended time (usually 24 hours) before applying a grout sealer to protect against stains and moisture. |
Step 10 | Continue tiling the wall, working your way outwards and upwards, using tile spacers, and regularly checking for levelness and alignment. |
What is the Starting Point When Installing Tiles on a Wall?
Tiling a wall can be a rewarding DIY project, as it adds a striking design element to any space. Whether you want to refresh your kitchen backsplash or give your bathroom a makeover, knowing where to start when tiling a wall is essential for achieving the best possible results.
I aim to provide a comprehensive guide to wall tiling, ensuring your next project runs smoothly from start to finish.
• Essential Tools and Materials
Before diving into the wall-tiling process, gathering all the essential tools and materials is necessary. Ensuring you have everything on hand before starting will save you time, effort, and frustration. Here is a list of the crucial items you will need:
- Tape measure and pencil
- Spirit level
- Tile spacers
- Trowel (V-notched)
- Tile cutter (manual or electric)
- Tile adhesive
- Grout
- Sponge and bucket of water
- Rubber grout float
- Tile saw (optional for intricate cuts)
- Safety goggles and gloves
• Finding the Starting Point
One of the most critical aspects of wall tiling is determining the correct starting point. Proper placement ensures an even and symmetrical layout, preventing the need to use small, uneven tiles at the room’s edges. To establish the perfect starting point, follow these steps:
- Measure the wall: Using a tape measure, calculate the length and width of the wall you plan to tile.
- Find the center: Divide the length by two to locate the wall’s center point. Mark this with a pencil.
- Check for level: Place a spirit level horizontally against the wall and ensure it is level. Adjust the mark if necessary.
- Dry layout: Lay out a row of tiles on the floor, along with tile spacers, to accurately gauge how many tiles will fit on your wall. Check for gaps at the edges – aim for no less than half a tile’s width. If the gaps are too small, adjust the starting point and lay the tiles out again until you achieve a satisfactory result.
- Vertical line: Once you have found the perfect starting point, use a spirit level to draw a vertical line through the center mark from the top to the bottom of the wall.
• Applying Tile Adhesive
Now that you have established your starting point, it is time to apply the tile adhesive. To ensure an even and secure bond, follow these guidelines:
- Choose the right adhesive: Use a suitable adhesive for your tile material and the specific conditions of your room (e.g., waterproof adhesive for bathrooms). Check the product label or consult a professional if you are unsure.
- Mix the adhesive: Following the manufacturer’s instructions, mix the adhesive to a smooth and lump-free consistency.
- Apply to the wall: Starting at the bottom center, use a V-notched trowel to spread an even layer of adhesive on the wall. Hold the trowel at a 45-degree angle and cover an area slightly larger than one tile.
- Comb out the adhesive: With the trowel still at 45 degrees, comb out the adhesive, creating horizontal ridges. This helps ensure full coverage and a strong bond between the tile and adhesive.
• Fixing the Tiles
With the adhesive prepared, you can now begin fixing the tiles to the wall. Follow these steps:
- Press the tile: Firmly press the first tile into the adhesive, starting at the bottom center of the wall. Ensure it is in line with the vertical guideline.
- Add spacers: Place tile spacers at the tile’s corners to maintain even spacing and ensure accurate grout lines.
- Continue fixing tiles: Fix the next tiles using the same steps, working your way up the wall and outwards towards the corners. Remember to use spacers and check for level as you go.
- Cutting the tiles: Depending on the layout and shape of your wall, you may need to cut the tiles to fit. Use a manual or electric tile cutter for straight cuts and a tile saw for intricate shapes. Always wear safety goggles and gloves when cutting tiles.
- Allow drying: Once all the tiles are fixed, allow the adhesive to dry according to the manufacturer’s instructions. Avoid touching or applying pressure to the tiles during this time.
• Grouting the Tiles
The final step in the wall-tiling process is applying the grout. To achieve a clean and consistent finish, consider the following tips:
- Choose the right grout: Select a suitable grout color and type for your tiles and room conditions (e.g., water-resistant grout for bathrooms).
- Mix the grout: Follow the manufacturer’s instructions to mix the grout to a smooth and lump-free consistency.
- Remove spacers: Remove all the tile spacers from the wall before grouting.
- Apply the grout: Using a rubber grout float, scoop up a manageable amount of grout and apply it to the wall, working diagonally across the tile joints. Press firmly to ensure the grout fills the joints completely.
- Clean the tiles: Use a damp sponge to remove excess grout from the tile surfaces as you work. Do not press too hard or pull the grout out of the joints.
- Allow to dry: Let the grout dry for the specified time, usually around 24 hours. Avoid touching the tiles or introducing water during this period.
- Polish the tiles: Once the grout is dry, use a clean cloth to remove any grout haze from the tile surfaces.
With these steps, you can now enjoy your beautifully tiled wall. Remember, practice makes perfect, so do not be disheartened if your first attempt is imperfect. The more experience you gain, the more efficient and confident you will become in your wall-tiling abilities.
Step | Description |
|---|---|
1 | Measure and mark the center of the wall to find your starting point. |
2 | Use a level to draw a horizontal line through the center mark. This will be your guideline for tiling. |
3 | Apply adhesive to the wall, starting from the centerline and working outwards. |
4 | Place tile spacers around the first tile to ensure even spacing, and continue placing tiles in a row along the horizontal line. |
5 | Place tile spacers around the first tile to ensure even spacing and continue placing tiles in a row along the horizontal line. |
6 | Press the first tile onto the adhesive, aligning it with the center and horizontal lines. |
7 | Make any necessary cuts to the tiles using a tile cutter and place them accordingly. |
8 | Allow adhesive to dry for the recommended time before removing spacers and applying grout. |
Is It Possible to Install Tiles Directly Onto a Wall?
Tiling directly onto a wall is common in many home improvement projects, providing a durable and attractive surface suitable for virtually any room in the house. However, several important factors must be considered before you begin the process.
We’ll explore the key considerations, benefits, and potential drawbacks of tiling onto a wall, and I will provide some expert guidance for achieving the best possible results.
• Evaluating Your Wall Surface
The suitability of your wall for tiling largely depends on the type and condition of the surface you’re working with. Generally speaking, there are three main categories of wall surfaces:
– Plasterboard and Drywall
This is a common wall material found in many modern homes. Plasterboard is relatively lightweight and easy to work with, making it a popular DIYer choice. However, it’s also more delicate than other wall types and can be prone to damage if not properly prepared.
– Cement-Based Backer Board
This type of wall surface is specifically designed for use in areas likely to experience high moisture levels, such as bathrooms and laundry rooms. Cement-based backer board is a rigid surface highly resistant to water and mold, making it an excellent choice for tiling projects.
– Solid Walls (Brick, Concrete, or Block)
These walls are robust and durable but can be more challenging, especially for beginners. Tiling onto a solid wall requires extra preparation, including leveling the surface and using the appropriate adhesives.
In addition to the type of wall surface, it’s essential to assess the condition of the wall before tiling. If there are any signs of damp or unstable areas, these issues should be addressed before tiling commences. Failure to do so may result in problems, including uneven surfaces, loose tiles, or potential water damage.
• Preparing the Wall Surface for Tiling
– Cleaning and Leveling
One of the most critical aspects of tiling directly onto a wall is ensuring a clean, smooth, and level surface. This involves removing dirt, grease, or loose debris that may interfere with tile adhesion. Should the wall have large irregularities or uneven areas, applying a thin layer of leveling compound may be necessary to create a suitable surface for tiling.
– Priming and Sealing
Once the wall is clean, it’s essential to prime the surface if you’re working with plasterboard or drywall. A high-quality primer will seal the porous material, preventing the adhesive from drying out too quickly and ensuring a more stable bond between the tile and the wall.
If you’re tiling onto a cement-based backer board or solid wall, priming the surface may not be necessary. However, sealing is crucial when tiling onto a porous surface such as brick, as it prevents water absorption and possible damage.
• Choosing the Right Adhesive
Selecting the appropriate adhesive is crucial for achieving a successful tiling job. The type of adhesive you choose will depend on the wall surface, the tile you’re using, and other factors, such as the size and the room’s moisture level.
A standard ready-mixed or powdered adhesive for larger tiles may be suitable for dry areas, such as living spaces or kitchens. However, using a waterproof adhesive in wet areas, such as bathrooms or laundry rooms, is important as the increased water resistance will help protect your tiles and underlying surface from damage.
• Laying the Tiles
When satisfied that your wall is properly prepared, you can begin laying the tiles directly onto the wall. There are numerous tiling techniques and patterns to choose from, depending on your personal preference and the desired aesthetic of your space.
It’s essential to use tile spacers when laying your tiles to ensure even spacing and proper alignment. I recommend using a notched trowel to evenly spread the adhesive onto the wall, firmly pressing each tile into the adhesive before moving on to the next.
Remember to work patiently and methodically, as rushing the process may result in uneven surfaces or loose tiles. Once all the tiles are in place, allow the adhesive to fully dry before grouting.
• Grouting and Sealing
Finally, after the adhesive has dried, it’s time to grout your tiles. Using a rubber grout float, work the grout into the gaps between the tiles to create a smooth, even finish. Be sure to remove any excess grout before it dries.
Once the grout has cured, I highly recommend applying a suitable tile sealer to protect your tiles and grout from water damage and staining. This is especially important if you’ve installed tiles in a wet area, such as a bathroom or shower.
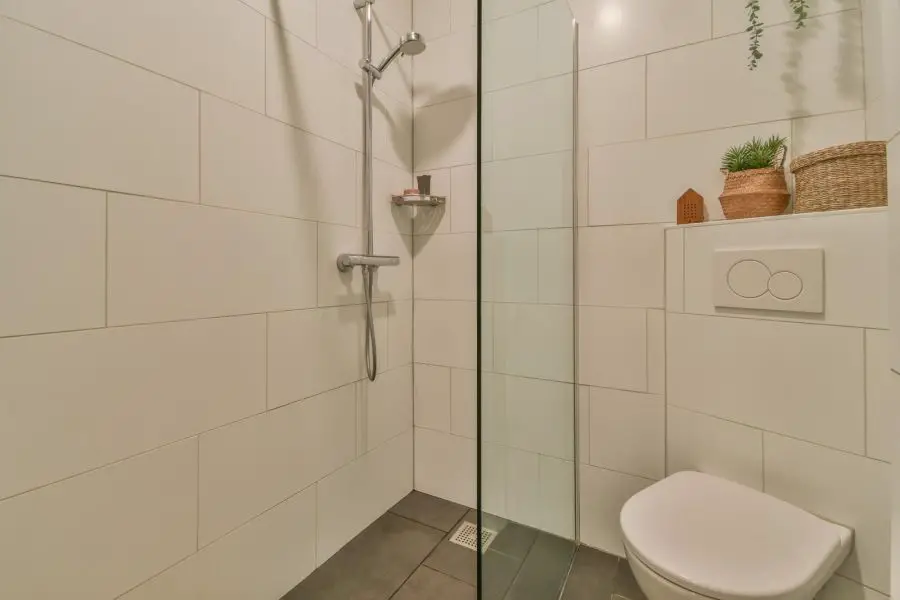
In summary, tiling directly onto a wall is a highly achievable and effective method for transforming your living space, provided you follow the proper preparation steps and use the right materials for your specific situation. With careful planning and attention to detail, you can create a stunning tiled surface that is both functional and visually appealing.
Is Tiling a Wall by Yourself a Simple and Straightforward Task?
Tiling a wall can be an enjoyable and rewarding DIY project for many homeowners. It can transform the appearance of your room, add value to your home, and even save you money compared to hiring a professional tiler.
But is tiling a wall an easy task for anyone to undertake? We will explore the process, the skills required, and the potential challenges you may face when tiling a wall yourself.
• Preparation is Key
First, prepare the wall surface you plan to tile to ensure a successful tiling project. This includes cleaning and leveling the surface and removing any remaining paint, wallpaper, or loose plaster. This is crucial as a clean and level surface is essential for the adhesive to bond effectively with the tiles.
Tip: If your wall is seriously damaged or uneven, you might consider using tile backer boards to create a smooth, level surface for your tiles.
• Choosing the Right Materials
Selecting the appropriate tiles and adhesive for your project is critical for a successful outcome. Your choice of tiles will depend on factors such as the desired aesthetics, budget, and intended use of the space. While ceramic tiles are generally more affordable and easier to cut and install, porcelain tiles can offer greater durability and water resistance.
When it comes to adhesives, using the right type of adhesive for your tiles is essential to ensure a strong, long-lasting bond. There are two main types of adhesives, ready-mixed and powder-based. Ready-mixed adhesives are generally easier to use but may not be suitable for large or heavy tiles, requiring the stronger bond of powdered adhesives.
Tip: Look for adhesives specifically formulated for the type of tiles you are using – manufacturers will often have recommendations on the packaging.
• Tools and Equipment
Having the right tools and equipment can make tiling a wall significantly easier and help to achieve a professional finish. Some essential tools you will need include:
- Tile cutter
- Notched trowel
- Tile spacers
- Grout float
- Sponges
- Spirit level
- Tape measure
Tip: Investing in a quality tile cutter can be a game-changer, making cutting and shaping tiles much more efficient, precise, and less prone to damage.
• Tiling Technique
Tiling a wall requires patience, attention to detail, and basic technical skills. The following steps outline the general approach to tiling a wall:
- Planning: Before starting, lay out your tiles and spacers on the floor to ensure enough tiles and determine the optimal cutting patterns.
- Applying adhesive: Using a notched trowel, apply the adhesive to the wall in a thin, even layer. Hold the trowel at a 45-degree angle while spreading to ensure consistent coverage and depth.
- Setting the tiles: Press each tile firmly and evenly onto the adhesive, using spacers to ensure regular gaps between the tiles. Check with a spirit level that your tiles are straight and level.
- Cutting tiles: As you progress, you must cut tiles to fit around edges or obstacles. Use a tile cutter or other relevant tools to cut tiles to the precise shape and size required.
- Grouting: After setting the adhesive, remove the spacers and apply the grout to the gaps between the tiles. Use a grout float to spread the grout evenly, ensuring full coverage of the gaps. Wipe away excess grout with a damp sponge.
- Cleaning and sealing: Thoroughly clean the tiles to remove any residue or haze. If necessary, apply a grout sealer to protect your grout and maintain its appearance.
Tip: Working in small sections can make the process more manageable and prevent the adhesive from drying before the tiles are in place.
• Potential Challenges
While tiling a wall may be an achievable project for many homeowners, it does present some challenges:
- Physical effort: Tiling can be physically demanding, requiring strength to lift and carry tiles, sustained focus, and dexterity when cutting and placing tiles.
- Accuracy and precision: A straight, level, evenly spaced tile installation requires precision and attention to detail.
- Problem-solving: You may need to cut tiles to fit around obstacles or adjust your layout if you encounter unforeseen issues.
• Conclusion
So, is it easy to tile a wall yourself? The answer depends on your skills, experience, and willingness to invest time in learning and practicing. Many homeowners can complete a tiling project with proper preparation, materials and tools, and a methodical approach.
However, if you lack confidence in your ability or the project involves complicated cutting or layouts, it may be worth considering hiring a professional to ensure a high-quality finish.
Is it Possible to Install Tiles Directly onto the Drywall?
Tiling directly to drywall is commonly debated among homeowners and professionals. There are some scenarios where tiling directly to drywall can be done successfully; however, there are also instances when it is not advised.
The following comprehensive guide will discuss the pros and cons of directly tiling to drywall and provide expert tips and recommendations.
• Understanding Drywall and Tiles
Before diving into whether or not you can tile directly to drywall, it is important to understand the materials involved. Drywall is a commonly used building material made of gypsum plaster pressed between two thick sheets of paper. It is known for its ease of installation and cost-effectiveness.
Tiles, on the other hand, vary considerably in material, size, and shape. Common tile materials include ceramic, porcelain, and natural stone. These materials have different porosity levels and should be considered when deciding whether tiling directly to drywall is suitable.
• Pros of Tiling Directly to Drywall
There are a few key advantages to tiling directly onto drywall, including the following:
– Cost-Effectiveness
Tiling directly to drywall can save you money, as it removes the need for additional materials such as cement boards and other specialized substrates. The cost of purchasing and installing these additional materials can be avoided when tiling to drywall.
– Time-Saving
Applying tile directly to drywall can save time, as the process can typically be completed in one step. This reduces the time and effort required for tiling projects and can be convenient for homeowners and professionals.
– Ease of Installation
As mentioned earlier, drywall is known for its ease of installation. It does not require lengthy preparation for other backing materials. This can make tiling directly to drywall a quicker and more straightforward process.
• Cons of Tiling Directly to Drywall
Despite the above advantages, there are also several downsides to tiling directly onto drywall:
– Lack of Structural Support
Drywall is not as strong or durable as other backing materials such as cement board or plywood. When exposed to large amounts of water, the gypsum in drywall can deteriorate and compromise the structure’s integrity.
This may cause tiles to loosen or fail entirely, which can be costly and time-consuming.
– Vulnerability to Moisture
The drywall is not waterproof and can be susceptible to damage from moisture exposure. It is essential to consider the location and purpose of the tiled area when deciding whether tiling directly onto drywall is appropriate.
Areas with high moisture levels or frequent water exposure, such as showers and bathrooms, typically require a more water-resistant backing material.
• Expert Recommendations
– Location Matters
As mentioned earlier, the location of the tiled area is paramount in deciding whether or not to tile directly to drywall. Tiling directly onto drywall can be an acceptable option for dry areas with minimal moisture exposure, such as kitchens and fireplaces.
However, using water-resistant backing material like a cement board is strongly recommended in areas exposed to water, such as showers and bathtubs.
– Proper Preparation
To ensure successful tiling directly to drywall, adequate surface preparation is essential. This includes cleaning the surface to remove dust, dirt, or debris and priming the drywall with a suitable primer.
Priming drywall can help improve the adhesion between the tile and the drywall, making the installation more durable and longer-lasting.
– Using the Right Adhesive
Selecting the correct adhesive is crucial when tiling directly to drywall. A high-quality, polymer-modified thin-set mortar is recommended for this purpose. This type of adhesive enhances the bond between the tiles and the drywall while also providing some protection against moisture.
– Grouting and Sealing
After installing tiles directly onto drywall, applying grout appropriately and ensuring it properly cures is essential. Additionally, sealing the grout lines and edges of the tiles with a quality sealant can help protect the installation from water damage and prolong the lifespan of the tile.
• Conclusion
Tiling directly to drywall can be cost-effective and time-saving in certain situations, such as low-moisture areas like kitchens and fireplaces. However, it is not recommended for areas with high moisture levels or water exposure, as it can lead to structural issues and potential damage.
By considering the location, properly preparing the surface, using the right adhesive, and applying grout and sealant correctly, it is possible to successfully tile directly to drywall in specific scenarios. Always consult a professional if unsure about the best approach for your tiling project.
Type of Tiling | Can Tile Directly on Drywall | Notes |
|---|---|---|
Non-wet areas (e.g., backsplash, accent wall) | Yes | Use a suitable underlayment, such as a cement backer board or uncoupling membrane, to ensure proper support and adhesion for floor tiling. |
Wet areas (e.g., shower, tub surround) | No | Use a waterproof backer board or a waterproofing membrane over drywall for wet areas to prevent water damage and mold growth. |
Floor tiling | No | Use a suitable underlayment, such as cement backer board or uncoupling membrane, to ensure proper support and adhesion for floor tiling. |
Heavy (e.g., large format, stone) tiles | Not recommended | Some heavy or large tiles may require installation on a more durable substrate, such as cement backer board, for proper support and adhesion. |