Plywood and Tiling: 7 things you should know
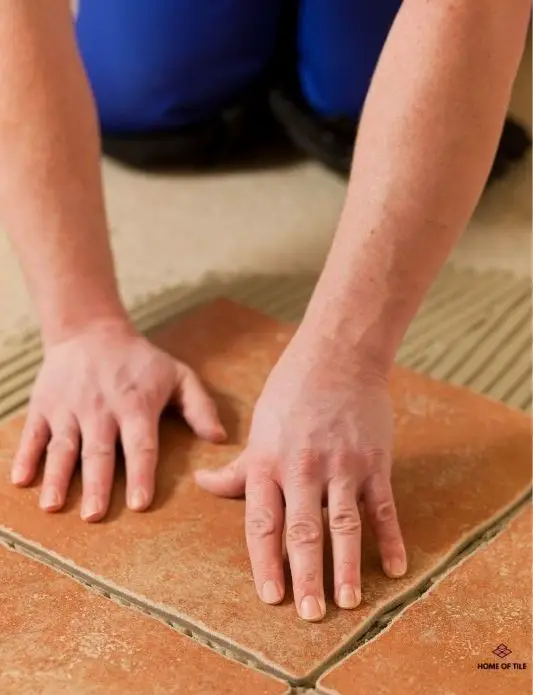
Tile is a nice addition to a floor. It protects against moisture and makes an excellent addition to the rest of the house. Moreover, it makes the home attractive, and it is comfortable to walk on the tiled floor and look at the tiled walls. Tiling on top of preexisting plywood is very common, and you might want to do it for your home too. Here are the seven things which you should know about plywood and tiling.
Contents
Tiling to plywood
For tiling to plywood, you should first assess your floor and. If needed, strengthen it. Ensure that the boards are correctly fixed and rigid for tiling onto the groove floorboard. To mitigate the chance of cracking, use flexible adhesives. For grouting, use good quality and flexible products.
In general, tiling to plywood includes the following steps:
● Step 1: Assess your floor
When assessing the floor, the existing floor must be stable, tidy, and in good condition with sufficient ventilation to prevent atmospheric moisture distortion. It should be adequately rigid and stable because unsupported movement in the subfloor can cause tiles to crack. The floor should be able to support the additional weight of the tiles without any deflection. The floors that require strengthening, and are ready for tiling, can be coated using a suitable flooring grade, 0.6 to 0.7-inch thickness WBP plywood. Where floors require further strengthening, you may fit additional noggins within the floor joist beneath the subfloor or the floorboards.
● Step 2: Prepare and strengthen your plywood floor
Depending on the assessment, further strengthen your plywood floor. You can use 0.6 to 0.7-inch thick plywood and fix it to the existing subfloor. Use a brick bond or varied design, so the joints are not uniform and similar. Use screws around 12 inches from each other, ensuring that the screw heads are flat with the board’s surface. Afterward, leave a 0.08 to 0.12 inches expansion gap around the room’s perimeter to allow for any movement. Fill the expansion gap with a silicone sealant to prevent it from being filled with tile adhesive. Before fixing your plywood overlay, you must ensure that the reverse and edges of the boards have been sealed using BAL Bond SBR as a primer, as this reduces water permeability.
● Step 3: Tiling onto plywood
It would be best to use flexible adhesives such as Topps Tiles Rapid Set Flexible, BAL Rapid-Flex fibre or BAL Flex fibre for tiling onto plywood. If you are using larger format tiles, a suitable S1 BAL PTB (Pourable Thick Bed) adhesive should be used. These help to mitigate the chance of cracking.
● Step 4: Tiling onto groove floorboard
For tiling onto the groove floorboard, you should ensure that the boards are adequately fixed and rigid. Floorboards will need to be primed using two neat and sufficient coats of BAL Prime APD; you have to apply the second coat perpendicularly to the first coat, allowing it to dry between coats. Afterward, apply a highly flexible tile adhesive (S2) such as BAL Fast-Flex using a Topps Tiles Pro Tipped 3mm trowel.
● Step 5: Grout your plywood floor
Then you have to grout a plywood floor. You must be very selective while choosing the grout. It would be best to consider the need for flexibility to deal with any additional movement faced when tiling to the plywood.
Priming plywood before tiling
For priming the plywood before tiling, you must use BAL bond SBR. Prime the reverse sides and edges of the plywood with BAL bond SBR. Then, apply the second coat perpendicularly to the first coat. Apply one coat horizontally and the other coat vertically.
Priming is necessary to reduce the porosity. It levels the surface for tiling and prepares it for waterproofing. So, if you want to ensure these factors, you should go with a good primer for plywood, such as BAL bond SBR.
Tiling on plywood boxing
For tiling on plywood boxing, first, box the pipes inside the plywood. Before starting to lay tile, use a primer. Use a flexible adhesive to make the chance of cracking smaller. Also, for the grout, use a good quality and flexible product.
Plywood boxing is used to box in several pipes. In general, tiling on plywood boxing involves the following steps:
● Step 1: Box the pipes inside plywood
First box in the pipes inside the plywood. Take the measurements of the pipes and then cut the plywood accordingly. Box up the pipes with some screws.
● Step 2: Apply adhesive and primer
You have to leave an expansion gap around the room’s perimeter to allow for any movement. Fill it with a silicone sealant to prevent it from being filled with tile adhesive later. Also, ensure that the reverse and edges of the boards have been sealed using BAL Bond SBR as a primer.
● Step 3: Tile on plywood boxing
It would be best to use a flexible adhesive such as Topps Tiles Rapid Set Flexible, BAL Rapid-Flex fibre or BAL Flex fibre for tiling on plywood boxing. And for larger format tiles, use a suitable S1 BAL PTB (Pourable Thick Bed) adhesive.
● Step 4: Place the tiles
After taking the appropriate measurements, you have to place the tiles onto the plywood with the help of these adhesives.
● Step 5: Apply the grout
Then apply the grout, making sure to choose a good quality and flexible grout for your tiles.
Tiling onto marine ply
If you use marine ply as the surface for tiling, ensure that it is adequately rigid and stable. Movement can cause tiles to crack. The floor should be able to support the additional weight of the tiles without any deflection. Use a suitable primer, depending on the size of your tiles. Start with the backing board first before continuing to lay tile on the marine ply. The last step is to apply the grout.
In general, tiling onto marine ply involves the following steps:
● Step 1: Check the floor or wall
Check the floor or wall and ensure that it is adequately rigid and stable. Unsupported movement in the surface can cause tiles to crack. This applies mainly to the floor, but also, in the case of a wall, you do not want to have tiles crack when you slam a door. The floor should also be able to support the additional weight of the tiles without any deflection. If this is not the case, strengthen the wall or floor with some additional marine ply.
● Step 2: Apply adhesives and primer
You must leave an expansion gap around the perimeter of the wall to allow for any movement. Fill it with a silicone sealant to prevent it from being filled with tile adhesive when you are fixing your tiles. Also, ensure that the reverse and edges of the boards have been sealed using BAL Bond SBR as a primer for a leveled ply.
● Step 3: Tile on the marine ply
For tiling onto marine ply, you should use a flexible adhesive such as Topps Tiles Rapid Set Flexible, BAL Rapid-Flex fibre, or BAL Flex fibre. For larger tiles, use a suitable S1 BAL PTB adhesive.
● Step 4: Place the backing board and tiles
After taking the appropriate measurements, you have to place the backing board first and then the tiles onto the marine ply with the help of the adhesives.
● Step 5: Apply the grout
The last step is to apply the grout. Use a good quality, flexible grout.
Tiling onto a plywood bath panel
If you want to tile your plywood bath panel, ensure that it is adequately rigid and stable. You do not wish to crack tiles when you use your bath. If you have an access panel, choose the size wisely. Use a suitable flexible primer before starting. If the tiling has been finished, use a flexible and good quality grout.
In general, tiling onto a plywood bath panel includes the following steps:
● Step 1: Check the bath panel frame
Check the bath panel frame and ensure that it is adequately rigid and stable. If not, movement from your bath can cause tiles to crack. Strengthen it when needed.
● Step 2: Check the access panel
If your bath has an access panel, try to make the size such that there is no need to cut tiles. This will make the result looks much better. Install and tile the access panel last, and check the size just before.
● Step 3: Apply adhesives and primer
You must leave an expansion gap around the perimeter of the wall to allow for any movement. Fill it with a silicone sealant to prevent it from being filled with tile adhesive when fixing your tiles. Also, ensure that the reverse and edges of the boards have been sealed using BAL Bond SBR as a primer for a leveled ply.
● Step 4: Check the bath backing board
If you use a backing board, ensure that it is mounted correctly. Tile Backer Boards are a perfect solution for wet rooms as they provide a waterproof barrier behind the tiles.
● Step 5: Apply adhesive and sealant
It would be best to align the bath tiles with the tiles on your floor or the wall for an excellent result. Always dry run how you are going to place the tiles before you start applying adhesive. When you are finished tiling, use a suitable sealant to waterproof and fill in the gap between the tiles, the walls, and the floor.
● Step 6: Apply the grout to the bath tiles
The last step is to apply the grout. Use a good quality, flexible grout.
Tiling onto a plywood shower
If you want to tile your plywood shower, ensure that it is adequately rigid and stable. You do not wish to crack tiles when you lean against the wall. Use a suitable flexible primer before starting. If the tiling has been finished, use a flexible and good quality grout.
In general, tiling your plywood shower includes the following steps:
● Step 1: Check the shower frame
Check the shower frame and ensure that it is adequately rigid and stable. If not, leaning to the shower wall can cause tiles to crack. Strengthen it when needed.
● Step 2: Check the shower backing board
If you use a backing board, ensure that it is mounted correctly. Tile Backer Boards are a perfect solution for wet rooms as they provide a waterproof barrier behind the tiles.
● Step 3: Apply adhesive and sealant
It would be best to align the shower tiles with the tiles on your floor or the wall for an excellent result. Always dry run how you are going to place the tiles before you start applying adhesive. When you are finished tiling, use a suitable sealant to waterproof and fill in the gap between the tiles, the walls, and the floor.
● Step 4: Apply the grout to the shower tiles
The last step is to apply the grout. Use a good quality, flexible grout.
Tiling over a plywood substrate
If you want to tyle over a plywood substrate, you first apply a suitable primer over the plywood substrate. Always leave an 0.08 to 0.12 inches expansion gap so the plywood substrate can move. Place the tiles with the help of a flexible adhesive and use a flexible, good-quality grout.
In general, tiling over a plywood substrate includes the following steps:
● Step 1: Prime the plywood substrate
The first step before tiling is to prime the plywood substrate. Use a suitable primer like BAL bond SBR. Prime the reverse sides and edges of plywood substrate with BAL bond SBR. Then apply the second coat perpendicularly to the first coat, keeping one coat horizontal and one coat vertical.
● Step 2: Apply adhesive and sealant
Leave an expansion gap around the perimeter of the shower to allow for any movement. Fill this gap with a silicone sealant to prevent it from being filled with tile adhesive.
● Step 3: Place the tiles
After finishing the previous steps, place the tiles with the help of tile adhesives such as Topps Tiles Rapid Set Flexible, BAL Rapid-Flex fibre or BAL Flex fibre. Using a flexible adhesive mitigates tiles cracking.
● Step 4: Apply the grout
Finally, apply the grout to the tiles. Use a flexible, good-quality grout.
Final Word:
Tile installation creates a beautiful, durable floor that’s easy to clean and walls and bathroom that look very attractive. Laying tile is not a straightforward job, but you definitely can do it with good preparation. The surface looks very eye-catching with the tiles. You should be familiar with tiling on plywood and should know seven things about plywood and tiling. These seven things are tiling to plywood, priming plywood before tiling, tiling on plywood boxing, tiling onto marine ply, tiling onto a plywood bath panel, tiling onto a plywood shower, and tiling over a plywood substrate. It would be best if you were very careful when tiling on plywood and should do tiling step-by-step to have perfect and attractive tiling on your plywood.

