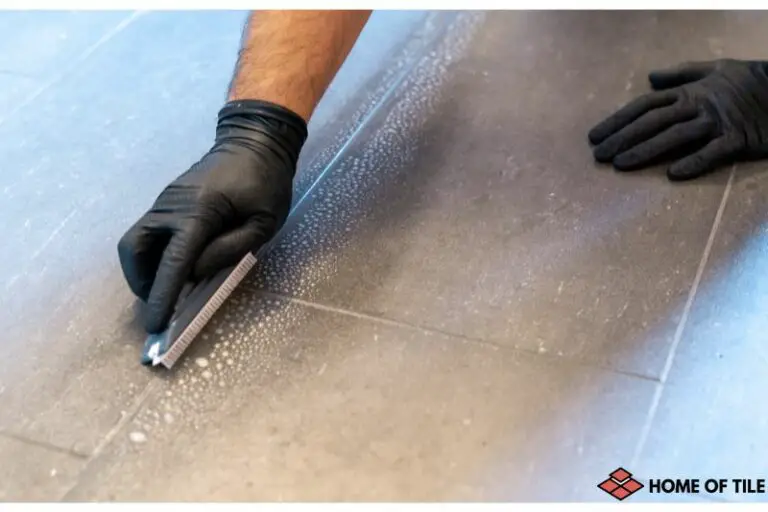
How To Clean Floor Grout Without Scrubbing. What pros say
Over time, floor tiles accumulate grime and dirt from people’s feet and footwear. The dirtier these tiles get, the messier the grout attached to them. Soon, you’ll be seeking out how to clean your floor grout.
Here’s how to clean your floor grout without scrubbing:
- Sweep the floor tiles.
- Mop up the surface of the floor tiles.
- Mix hydrogen peroxide and baking soda in a 1:1 ratio.
- Add a splash of dishwashing soap to the mixture.
- Apply the paste to the grout and wait 7 to 10 minutes.
- Wipe off the paste and rinse the area with water.
- Let the area dry.

Keep reading to learn more about cleaning your floor grout without having to scrub it. If you’re not entirely convinced, you’ll also discover why cleaning the grout is important!
Contents
- 1 1. Sweep the Floor Tiles
- 2 2. Mop Up the Surface of the Floor Tiles
- 3 3. Mix Hydrogen Peroxide and Baking Soda in a 1:1 Ratio
- 4 4. Add a Splash of Dishwashing Soap to the Mixture
- 5 5. Apply the Paste to the Grout and Wait 7 to 10 Minutes
- 6 6. Wipe Off the Paste and Rinse the Area With Water
- 7 7. Let the Area Dry
- 8 Why Should You Clean Your Floor Grout Regularly?
- 9 Conclusion
1. Sweep the Floor Tiles
The process of cleaning grout can be pretty messy. Since you don’t want to create a bigger mess than you already have, the first thing you’ll want to do is sweep or vacuum the floor.
Aside from grout-cleaning times, it’s important to sweep your floors regularly 一 at least twice a week. Regular cleaning helps get rid of debris that may have accumulated on the tiles and keeps the house free of unappealing and unhygienic dust.
You can also use a vacuum cleaner if that’s an option. It’s a better way to clean your floors than sweeping because it removes both visible dust and microscopic particles.
2. Mop Up the Surface of the Floor Tiles
Wiping the floor with hot water helps soften the dirt on the grout, making the cleaning agent more effective.
Heat some water and get a lint-free mop to wipe the floor tiles with after sweeping. A lint-free mop is recommended because it can easily take in a lot of water and retain it even after many wipes.
It’s good floor maintenance practice to mop parts of the house that are used often regularly. When doing this, you might want to add some detergent to the mopping water. It’s a great way to kill germs, remove dirt, and improve the aesthetics of your floor tiles.
3. Mix Hydrogen Peroxide and Baking Soda in a 1:1 Ratio
Hydrogen peroxide is a natural cleaning agent because of its anti-bacterial and anti-fungal properties. It’s also affordable, making it an excellent solution for removing filth between your floor tiles without scrubbing.
Baking soda is also an effective and economical cleaning agent because it easily dissolves organic compounds like dirt and grease. It provides mild abrasion that cleans without leaving scratches on your tiles, removes built-up sludge, and kills bacteria in floor grout.
Add baking soda and hydrogen peroxide in a bowl in equal measures and mix well to form a paste. This mixture has long been used to remove tough stains in various applications, and cleaning your floor grout is no exception.
4. Add a Splash of Dishwashing Soap to the Mixture
Add a spoonful of dishwashing soap to your pasty hydrogen peroxide and baking soda mixture. Mix until the liquid is infused into the paste.
Adding dishwashing soap will make your mixture more effective. That’s because dishwashing soap contains surfactants that help reduce surface tension in a liquid to improve its wetting and penetrative properties. Surfactants are useful cleaning agents because they help soaps mix well with water for easier stain removal.
5. Apply the Paste to the Grout and Wait 7 to 10 Minutes
Apply the mixture of baking soda, hydrogen peroxide, and dishwashing soap on the floor grout gently. Avoid smearing the floor tiles with the paste.
The cleaning mixture will need some time to take effect on the grout, so leave it for about 5 to 10 minutes (depending on the amount of dirt on the floor grout). During this time, the mixture will break down the compounded dirt and debris on the grout.
6. Wipe Off the Paste and Rinse the Area With Water
After you have left the paste for some time, get a towel or napkin and wipe it off. Next, rinse the area with water and wipe it off.
Ideally, your floor grout should appear cleaner and better. If there is still dirt in some parts of the grout, reapply the cleaning paste and let it sit longer before wiping and rinsing the area.
7. Let the Area Dry
Now that your floor grout looks just as you want, you have to leave it to dry up. Without proper drying, the super-clean effect on your tiles and grout may not last as long as it should.
To speed up to process, you can turn on a fan and open the windows for ventilation,
Why Should You Clean Your Floor Grout Regularly?
Cleaning your floor grout regularly is important because it improves home aesthetics, helps keep your family healthy, and extends the durability of your floors.
Cleaning your floors and the floor grout gives your house a more inviting outlook. Visitors will immediately notice how neat your floors are and feel at home; they may even ask for your secret to the sparkling floors!
Taking care of your floor grout can also help create a healthy environment in your home. Dirty grout tends to house dirt, germs, and other harmful pollutants. Cleaning the floors reduces the chances of those living in your house getting infected with diseases from the germs. It also reduces the chances of allergies.
Last but not least, cleaning grout regularly can help keep your floor in good condition for longer. It prevents mold and mildew from growing on your floor, which can cause permanent damage.
Conclusion
Many people tend to get reluctant about cleaning their floor grout because they think they have to scrub the floors. Not only is scrubbing hectic, but it also carries a risk of damaging the grout and leaving unsightly marks on nearby tiles.
Lucky for you, you’ve just learned a better approach to cleaning your floors without the hassle and risks associated with scrubbing.


