How To Regrout Tile Without Removing Old Grout. What pros say
If your ceramic tiles are in desperate need of a makeover, but the tiles themselves are in good condition, you may want to consider regrouting. Once you have new grout, you’ll notice a stark difference in how your tiles look.
You can regrout tile without removing old grout if you use epoxy grout and scrape out a 5/64-inch (2-mm) layer of the old grout. After clearing away the area, you can apply the new grout as usual. Ensure that you apply caulk in the appropriate areas to finish the job.

Here is a quick guide on how to regrout tile without going through the trouble of removing old grout. You can get started on this project regardless of your expertise.
Contents
Step 1: Selecting Suitable Grout
First and foremost, it is critical that you choose the correct type of grout for this project. While the most common type of grout is cement-based, it’s better to look for an epoxy-based grout. It’s made of a tougher material that will last a lot longer, so you won’t need to think about regrouting again anytime soon.
Epoxy grout is not as porous as traditional cement-based grout, making it less likely to get dirty and discolor as it sits in the damp environment of a shower. Also, it doesn’t shrink or crack very easily, so it’s ideal as a long-lasting solution. A bonus is that epoxy grout is not considered toxic, so it’s safe to use.
Some brands sell different epoxy grout colors, so you can choose a shade that matches your tile for a more aesthetically pleasing effect.
Step 2: Scraping Away Old Grout
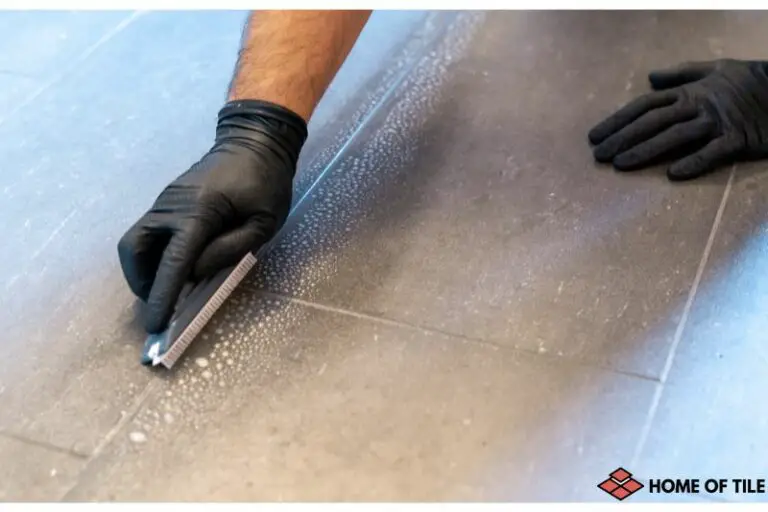
Although you don’t need to remove all the old grout before you start applying new grout, you still need to make space for it. Using a grout saw, gently scrape away a thin layer from the existing grout. It’s a tool that creates a v-shaped groove when pushed through the grout. Don’t worry about removing it all—you only need 5/64 inch (2 mm) of space for the new application of epoxy.
Pro Tip: When scraping the surface of the old grout, work by pushing the grout saw away from you until you approach a corner. Pull the saw away from the corner to avoid chipping the tile.
Some people use a standard slotted screwdriver in a pinch when they don’t have access to a grout saw. This step is likely to be the most time-consuming part of the entire project, but it’s essential for the best results.
Do not skip this step because you need enough space for a substantial amount of epoxy to be applied between the tiles without bulging above the tile. Otherwise, you might apply too little epoxy grout, which might not bind properly.
Step 3: Removing Dust and Disinfecting
Once you’ve finished scraping, you’ll find a lot of dust and debris left all over your tile. Before you apply the new grout, you’ll need to prep the area by:
- Sweeping debris: Sweeping away the debris and large dust particles from scraping the grout.
- Mopping the area: Mopping the area to ensure no dust remains on the tiles or between them.
- Apply disinfectant: Applying a disinfectant to reduce the chances of mold growing between the old and new grout.
For a disinfectant, I recommend using any household disinfectant you are comfortable using. Hydrogen peroxide is a traditional option with the added benefit of bleaching the old grout to reduce the visibility of stains and discoloration. You can also use household chlorine bleach instead.
Step 4: Grout Application Technique
This step is the most technical part of the process, but it shouldn’t be too difficult for most people to follow. Here are the tools you will need:
- Epoxy grout (any brand will do)
- Flat bar
- Bucket
- Liquid dish soap
- Grout float
- Grout sponge
Make sure the old grout is dampened before beginning the application process. Here is a step-by-step grout application technique you can follow:
- Step 1. Pour both parts: Pour both parts of the epoxy preparation into the same container, ensuring that all the available product is poured out.
- Step 2. Mix: Using any flat tools (such as a stick or a flat bar), mix the two parts together thoroughly until you see a uniform color.
- Step 3. Aerate: Continue to stir and fold the epoxy mixture to aerate it and increase its compressive strength. This technique helps it bond better when applied.
- Step 4. Use liquid soap: Pour a small quantity of liquid dish soap on the tile and slather the entire area.
- Step 5. Use a grout float: Using a grout float, apply small dollops of the epoxy grout onto the grooves you made and scrape the excess away by angling the float at approximately 90°. You can use the scraped extra grout again, so add it to the bucket of mixed grout.
- Step 6. Wipe excess grout: Dip your grout sponge into a bucket of clean water, and wipe away the excess grout that is left over on the tile.
Make sure to work quickly and in sections because the mixed epoxy resin can become very sticky and difficult to work with if you wait too long.
Step 5: Finishing Touches
Once you’ve applied the new grout to the entire tile and removed the excess using a sponge, you will need to allow it to set. Leave the grout to dry for at least 24 hours. During that time, make sure that you do not expose the new grout to any moisture at all. That means skipping the shower and avoiding any water in your bathroom until it dries.
Before you decide to begin waiting for the epoxy to set, you may want to consider caulking some parts of your ceramic tile, such as the edge. You can wait for both applications to set simultaneously, and it can allow you to fully waterproof the bathroom even in areas where you can’t use epoxy.
Final Thoughts
As you can see, regrouting can be simple if you know which materials to use and the proper techniques to apply. The project won’t take more than a day and doesn’t require any special skills. Go ahead and get yourself some epoxy grout and give your bathroom or kitchen a fresh layer of grout to brighten up that discolored and cracked tile.


