How To Install Carpet Tiles, 5 Things You Should Know
How you install your carpet tiles determines if the final look will match your taste and style. When installed well, these tiles can add glamor to your home and last longer, even in a busy household.
There are five things you should know before installing carpet tiles by yourself, and that’s what today’s post is all about.
Contents
How To Install Carpet Tiles
There are two types of carpet tiles: one is installed using carpet glue and the other comes with an adhesive backing. Both types are easier to install than wall-to-wall carpets.
The installation process for carpet tiles involves sizing the room, preparing the floor, fixing the tiles into place, and pressing them into place so the adhesive/glue can take hold. However, there may be small differences in the exact steps for each carpet tile type.
When installing carpet tiles, your main concern should be:
- Aligning the carpet tiles to fit the house measurements.
- Laying out the tiles’ patterns to achieve flawless optical and textural effects.
- Sticking the tiles firmly to the subfloor.
To install the carpet tiles, follow these steps:
Step 1. Determine the Number of Carpet Tiles Needed for Your Room
Use a measuring tape to determine the room’s square footage. If your room is not rectangular, divide it into rectangular portions to estimate its square footage. To the figure you get, add 10-15% to account for waste and matching patterns.
Next, divide the square footage of the floor by the area of one carpet tile to get the number of tiles that will cover the room.
Step 2. Prepare the Floor
The room must be empty when installing carpet tiles so you don’t have to deal with obstructions as you go about your DIY project. You also need to clean or vacuum the floor and ensure it’s flat. If there are any dents and patches, fix them before installation to preserve the integrity of the carpet tiles.
Step 3. Spread the carpet glue evenly.
Pour the glue from the back of the room and spread it using a roller to get a thin, transparent film. Leave it to air dry for around 45 minutes to get a tacky but not wet floor. This makes it easy to remove the tiles in the future if you need to. Installing tiles when the floor is wet fixes the tiles permanently.
Note: This step will be unnecessary for peel-and-stick carpet tiles. You only need to peel the adhesive covering.
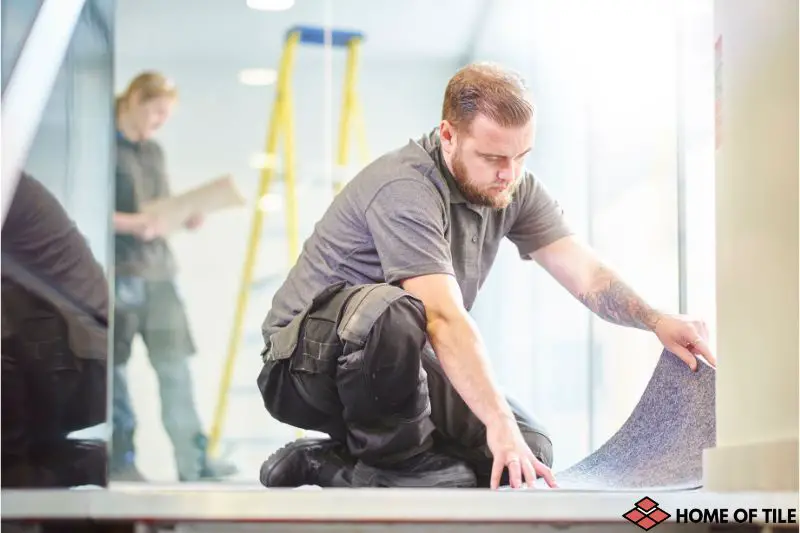
Step 4. Fix the carpet tiles.
All carpet tiles have arrows at the back pointing in the direction to follow when installing. Once you lay the first tile, stretch it with your hands to remove the air bubbles. Repeat the process throughout the room, ensuring the arrows face the same direction.
Step 5. Fill the spaces along the walls and Roll over the Carpet
Since walls are not always straight, you’ll have some gaps left along the edges. Measure the dimensions of each gap, cut a portion of the carpet tile from a full tile using a utility knife, and fit it in.
After covering the entire room, go over the tiles with a roller, making several passes on each tile to give it a firm adherence to the subfloor.
How To Cut Carpet Tiles
The variance between the area of the room and the carpet tiles necessitates using incomplete tiles to cover the room entirely. This is mostly required on the wall edges and corners.
To cut carpet tiles, proceed as follows:
- Put the tile you want to cut upside down against the wall and tightly lap it adjacent to the gap while taking note of the direction of the arrows.
- Use a marker pen to mark both edges where the tile fits the gap.
- Use a ruler to join the two edges in a straight line.
- While holding the ruler intact, cut along the line with a utility knife to get a straight line.
- Turn the piece of tile and fit it into the gap.
5 Things You Should Know When Installing Carpet Tiles
Though installing carpet tiles is an easy process that does not need prior experience, you can mess it up if you have never done it before. Here are a few things you should keep in mind to ensure that doesn’t happen.
1. Carpet Tiles Acclimate
Carpet tiles are elastic. They expand and contract depending on the ambient temperature in a room. Before installation, you should lay the tiles in the room for at least 24 hours to allow them to adjust to the room temperature. The technical term for this acclimatization.
Overlooking this step makes the final product unsightly. The edges or the center lift off, loosening the tiles. The adhesive also becomes warped, affecting the durability of the carpet tiles.
2. The Integrity of Your Floor Matters
The condition of your floor is the main determinant of how strong the carpet tile adhesive sticks. It also affects the overall appearance of the carpet tiles. If the subfloor has dents, texture, and grout lines, you’ll feel them with your feet through the carpet.
You can fix carpet tiles over the existing floor if it’s made of hardwood or concrete. But if the floor is made of carpet, ceramic tiles, or vinyl, you’ll have to remove it because the carpet tile adhesive might not bond with such materials.
Note: The subfloor should be hard, flat, free of dents, clean, and compatible with the adhesive.
3. You Should Lay Tiles From the Center of the Room
Most rooms are not perfect squares. To fill the room, you’ll have to use some incomplete tiles. Installing tiles from the end of the room means you’ll have one side with complete tiles and the other with cut strips.
To avoid this, you start installing from the center of the room. You can find the center by measuring the middle of each wall using a tape measure and joining the points using perpendicular lines. Next, mark the point these lines intersect; that’s the center of your room.
4. Peel and Stick Carpet Tiles Are Easier To Remove
All carpet tiles fixed with an adhesive are removable. However, peel-and-stick carpet tiles are easier to remove than those installed using carpet glue. Carpet glue is more sticky, especially if you install the tiles when it’s still wet.
To remove peel-and-stick tiles, run a warm object, such as a hair dryer, on each tile to loosen the adhesive. Next, use a putty knife to pull the carpet tiles out, starting from the corners. Some adhesive might remain on the floor, but it’s easily removable with a scrapper.
5. Carpet Tiles Don’t Damage Hardwood Floors
Carpet tiles don’t damage hardwood floors. Instead, they act as protective covers. They protect the hardwood from elements and scratches. However, the adhesive might be hard to remove because hardwood isn’t washable with most washing agents.
Also, the hardwood floor can get damaged if the carpet gets saturated with water or other liquids. Carpet tiles are porous, so liquids can get past them and contact the hardwood. This causes mold and mildew to grow on the hardwood.
Final Thoughts
The main reason carpet tiles are popular is their ease of installation and maintenance. You can revamp your house to your desired style and design that will last for more than five years. And if any part gets damaged, you don’t have to change the entire carpet. This minimizes wastage while saving you money.