Easy To Install Outdoor Tiles. 6 things you should know
Installing outdoor tiles is a great way to improve the look of your garden while also making it more functional. Garden tiles are available in a variety of colors, styles, and materials, so you can find the perfect ones to match your garden. They are also easy to install, so you can do it yourself or hire a professional to do it for you.
Contents
- 1 Easy To Install Outdoor Tiles
- 2 What Is The Easiest Tile To Install?
- 3 How Do You Install Outdoor Tile Without Concrete?
- 4 Diy Concrete Outdoor Tiles
- 5 How Do You Make Concrete GaOutdoor rden Tiles?
- 6 Can I Make My Own Concrete Pavers?
- 7 How Do You Make Concrete Look Like Pavers?
- 7.1 ● Concrete Pavers: Pros And Cons
- 7.2 ● How To Make Concrete Pavers: The Step By Step Process
- 7.3 ● The Best Types Of Concrete Pavers To Use
- 7.4 ● Concrete Pavers Vs. Concrete Slabs: What’s The Difference?
- 7.5 ● Concrete Pavers Vs. Paved Stone: What’s The Difference?
- 7.6 ● Concrete Pavers vs. Asphalt: What’s The Difference?
- 7.7 ● Care And Maintenance Of Concrete Pavers
- 8 Is It Cheaper To Make Your Own Concrete Blocks?
Easy To Install Outdoor Tiles
Installing garden tiles is a quick and easy way to improve the appearance of your garden. Many different garden tiles are available, so you can find the perfect ones to match your garden’s style.
- Location: To install outdoor tiles, you’ll first need to decide where to place them. You can use them to create a path, border, or patio area.
- Mark the outline: Once you’ve decided on the location, use a tape measure to figure out the size of the area, and then mark the outline with stakes or flags.
- Remove the soil: Next, use a shovel to remove the soil from the marked area. Be sure to remove any rocks or other debris that could damage the tiles.
- Add uniform sand: Then, evenly spread a layer of uniform sand over the area and use a rake to smooth it out.
- Compress: Compress the sand. You can use a machine for this. Check with a large level to ensure that the whole area is level.
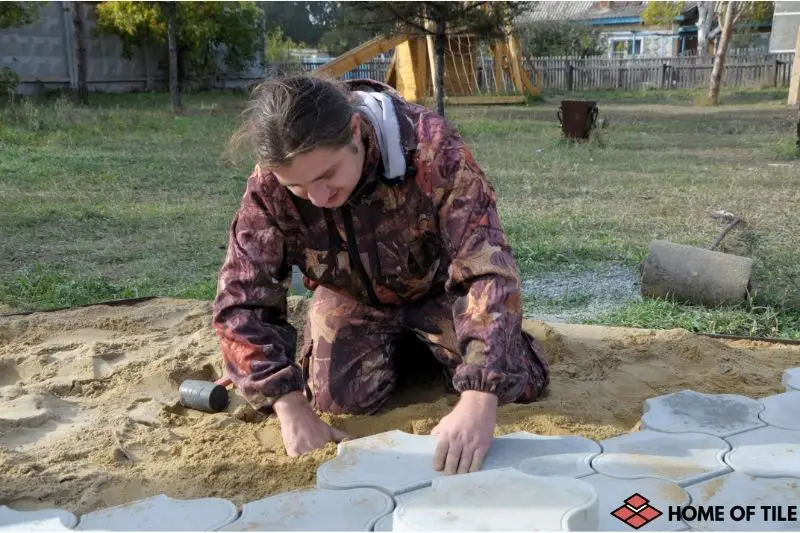
- Place the tiles: Finally, place the outdoor tiles in the desired location and press them into the sand. If needed, use a rubber mallet to help them adhere.
- Fill the area between the tiles: Use fine sand to fill the area between the tiles.
That’s it! Your outdoortiles are now ready to be enjoyed.
● How To Install Outdoor Tiles
Installing outdoor tiles is a great way to add pizzazz to your yard or garden. There are various ways to install garden tiles, so it’s important to choose the method that will work best for your specific situation.
– Install Outdoor Tiles Using Landscape Adhesive
One popular way to install garden tiles is to use a landscape adhesive. This type of adhesive is designed to stick to most surfaces, including concrete, brick, and stone. It’s also weatherproof so that it will withstand the elements.
If you’re using landscape adhesive, start by cleaning the surface of your yard or garden. Make sure it’s free of any dirt, debris, or leaves. Once the surface is clean, apply the adhesive to it using a trowel. Then, place the outdoor tiles in the desired location and press them firmly into the adhesive.
If you’re using a different type of adhesive, follow the manufacturer’s instructions carefully. Be sure to read the label to ensure the adhesive is compatible with the outdoor tiles.
– Install Outdoor Tiles Using a Mortar Mix
Another popular way to install outdoor tiles is to use a mortar mix. This type of adhesive is also weatherproof, and it will stick to most surfaces. However, it’s a little more challenging to use than landscape adhesive.
To use mortar mix, start mixing the adhesive according to the manufacturer’s instructions. Then, using a trowel, spread the adhesive over the surface of your yard or garden. Place the garden tiles in the desired location and press them firmly into the adhesive.
If you’re using a different type of adhesive, follow the manufacturer’s instructions carefully. Be sure to read the label to ensure the adhesive is compatible with the outdoor tiles.
Whichever method you choose, allow the adhesive to dry completely before walking on the tiles. Depending on the adhesive you’re using, this could take several hours to several days.
● The Benefits Of Installing Outdoor Tiles
Installing outdoor tiles is a great way to improve the look of your garden while also adding some functionality. There are several benefits to installing garden tiles, including the following:
- Increased durability: Outdoor tiles are made from a tough material that can withstand wear and tear. This means that they will last for many years, even in harsh weather conditions.
- Improved drainage: Outdoor tiles have small holes that allow water to drain away quickly. Your garden will be less likely to become flooded or muddy after rainfall.
- Added insulation: Outdoor tiles can help insulate your garden from the cold weather. This means that you can extend the growing season for your plants and that you will be able to use your garden all year round.
- Aesthetic appeal: Outdoor tiles can add a touch of elegance to your garden. They come in various shapes and colors, so you can find the perfect design to match your style.
● The Different Types Of Outdoor Tiles Available
There are many types of outdoor tiles available on the market. You can choose from various materials, colors, and textures to create the perfect look for your outdoor space.
– Concrete Outdoor Tiles
One of the most popular materials for outdoor tiles is concrete. Concrete tiles are available in various colors and can be stamped with various textures to create a unique look. They are also very durable and can withstand extreme weather conditions.
– Porcelain Outdoor Tiles
Another popular material for outdoor tiles is porcelain. Porcelain tiles are available in various colors and shapes, and they are also very durable. They can be used to create multiple looks, from rustic to modern.
– Stone Outdoor Tiles
If you are looking for a more natural look, you may want to consider using stone tiles. Stone tiles are available in various colors and textures and can create a variety of looks, from traditional to contemporary. They are also very durable and can withstand extreme weather conditions.
– Plastic Outdoor Tiles
Finally, you may want to consider using plastic tiles. Plastic tiles are available in various colors and shapes, and they are very affordable. They are not as durable as other tiles, but they are perfect for use in a children’s garden or in a garden that is not exposed to extreme weather conditions.
What Is The Easiest Tile To Install?
There are a few types of tile that are considered easy to install. These include ceramic, porcelain, and vinyl tiles. These tiles are all relatively thin and can be installed over most surfaces, including concrete and wood. They are also relatively affordable, making them a popular choice for homeowners.
How Do You Install Outdoor Tile Without Concrete?
Installing outdoor tile without concrete is challenging, but it can be done. Here are some tips to help you get started:
- Planning: Plan your installation carefully. Make sure you know where each tile will go before installing them.
- Uniform sand: Add a layer of uniform sand, and level the area you plan to lay tile first.
- Compress: Compress the sand. You can use a machine for this.
- Level: Use a level to ensure that each tile is level.
- Add the tiles: Place the tiles in the desired location and press them firmly into the ground.
- Fill the area between the tiles: Use fine sand to fill the area between the tiles.
Diy Concrete Outdoor Tiles. 14 things you should know
There’s something about concrete that just seems so industrial and tough. But it doesn’t have to be that way! Concrete can be used to create beautiful and unique outdoor tiles that will last for years. In this tutorial, you’ll learn to make your concrete garden tiles using just a few simple supplies.
Diy Concrete Outdoor Tiles
Concrete outdoor tiles are a popular DIY project because they are affordable, durable, and easy to install.
To install garden tiles, first mark the area where you want them to be installed. Dig a small trench in the soil and place the tiles in the trench. Make sure that they are level and that the edges are even. Fill in the trench with soil and tamp it down.
Concrete outdoor tiles can be used to create various designs in your garden and create a path, a patio, or even a wall. They are also great for creating raised beds. They are also a great way to add color and personality to your garden, as they come in many colors and designs.
● Designing Your Outdoor Tiles
When designing your garden tiles, keep a few things in mind:
1. Outdoor size
First, think about the size of your garden. If you have a small garden, you will want to choose a design that doesn’t take too much space. If you have a large garden, you can be more creative with your design.
2. Tile color
Another thing to consider is the color of your tiles. If you want your garden to be bright and colorful, choose a design with many colors. Choose a design with fewer colors if you want a more subtle look.
3. Type of Tile
Finally, think about the type of tile you want to use. If you want a durable tile that will last for many years, choose a hard tile like concrete or stone. Choose a soft tile like clay or ceramic if you want a more decorative tile.
4. Planning the design
Once you have chosen a design, you can start planning the layout of your tiles. Start by sketching your garden, and then mark the location of each tile. Be sure to leave enough space between the tiles for plants and flowers.
5. Install the Tiles
Once you have planned the layout, it’s time to start installing the tiles. If you use a hard tile, you will need to use a concrete or stone saw to cut the tiles to size. If you use a soft tile, you can use a tile cutter or another machine to cut it.
6. Add the plants
Once the tiles are installed, it’s time to add plants and flowers. Be sure to choose plants that will grow well in your garden, and don’t forget to add a few benches or chairs to relax and enjoy your garden.
How Do You Make Concrete GaOutdoor rden Tiles?
Concrete outdoor tiles are a popular way to create a hard surface for a garden. They are durable, weather-resistant, and can be stained or painted to match any décor. Here is a simple guide on making your concrete outdoor tiles.
What you will need:
- Concrete mix
- Trowel
- Paint or stain (optional)
- Tile cutter or sharp knife
- Mold or form
- Rubber mallet
- Wire brush
- Hammer
- Saw
Use the following steps to make concrete outdoor tiles yourself:
- Mix the concrete: Begin by mixing the concrete according to the instructions on the package. If you prefer a certain uniform color, you can add concrete color powder or concrete pigment powder.
- Poor into the mold: Pour the concrete into a mold or form. A mold can be made from any object with a smooth, even surface, such as a plastic bucket or a cardboard box. You can even make a mold from sand or clay. If you are using a form, make sure it is oiled or sprayed with a release agent to prevent the concrete from sticking.
- Smooth the surface: Use a trowel to smooth the surface of the concrete and remove any air bubbles.
- Wait to set: Allow the concrete to set for 24 hours.
- Cut the tiles if needed: If the tiles are not the needed size, you can cut them once the concrete has been set. Use a tile cutter for this.
- Paint if needed: If you want to, you can paint or stain the tiles to match your décor.
Can I Make My Own Concrete Pavers?
Yes, you can make your own concrete pavers. This is a great way to save money, and it is also a fun project. Here is how to make your concrete pavers:
- Size: Decide on the size and shape of the pavers you want to make.
- Concrete mix: Purchase some concrete mix from your local hardware store. If you prefer a certain uniform color, you can add concrete color powder or concrete pigment powder.
- Mold: Mold the pavers using cardboard or plastic containers.
- Pour the concrete: Pour the concrete mix into the molds and let it dry.
- Dry them completely: Remove the pavers from the molds and let them dry completely.
- Seal if needed: Seal the pavers with a concrete sealant to protect them from the elements.
How Do You Make Concrete Look Like Pavers?
Concrete pavers are a popular way to add some style to a concrete driveway, patio, or walkway. They can also be used in place of traditional pavers to create a unique look.
To make concrete look like pavers, you will need first to mix the concrete. Be sure to follow the instructions on the package, as the mix ratios may vary. Once the concrete is mixed, you will need to pour it into a form. A mold can be made from plywood or other materials.
Once the concrete is in the form, use a trowel to spread it out. Be sure to make it as even as possible. Once the concrete is spread out, use a straight edge to create a smooth surface. Then, use a stamp to create the paver pattern.
Be sure to let the concrete dry completely before using it.
● Concrete Pavers: Pros And Cons
When choosing a paving material for your driveway, patio, or walkway, there are many factors to consider. Concrete pavers have both pros and cons compared to other materials.
One pro of concrete pavers is that they are very durable and can last for many years. They are also easy to clean and maintain and can be repaired if necessary. Another pro is that they come in different colors and styles, so you can find one that will match your home and landscape.
One con of concrete pavers is that they can be expensive, depending on the size and style you choose. They can also be difficult to install, so it is important to hire a professional if you are not familiar with this type of paving.
Overall, concrete pavers are good for durable, long-lasting paving material. They are easy to clean and maintain and come in various colors and styles to match your home and landscape.
● How To Make Concrete Pavers: The Step By Step Process
Concrete pavers are a popular type of paving stone that can be used to create several different designs in your garden or yard. They are made by pouring a concrete mix into a mold and allowing it to set. Follow the step-by-step process:
– How To Make Concrete Pavers: Materials needed
- Concrete mix
- Mold: you can use a number of different objects to create a mold, such as a large container, a box, or a mold made from plywood
- Trowel
- Paver edger
- Wire brush
- Broom
- Paint or sealant (optional)
How To Make Concrete Pavers, Step By Step:
– Step 1: Prepare the Mold
The first step is to prepare the mold. If you are using a container, like a large plastic container, you will need to cut the bottom out so that the pavers will be able to come out easily. You can also use plywood to make a mold.
– Step 2: Mix the Concrete and add it to the mold
Next, you will need to mix the concrete. Follow the instructions on the concrete mix to create the correct ratio of water to concrete. Pour the mix into the mold and use the trowel to smooth it out.
If you prefer a certain uniform color, you can add concrete color powder or concrete pigment powder.
– Step 3: Let the Concrete Set
After the concrete has been added to the mold, you will need to let the concrete set. This will usually take anywhere from 24 to 48 hours. Once the concrete has been set, you can remove the pavers from the mold.
– Step 4: Edge the Pavers
If you want to create a nice, finished look for your pavers, you will need to edge them. You can do this with a paver edger or a sharp knife.
– Step 5: Clean the Pavers
Before you can use the pavers, you will need to clean them. Use a wire brush to remove any excess concrete and then sweep them clean. You can also paint or seal the pavers if you want.
● The Best Types Of Concrete Pavers To Use
Concrete pavers are a popular choice for outdoor paving. They come in different shapes, sizes, and colors, and they can be used to create a variety of different looks. Here is a look at some of the best types of concrete pavers to use for your next paving project:
– Stone Pavers
Stone pavers are a popular choice for paving projects because they are incredibly durable and can withstand a lot of wear and tear. They are also available in various colors and styles so that you can find the perfect option for your project.
– Concrete Pavers
Concrete pavers are a versatile option that can be used for many different paving projects, and they are generally cheaper than stone pavers.
If you like, you can even make concrete pavers yourself. With some color powder and a suitable mold, they can be in any shape you like.
– Porcelain Pavers
Porcelain pavers are a popular choice for high-traffic areas because they are incredibly durable and can withstand a lot of wear and tear. They are also available in a lot of styles and colors.
Porcelain pavers are more expensive than concrete with a cost between $6 and $15 per square foot, depending on the size and quality.
● Concrete Pavers Vs. Concrete Slabs: What’s The Difference?
When it comes to driveways, sidewalks, and patios, there are two main types of pavement to choose from: concrete slabs and concrete pavers. Both have their unique benefits and drawbacks, so it can be tough to decide the best option for your home.
– Concrete Slabs
Concrete slabs are made by pouring concrete into a mold and allowing it to harden. This creates a solid, flat surface that is perfect for driveways, sidewalks, and patios. One downside of concrete slabs is that they can be quite heavy, so they may not be the best option for homes with a limited weight capacity.
– Concrete Pavers
On the other hand, concrete pavers are made to form a paving surface by placing concrete blocks together. This creates a surface that is not as smooth as concrete slabs but is much more flexible and can handle more weight. Pavers also come in various colors and styles, allowing for more customization than concrete slabs.
– What is the better option?
So, which is the better option? It depends on your needs and preferences. If you are looking for a smooth, solid surface, then concrete slabs are the way to go. Concrete pavers are the better option if you want more flexibility and customization.
● Concrete Pavers Vs. Paved Stone: What’s The Difference?
When it comes to paving your driveway, patio, or walkway, there are a few different materials you can choose from: concrete pavers, paved stone, and asphalt. All have their unique benefits and drawbacks, so it can be tough to decide the best option for your needs.
– Concrete Pavers
Concrete pavers are made from concrete and come in various shapes and sizes. They are a popular choice for driveways and patios because they are durable and can be installed in various patterns. One downside to concrete pavers is that they can be expensive and can also be challenging to repair if they are damaged.
– Paved Stone
Paved stone is made from natural or crushed stone and is popular for walkways and driveways. It is durable, easy to install, and can be installed in various patterns. One downside to paved stone is that it can be expensive, and it can also be challenging to repair if it is damaged.
● Concrete Pavers vs. Asphalt: What’s The Difference?
When deciding between concrete pavers and asphalt for a driveway or parking lot, there are several factors to consider. Cost, durability, and appearance are all important factors to consider.
– Concrete Pavers
Concrete pavers are more expensive than asphalt, but they last much longer. Pavers can also be replaced one at a time if they become damaged, while asphalt must be replaced in large sections. Pavers also have a more attractive appearance than asphalt.
– Asphalt
Asphalt is made from asphalt and is a popular choice for driveways and roads. It is easy to install and can be installed in various patterns. One downside to asphalt is that it can be expensive, and it can also be challenging to repair if it is damaged.
Asphalt is less durable than concrete pavers and can become pothole-ridden if not properly maintained. However, asphalt is much cheaper to install than pavers.
● Care And Maintenance Of Concrete Pavers
Concrete pavers are a popular choice for driveways and walkways because they are durable and easy to maintain. However, proper care and maintenance are necessary to keep them looking their best.
- Cleaning: To clean concrete pavers, use a broom to sweep away debris, then use a garden hose to rinse them off. For tougher dirt and stains, you can use a pressure washer. If there is any stubborn dirt or stains, you can use a mild detergent or a concrete cleaner. Be sure to rinse the pavers thoroughly afterward.
- Protection against fading and staining: To protect concrete pavers from fading and staining, you can seal them with a concrete sealer. There are many different types of sealers available, so be sure to choose the one that is best suited for your needs.
- Cracks: If you notice any cracks or chips in the pavers, you can repair them with a concrete patching compound. Be sure to follow the manufacturer’s instructions carefully so the repair will be effective.
Concrete pavers can last for many years with proper care and maintenance. By following the tips mentioned above, you can keep them looking great for many years to come.
Is It Cheaper To Make Your Own Concrete Blocks?
Making your concrete blocks is a great way to save money on home construction or garden project. Concrete blocks are typically not extremely expensive, but you can significantly reduce the cost by making them yourself.
1. Needed materials
The first step is to purchase the necessary materials. You will need concrete, sand, gravel, and water for most projects. You will also need a form to mold the blocks and a way to vibrate the blocks to remove any air pockets.
2. Mix the concrete
The next step is to mix the concrete. The ratio of concrete to sand to gravel will vary depending on the specific project, but a general guideline is 1 part concrete, two parts sand, and three parts gravel. Mix the ingredients in a large container, then add water until the mixture is the desired consistency.
3. Fill the mold
Next, fill the form with the concrete mixture and vibrate it to remove any air pockets. Let the concrete set for a few hours, then remove the block from the form.
4. Let the blocks cure
If you are using the blocks for a foundation, you will need to cure them for several weeks before using them. If you use the blocks for a wall, you can use them sooner. By making your concrete blocks, you can save a significant amount of money on your home construction projects.