How To Seal Grout. What professionals say
However much you keep your tiles clean, grout lines can become dirty and cause your tiles to look uneven. Sealing the grout around the tiles can prevent staining, discoloration, and help keep your tiles looking neat and even. Fortunately, the grout sealing process is easy.
Here’s how to seal grout in 7 simple steps:
- Clean and repair the grout.
- Choose a sealer.
- Choose a sealer applicator.
- Tape off the non-tile surface.
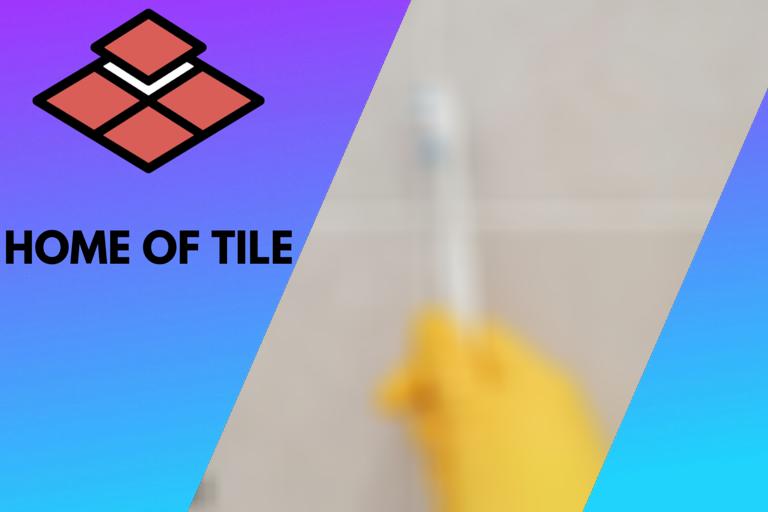
- Apply the sealer with care.
- Test the grout sealer with water
- Reapply if necessary.

Seven steps can seem like a lot but, after reading them, you will realize that you don’t have to be a DIY expert to seal grout professionally!
Contents
1. Clean and Repair the Grout
Before applying your grout seal, clean your tiles thoroughly with water and soap. You can also use vinegar and warm water to remove stains. Clean one grout line at a time to ensure that you remove the stains properly.
After cleaning the grout, allow it to dry completely before repairing any cracks. The drying process can take anything from a few hours to 2 hours, depending on the humidity levels in your home.
To repair cracks in your grout, you’ll need to fill them in with some new grout. Here’s how to do it:
- Step 1. Mix gout and water: Mix some grout and water in a small container.
- Step 2. Apply the grout: Apply the grout carefully to the cracked areas using a chopstick or kebab skewer, being careful to apply it smoothly and evenly for a neat finish.
- Step 3. Let it cure: Allow the grout to dry thoroughly for 72 hours before proceeding to the next step.
2. Choose a Sealer
After cleaning the surface and the grout lines, choose the best sealer based on the type of tiles you have. Unfortunately, there is no such thing as a universal grout sealer, and your best bet is to go to a home improvement store and select a suitable sealant.
Each product is designed for a specific tile type (e.g. marble, ceramic, stone, etc) as different tiles can withstand varying moisture levels. Depending on your tiles and their location, you can choose between penetrating and membrane-forming sealers for the grout.
Penetrating sealers should be mixed with water or a mineral spirit base. It allows the formula’s tiny latex or silicone particles to penetrate the grout’s granular structure. The latex and silicone particles fill in all the gaps left by the porous grout as it absorbs the sealer, keeping moisture out. These sealers are the best option for use in humid areas, such as bathrooms or showers.
Membrane-forming sealants coat the grout’s surface with a layer that prevents water from penetrating. These sealers are great for the kitchen but should not be used in the bathroom because they prevent trapped moisture from evaporating, which could result in mildew in a wet shower.
Membrane-forming sealers work well on unglazed tiles, such as stone, but they won’t adhere to glazed tiles, like most ceramics.
If you want to change the color of your grout, you can do this by using a pigmented sealer.
3. Choose a Sealer Applicator
Choose the right application tool before applying the seal. Though many people use aerosol sprays, other tools can help to create a neat finish in the grout line. A good way of choosing the right tool is to look at your tiles and the grout line type before deciding on the best tool.
Aerosol sprays come in handy when you want convenience. If your grout lines are large, it makes application easy. However, it can be messy, ending up on the tiles and leading to product wastage.
For tiny grout lines and unsealed tiles, use a sponge as it allows you to seal a bigger section at once.
If you have glazed tiles, use an applicator brush. Applicator bottles with rolling wheels also work well with glazed tiles.
For a professional finish, make sure you read the user manual before using any application tool.
4. Tape off the Non-Tile Surfaces
Before you apply your grout seal, use masking tape to protect any non-tile surfaces, such as wood, metal, door and window frames. Avoid sealing these surfaces as it will cause discoloration, and the stains might be hard to remove.
Applying an oil or some petroleum jelly to the non-tile surfaces can also work.
Make sure that you can easily remove the tape or oil after applying the sealant and use smaller application tools if you don’t want to get sealant on other surfaces.
5. Apply the Sealer With Care
Apply your sealant carefully to avoid spillage and wastage. You can begin from top to bottom, and apply the product from left to right. By working systematically, you can avoid missing any areas.
It’s inevitable that the process can get messy, so make sure you have a dry piece of cloth to wipe off the excess quickly before it dries.
6. Test the Grout Sealer With Water
After applying the first coat, allow it to cure for around 30 minutes.
When you think it is dry, test its water resistance by placing a few water droplets on the newly-sealed grout. If it beads up, the sealant is effective but, if the water seeps into the sealant, you may need to apply another coat.
7. Reapply if Necessary
If you need to reapply your sealant, wipe away the water droplets and wait 30 minutes before reapplying for another seal.
Test the water resistance again and if it fails, apply a third coat. This may seem like a time-consuming and tedious process but it’s worth it.
To keep your tiles looking as good as new, clean them regularly and remove any stains and grease as soon as possible. You should also gently clean the grout and sealant regularly.
Unfortunately, as much as you maintain your grout joints and lines, the sealant will inevitably wear off and lose effectiveness.
It is advisable to replenish your sealants annually. I recommend applying a new seal layer once you discover that water is no longer beading up. Follow the steps above, and your grout will look great for many years to come.
Final Thoughts
Never underestimate the power of grout sealant, as it can help maintain your tiles for years. Always follow the steps outlined above for the best results.
Although these steps are simple and you don’t need to be a DIY expert to apply grout sealant, you might need to consult an expert if you don’t feel confident.