How To Fix Outdoor Tiles. 12 things you should know
If you have a garden with tiles, you know that you’ll need to fix them at some point. It’s just a fact of life. Luckily, it’s not a complicated process, and with a few simple steps, you can have your tiles looking good as new.
Contents
How To Fix Outdoor Tiles
If you have a garden with tiles, you may have noticed that they can get damaged over time. Here are some tips on how to fix outdoor tiles:
● Cracked tiles:
Cracked tiles can be fixed with tile adhesive if the tiles are just cracked.
- Clean: First, clean the surface of the tiles with a damp cloth
- Adhesive: Apply the adhesive to the cracks.
- Dry: Let it dry for 24 hours, then apply a sealant.
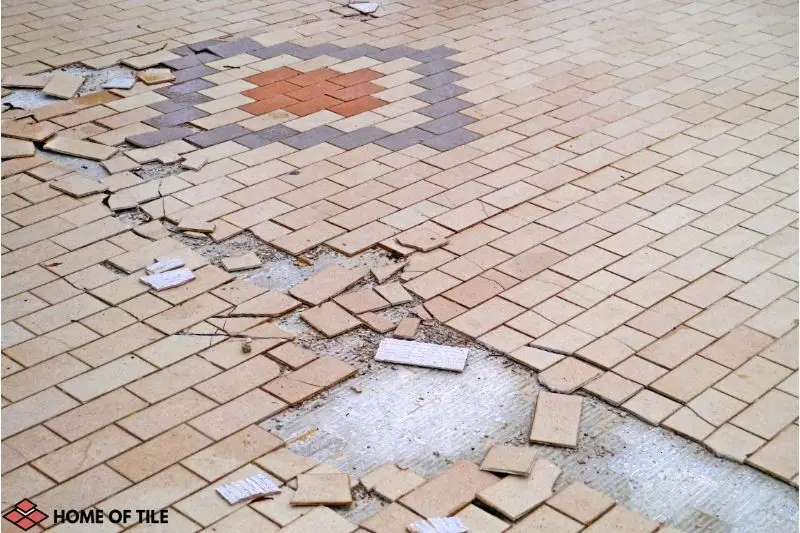
● Missing or broken tiles:
Missing or broken tiles can be replaced with new tiles.
- Remove: First, remove the old tiles by prying them up with a screwdriver.
- Stuck tiles: Use a hammer to break them loose if the tiles are stuck.
- Clean: Then, clean the surface of the substrate with a damp cloth.
- Adhesive: Add some tile adhesive.
- New tiles: Place the new tiles on top, and press them down firmly.
- Dry: Let the adhesive dry for 24 hours
- Sealant: If needed, apply a sealant.
How To Fix Outdoor Tiles: Grout Repair
If you have noticed that the grout in your outdoor tiles is starting to crumble and come loose, there is no need to worry. You can fix this yourself very easily and for a fraction of the cost of having a professional do it for you.
– Needed materials:
To fix the grout in your outdoor tiles, you will need:
- Grout repair kit
- A bucket
- A sponge
- A toothbrush
- Rubber gloves
- Eye protection
- Safety goggles
- Protective clothing
– Step 1: Clean the area
The first step is to make sure that the area around the tiles is clean and free of any debris. If any dirt or dust is present, it will interfere with the repair process.
– Step 2: Remove damaged grout
Remove with a screwdriver or a small chisel the damaged grout. Be careful not to damage the tiles.
– Step 3: Make the grout
Next, put on your gloves, eye protection, and safety goggles. Ensure that your clothing is also protected from any potential splashes or spills.
According to the instructions, fill the bucket with water and mix in the grout repair kit.
– Step 4: Apply the grout
Take the sponge and dip it into the mixture. Apply it to the grout between the tiles, and use the toothbrush to scrub it in.
Be sure to work on a small area at a time and rinse the sponge and toothbrush frequently.
– Step 5: Let the grout dry
Allow the grout to dry completely before walking on it or using the tiles.
● How To Fix Outdoor Tiles: Replacing Tiles
If a tile in your garden is missing or broken, you can replace it with a new tile. Here’s how:
- Remove the tile: Remove the old tile. Use a hammer and chisel to break the tile into small pieces.
- Clean: Clean the area where the tile was located. Use a wire brush to remove all the debris and dirt.
- Mortar: Apply mortar or tile adhesive to the back of the new tile.
- Add the tile: Press the tile into place.
- Dry: Allow the mortar or tile adhesive to dry.
How Do You Fix Lose Outdoor Tiles?
You can fix loose outdoor tiles using tile adhesive. First, clean the surface of the tiles and the substrate with a damp cloth. Then, apply the tile adhesive to the back of the tiles using a notched trowel. Place the tiles in the desired location and press them firmly into the adhesive. Let the adhesive dry for 24 hours before walking on the tiles.
● How Do You Fix Loose Outdoor Tiles: Tile Repair
Tile repair is a common household repair, and it is also a repair that the homeowner can easily do. You will need to have a few things on hand before you start the repair.
– Grout saw
The first thing you will need is a grout saw. You can find one at most home improvement stores. You will also need a grout float, a bucket, and a sponge.
– Remove the loose tile
If the tiles are loose, you will need to remove them. Use the grout saw to cut the grout around the tiles. Be careful not to cut the tiles. Once the grout is cut, use the edge of the grout float to pry the tiles up. If they are stubborn, you can use a hammer to gently tap on the edge of the float to loosen them.
– Clean the area
Once the tiles are loose, remove them and place them in a safe place. Clean the area that the tiles were removed from with a damp sponge, and remove all of the old grout.
– Add fresh grout
Once the area is clean, start to re-grout the area. Use the grout float to apply the grout to the area. Make sure to fill in all of the cracks and holes.
– Let it dry
Once the grout is dry, reinstall the tiles. Use the edge of the grout float to press the tiles into the grout. If they are still stubborn, you can use a hammer to tap on the edge of the float.
Let the tiles dry for 24 hours before using them.
● How Do You Fix Loose Outdoor Tiles: Tile Adhesive
If you have loose outdoor tiles, the best way to fix them is by using tile adhesive. This will help to secure the tiles in place and prevent them from becoming loose again.
Before you start, you will need to clean the surface of the tiles and remove any dirt or debris. Then, using a trowel, apply a thin layer of adhesive to the back of each tile.
Carefully place the tiles in the desired location and press them down firmly. Leave the tiles to dry for 24 hours before using them.
How Do You Stick Outdoor Tiles Down?
A few different installation methods can be used when it comes to outdoor tiles. One of the most popular methods is to use adhesive. This is a good option if you want a quick and easy installation.
First, make sure the surface is clean and dry to install adhesive. Then, using a trowel, spread the adhesive onto the surface. Place the tiles in the desired location and press them firmly into the adhesive. Allow the adhesive to dry completely before walking on the tiles.
Another option for installing outdoor tiles is to use mortar. This is a more time-consuming process, but it can create a more durable and longer-lasting installation.
To use mortar, mix the mortar according to the instructions. Then, using a trowel, spread the mortar onto the surface. Place the tiles in the desired location and press them firmly into the mortar. Allow the mortar to dry completely before walking on the tiles.
How Do You Fix A Loose Patio Tile?
If a patio tile is loose, it can be fixed by using a putty knife to apply a thin layer of adhesive around the edge of the tile. Use a trowel to press the adhesive into the grout lines and place the tile back in its original position. Finally, use a rubber hammer to tap the tile carefully into place.
● Prepping The Loose Tile
Prepping the loose tile is one of the most important steps in the tiling process. This is because if the tile is not properly prepped, it can loosen and fall off the wall or floor.
Here are the steps to prepping the loose tile:
- Remove the grout: Use a chisel and hammer to break away the grout around the loose tile.
- Remove the tile: Use a screwdriver to pry the tile off the wall or floor.
- Clean: Use a wire brush to remove the old adhesive and dirt from the tile.
- Add new adhesive: Apply a layer of new adhesive to the back of the tile.
- Add the tile: Place the tile in its original position and use a hammer and screwdriver to secure it in place.
- Add the grout: Apply a layer of grout over the tile.
● Removing The Old Tile Adhesive
Removing the old adhesive is a tedious task, but it is necessary to adhere to a new adhesive properly. To remove the old adhesive, you will need to use a solvent that will break down the adhesive. There are a variety of solvents that can be used, but the most common is acetone.
- Scrape the old adhesive: To begin, scrape away as much of the old adhesive as possible using a putty knife or other scraping tool.
- Soak with acetone: Once you have removed as much of the adhesive as possible, soak a cloth in acetone and place it over the adhesive. Allow the acetone to soak in for a few minutes.
- Remove the remaining adhesive: use a scraper or other tool to remove the adhesive.
- Repeat if needed: Repeat this process until the adhesive is completely removed.
Wear gloves and eye protection when working with acetone, as it can be harmful if inhaled or ingested. Ensure there is enough ventilation.
● Applying New Tile Adhesive
How to apply new adhesive:
- Clean the surface to which the adhesive will be applied with a solvent such as acetone or alcohol. Allow the surface to dry completely.
- Apply the adhesive to the surface according to the manufacturer’s instructions.
- Allow the adhesive to dry completely.
- Test the adhesive to ensure that it is secure.