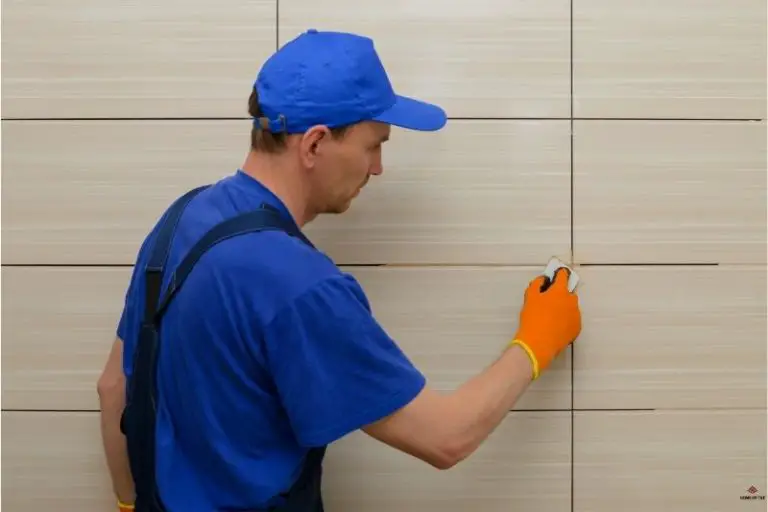
How Long Does Tile Adhesive Take To Dry
Are you amidst a home renovation or tackling a DIY tiling project? Have you ever wondered, “How long does tile adhesive take to dry?” You’re not alone! In this blog post, I’ll discuss the factors that influence tile adhesive drying time and provide an accurate timeline for your project.
How long does tile adhesive take to dry:
Tile adhesive drying time depends on various factors such as type of adhesive, temperature, humidity, surface porosity, and adhesive layer thickness. Pre-mixed, cement-based, and epoxy adhesives have different drying times. For a successful application, follow the manufacturer’s instructions, maintain ideal temperature and humidity, avoid over-application, and allow adequate drying time before grouting or walking on the surface.

Discover the factors influencing tile adhesive drying time and the recommended waiting periods for various adhesive types. Gain valuable insights on ensuring strong, long-lasting bonds for a flawless, professional-looking finish that stays put for years. Read on to become a well-informed DIY tiler!
Contents
- 1 What is the Drying Time for Tile Adhesive?
- 2 What is the required drying duration for tile adhesive before applying grout?
- 3 What is the duration required for the tile adhesive to fully cure?
- 4 What are the methods to accelerate the drying process of tile adhesive?
- 5 Is it possible to walk on tiled flooring after a 6-hour duration?
What is the Drying Time for Tile Adhesive?
Tile adhesive is a critical component in any tiling project, as it helps to bond the tiles securely to the surface. One of the most commonly asked questions about tile adhesive is how long it takes to dry.
This is an important consideration for any project, as it affects when the area can be walked on and when grouting can be applied.
I will explore various factors that affect the drying time of tile adhesive and what to expect in terms of drying times. I will also provide recommendations from a professional perspective.
• Factors Affecting Tile Adhesive Drying Time
The drying time of tile adhesive depends on several factors, including:
– Type of Adhesive
Different tile adhesives are on the market, each with its own drying time. For example, pre-mixed adhesives often dry more quickly than cement-based adhesives. In general, rapid-setting adhesives dry faster than standard-setting adhesives.
– Temperature and Humidity
Ambient temperature and humidity can significantly impact the drying time of tile adhesive. High temperatures and low humidity can cause the adhesive to dry faster, while low temperatures and high humidity can slow the drying process.
– Surface Porosity
The porosity of the surface to which the adhesive is applied also influences the drying time. Highly porous surfaces, such as wood or concrete, can absorb moisture from the adhesive more quickly, resulting in a faster drying time.
Non-porous surfaces, such as metal or plastic, can slow drying.
– Thickness of Adhesive Layer
A thicker adhesive layer will take longer to dry than a thin layer. Following the manufacturer’s recommendations for the appropriate thickness is essential to ensure proper bonding and drying time.
• Estimated Drying Times Based on Adhesive Type
It is essential to consult the manufacturer’s instructions for specific drying times, as these can vary between products. However, here are some general guidelines for drying times of various types of tile adhesives:
– Pre-Mixed Adhesives
Pre-mixed adhesives are typically the quickest to dry, with most products requiring 24 hours before grouting can begin. However, some rapid-setting pre-mixed adhesives can be ready for grouting within 3-5 hours after application.
– Cement-Based Adhesives
Cement-based adhesives, commonly used for ceramic tiles, typically have a longer drying time. Standard-setting cement-based adhesives usually require a drying time of 24-48 hours before grouting.
Rapid-setting cement-based adhesives can be ready for grouting in at least 2-6 hours, depending on the specific product.
– Epoxy Adhesives
Epoxy adhesives, such as natural stone tiles, are often used for moisture-resistant or heavy-duty applications. The drying time for epoxy adhesives can vary, but most products require at least 24 hours before grouting can begin.
• Recommendations for Success
Here are some tips and recommendations from a professional perspective to ensure the successful application and drying of your tile adhesive:
– Follow Manufacturer Instructions
Always read and follow the instructions provided by the adhesive manufacturer. These instructions will typically include the recommended drying time, appropriate thickness, and any specific environmental conditions that should be met during the application and drying process.
– Maintain Ideal Temperature and Humidity
Tile adhesive drying time can be greatly affected by the surrounding temperature and humidity levels. Aim to maintain a temperature of around 68-72F (20-22C) and relative humidity of 50-70% for optimal drying conditions.
– Avoid Over-Application of Adhesive
Applying too much adhesive can result in extended drying times and potentially cause issues with bonding. Be sure to apply the adhesive evenly and according to the manufacturer’s recommendations for thickness.
– Allow Adequate Drying Time Before Grouting or Walking
It is crucial to allow the tile adhesive to dry fully before beginning the grouting process or walking on the surface. Failing to do so can result in the tiles shifting or becoming detached.
In conclusion, tile adhesive drying time is an essential consideration when planning a tiling project, and various factors can affect the time required for proper drying.
By understanding these factors and following the recommendations in this guide, you can ensure a successful and long-lasting tile installation.
Type of Adhesive | Average Drying Time |
|---|---|
Standard Thinset | 24 hours |
Rapid Setting Thinset | 2-4 hours |
Pre-Mixed Mastic | 24-48 hours |
Epoxy-based Mortar | 24 hours |
What is the required drying duration for tile adhesive before applying grout?
Selecting the right tile adhesive and allowing it to dry properly before grouting is essential for a long-lasting and professional-looking installation.
I will provide a thorough guide to help you understand how long tile adhesive should dry before applying grout, factors influencing drying time, and expert recommendations.
• Understanding Tile Adhesive Drying Time
Generally, tile adhesive should dry for at least 24 hours before grouting. However, drying time can vary depending on several factors, including the type of adhesive, the size and type of tile, and environmental conditions such as temperature and humidity.
– Types of Tile Adhesives
There are two main types of tile adhesives: pre-mixed and powdered adhesives that require mixing with water. Each type of adhesive has its own specifications for drying time.
Pre-Mixed Adhesives
Pre-mixed tile adhesives are convenient and easy to work with, as they come in a ready-to-use form. They’re typically best for smaller projects and don’t require any additional water or mixing.
Pre-mixed adhesives usually have a longer drying time than powdered adhesives, typically taking around 24 to 72 hours to dry completely, depending on the brand and specific formulation.
Powdered Adhesives
Powdered tile adhesives require mixing with water and are more commonly used for larger projects. They generally dry faster than pre-mixed adhesives, with standard-setting adhesives taking around 24 hours to dry. However, rapid-setting adhesives can dry in at least 2 to 4 hours, making them ideal for time-sensitive installations.
Following the manufacturer’s instructions carefully when using powdered adhesives is essential, as the mixing ratio and consistency can significantly impact the drying time and bond strength.
– Tile Size and Type
The size and type of tile being installed can also affect the drying time of tile adhesive. Large-format tiles or heavy materials, such as natural stone, may require a longer drying due to their weight and surface area.
Additionally, non-porous tiles, such as porcelain, don’t absorb moisture from the adhesive, leading to a longer drying time. A suitable adhesive specifically formulated for the type of tile you’re installing is crucial to ensure proper drying and adequate bond strength.
– Environmental Conditions
Temperature and humidity play a significant role in tile adhesive drying time. Higher temperatures and lower humidity levels can cause the adhesive to dry faster, while lower temperatures and higher humidity can slow the drying process.
Ideal conditions for drying tile adhesive are temperatures between 60 and 70 degrees Fahrenheit and relative humidity of around 50%. If your installation is in an area with an extreme temperature or humidity variation, it’s essential to consider this and adjust your drying time accordingly.
• Expert Recommendations for Drying Time
As an experienced professional, I recommend allowing at least 24 hours for standard-setting tile adhesives to dry, regardless of the type or brand. You can shorten the drying time to 2 to 4 hours using a rapid-setting adhesive. However, always follow the manufacturer’s instructions for drying time for optimal results, and don’t rush the process.
It’s also wise to consider the size and type of tiles, environmental conditions, and any other factors that may impact drying time when determining your specific drying time.
• Monitoring Adhesive Drying and Testing Tile Bond
Before applying grout, it’s essential to ensure that the tile adhesive has dried sufficiently and that the tiles have adequately bonded to the substrate. To test the bond, gently press or tap a tile’s surface, careful not to apply excessive pressure. If it feels secure and there’s no movement, proceeding with grouting is safe.
• Final Thoughts
Allowing the proper drying time for tile adhesive is crucial for a successful tile installation. Providing enough time for the adhesive to cure ensures the installation’s strong bond and longevity.
Remember to follow the manufacturer’s instructions and recommendations, and consider all factors influencing drying time when planning your project. You’ll achieve a professional-looking, long-lasting result with careful attention to these details.
Adhesive Type | Recommended Drying Time |
|---|---|
Standard Thinset | 24 hours |
Quick-Setting Thinset | 2 to 4 hours |
Mastic Adhesive | 24 hours (up to 48 hours for larger tiles) |
Epoxy Adhesive | 24 hours |
Powdered Adhesive | 24 hours (up to 48 hours for larger tiles) |
What is the duration required for the tile adhesive to fully cure?
• The Importance of Proper Tile Adhesive Curing
Tile adhesive is crucial in installing tiles for various residential and commercial applications. The adhesive is the bonding agent between the tile and the substrate, ensuring a strong and lasting connection.
Failure to allow the adhesive to cure properly can lead to weak adhesion, potentially resulting in loose or uneven tiles that can create safety hazards and reduce the overall aesthetics of the space.
Understanding the curing process and recommended times for different adhesives can help improve the overall quality of your tile installation project while ensuring a durable and long-lasting result.
• Different Types of Tile Adhesives
Several types of tile adhesives are available on the market, each with its own properties and recommended curing times. The main categories of tile adhesive include:
- Organic mastics are pre-mixed adhesives suitable for smaller tiles and wall installations. They have a limited open time, meaning they can dry or skin over quickly, requiring efficient work during tile installation. Organic mastics typically require 24 to 72 hours to dry completely.
- Dry-set mortars: Also known as thin-set adhesives, these are commonly used in larger tile installations, such as floor applications. Dry-set mortars are typically mixed with water or an additive just before application. They provide a strong bond and expedite the curing process, often taking around 24 hours to dry.
- Modified thin-set adhesives: Similar to the dry-set mortars, but contain additional polymers to enhance flexibility and bond strength. This type of adhesive is ideal for more demanding tile installations, such as those subjected to heavy foot traffic or temperature fluctuations. Modified thin-set adhesives usually take at least 24 to 48 hours to cure but may require up to 72 hours in some circumstances.
• Factors That Affect Tile Adhesive Curing Time
Several factors can impact the length of time it takes for the tile adhesive to cure:
– Adhesive Type
As mentioned earlier, different adhesives have different curing times. Read the manufacturer’s recommendations on the packaging to determine the correct cure time for your specific adhesive.
– Environmental Conditions
Temperature and humidity play a crucial role in the curing process of tile adhesive. Higher temperatures and lower humidity levels can accelerate the curing process, whereas cooler temperatures and higher humidity can slow it down.
It is important to follow the manufacturer’s recommendations for environmental conditions during installation, paying particular attention to temperature and humidity.
Generally, a temperature range of 60 to 90 degrees Fahrenheit (16 to 32 degrees Celsius) and a relative humidity level of 30 to 70% are considered ideal for tile adhesive curing.
– Tile and Substrate Porosity
The tile and substrate’s porosity can significantly affect the adhesive’s curing time. More porous materials like unglazed ceramic or natural stone tiles will absorb more adhesive moisture, accelerating the curing time. Likewise, a porous substrate like a cement backer board will also hasten drying.
In contrast, less porous tiles, such as glazed porcelain or glass, and less porous substrates, like waterproof membranes or a well-sealed concrete slab, will slow down the curing process.
– Thickness of the Adhesive Layer
Applying a thicker adhesive layer will lengthen the curing time simply because there’s more material to dry. If you’re working with larger tiles or an uneven substrate that requires a thicker adhesive application, be prepared to account for additional curing time.
– Ventilation and Airflow
Adequate airflow within the installation area can help remove moisture from the adhesive, allowing it to dry more quickly. Be mindful of ventilation during and after applying the adhesive, but avoid directing high-speed fans directly at the installation, as rapid drying may lead to weak bonds.
• Determining When the Tile Adhesive has Cured
It’s essential to avoid disturbing or applying pressure to the tiles while the adhesive cures. Prematurely moving the tiles or applying grout can compromise the bond strength, resulting in an unstable and potentially dangerous installation.
As a general rule, you can safely assume that the adhesive has cured if:
- The recommended curing time from the manufacturer has passed
- The adhesive is no longer soft or malleable when touched through tile joints or open areas
- Tiles have remained in place and are properly adhered to the substrate.
• Conclusion
Allowing tile adhesive to cure properly is essential for a successful and durable installation. By understanding the factors that affect the curing process, selecting the appropriate adhesive, and adhering to the manufacturer’s recommendations, you can ensure a secure and lasting bond between your tiles and their substrate.
Be patient, and give yourself ample time for the adhesive to cure before moving on to the next step in your tile installation project.
Type of Tile Adhesive | Setting Time | Curing Time |
|---|---|---|
Standard Thinset Mortar | 24 hours | 28 days |
Rapid-setting Thinset Mortar | 2-4 hours | 24 hours |
Mastic Adhesive | 8-10 hours | 24-48 hours |
Epoxy Adhesive | 1-2 hours | 24 hours |
What are the methods to accelerate the drying process of tile adhesive?
Tile adhesive is a vital component in any tile installation project. It is the bonding agent between the tile and the substrate, ensuring a secure and reliable connection. However, getting the adhesive to dry quickly can sometimes be challenging, especially in humid environments or when working with large, porous tiles.
We will explore several expert techniques to make tile adhesive dry faster, ensuring a quicker and more efficient installation.
• Choosing the Right Adhesive
The first step in ensuring a faster drying time is to select an appropriate adhesive for the specific tile and substrate. There are various types of tile adhesives available in the market, such as:
- Thinset mortar: This cement-based adhesive is suitable for both indoor and outdoor applications and works well with most types of tiles, including porcelain, ceramic, and natural stone. It offers a relatively fast drying time.
- Mastic adhesive: This pre-mixed adhesive is designed for light-duty applications and is ideal for smaller tiles and wall installations. It provides a faster drying time than thinset mortar but has a limited application range.
- Epoxy adhesive: This two-part system offers superior bonding strength and is typically used for specialized installations, such as swimming pools or chemical-resistant surfaces. It is the fastest drying adhesive but is more challenging to work with and expensive.
Choosing the appropriate adhesive for your project will significantly improve the drying time and overall installation efficiency.
• Preparing the Adhesive and Substrate
Once you’ve selected the right adhesive, preparing both the adhesive and the substrate is crucial to ensure optimal drying time.
– Mixing the Adhesive
Mixing adhesive according to the manufacturer’s instructions is essential to achieve the best consistency and drying time. Use clean water and an appropriate mixing paddle or drill attachment. Over-mixing or under-mixing the adhesive can lead to longer drying times.
– Surface Preparation
A clean, dry, well-prepared substrate is crucial for faster adhesive drying time. Ensure the surface is free from dust, debris, and any existing adhesive or paint residues. Priming the surface with a suitable primer will also enhance the bond and reduce drying time.
• Apply Adhesive in Thin Layers
Applying the adhesive in thin, even layers is essential to accelerate drying. A thicker adhesive application will lead to longer drying times and a higher likelihood of tile slippage or misalignment.
Typically, a trowel with 1/4-inch notches is suitable for applying thin adhesive layers, although larger tiles may require a larger notched trowel. Additionally, spreading the adhesive evenly on the substrate and using a back-butter technique for heavy or large tiles can help promote a more even distribution of adhesive and efficient drying.
• Adjusting Ambient Conditions
The drying time of tile adhesive can be affected by the installation area’s ambient temperature, humidity, and air circulation. Adjusting these factors can help speed up the drying process.
– Temperature
Maintaining an ambient temperature of around 70F (21C) can help facilitate faster drying times. Avoid working in extremely hot or cold conditions, which can negatively impact the adhesive’s performance and drying time.
– Humidity
The drying process of adhesives can be significantly hindered in high-humidity environments. Consider using a dehumidifier to lower the relative humidity in the installation area or adjust the room’s ventilation to promote better air circulation.
– Air Circulation
Proper air circulation can help speed up the drying time of tile adhesive. Ensure the installation area is well-ventilated by opening windows or using portable fans to create a consistent airflow. However, avoid creating an excessive draft that can prematurely cool or dry the adhesive, affecting its bonding capabilities and overall drying time.
• Allow Adequate Curing Time
It’s crucial not to rush the drying process, as this can lead to poor adhesion and potential failures in the installation. Always follow the manufacturer’s recommended curing times and avoid heavy foot traffic, pressure, or tile grouting until the adhesive has fully cured.
In summary, making tile adhesive dry faster involves selecting the right adhesive, proper surface preparation, applying thin adhesive layers, and adjusting ambient conditions.
Following these expert tips and techniques can achieve a quicker and more efficient tile installation process. Additionally, always follow safety guidelines and adhere to the manufacturer’s recommendations to ensure the best results.
Methods | Description |
|---|---|
Use a quick-setting adhesive | Choose an adhesive specifically designed to dry quickly, usually within a few hours. |
Apply thin layers | Applying a thin, even layer of adhesive will help it dry faster. Thick layers take longer to dry and may lead to uneven drying. |
Improve ventilation | Increase airflow in the room by using fans or opening windows. This helps the adhesive dry faster by evaporating the moisture more quickly. |
Use a dehumidifier | Using a dehumidifier can help remove excess moisture from the air, speeding up the drying process. |
Heat the room | Increasing the temperature in the room can help the adhesive dry faster as heat accelerates the evaporation process. |
Choose the right tiles | Some tiles, like ceramic and porcelain, are less porous and will help the adhesive dry faster. Natural stones like marble are more porous and may slow down drying time. |
Is it possible to walk on tiled flooring after a 6-hour duration?
When it comes to laying tiles, one of the most critical factors to consider is the curing time or the time it takes for the tile adhesive (thinset) and grout to achieve optimal bond strength before they can be exposed to regular use.
A commonly asked question is whether it is safe to walk on the tile after six hours. I will address this question, explore the factors affecting cure times, and offer practical recommendations for various situations.
• Understanding Tile Adhesive Cure Times
To determine whether walking on tiles after six hours is feasible, we must first understand the curing times for various tile adhesives. Most tile adhesives are classified into rapid-set (quick-drying) adhesives and standard-set (regular-drying) adhesives.
– Rapid-Set Tile Adhesives
Rapid-set adhesives are designed to cure faster than standard-set adhesives. Their significant advantage allows you to move on to the next step of your tile project more quickly. This speedier timeframe can benefit professionals who need to complete jobs on tight schedules or DIY enthusiasts wanting to lay tiles speedily.
Most rapid-set adhesives can achieve initial bond strength within a few hours, often allowing light foot traffic after six hours. However, complete curing typically takes at least 24 hours for these adhesives.
– Standard-Set Tile Adhesives
Standard-set adhesives are more cost-effective than rapid-set adhesives and offer a longer working time. The extended window can be advantageous for larger tiling projects or installations requiring intricate design work.
Nevertheless, standard-set adhesives generally take 24 to 72 hours to achieve initial bonding strength, making it unadvisable to walk on tiles within six hours.
• Influence of Temperature and Humidity
Temperature and humidity can significantly affect the cure times for both tile adhesive and grout. High temperatures and low humidity can cause adhesives and grouts to dry too quickly, weakening bonds and hampering their long-term stability.
Meanwhile, low temperatures and high humidity can slow down the curing process, which may prolong the time it takes to achieve optimal bond strength.
I recommend that you ideally work at a room temperature of around 70F (21C) and relative humidity of around 50%. If you work in less-than-ideal conditions, consult the adhesive or grout manufacturer’s guidelines to adjust your cure time and application methods appropriately.
• Grout Curing Times
In addition to tile adhesive, it is crucial to consider grout cure times when determining when you can safely walk on your newly installed tiles. Most grouts come in two types: cement-based and epoxy-based.
– Cement-Based Grout
Cement-based grouts are the most common choice for residential and commercial tile installations. Depending on the specific product and environmental conditions, they typically require at least 24 to 72 hours to achieve sufficient bonding strength for light foot traffic.
– Epoxy-Based Grout
Epoxy-based grouts resist stains, chemicals, and moisture, making them ideal for surfaces exposed to heavy use or wet conditions. Epoxy grouts generally need a longer initial curing time than cement-based grouts, with most manufacturers recommending at least 24 to 48 hours before walking on the tiles.
• Practical Recommendations
When determining whether it is safe to walk on tiles after six hours, consider the following practical recommendations:
- Check product guidelines: Consult the manufacturer’s instructions for your specific adhesive and grout products to ensure you adhere to their recommended cure times.
- Monitor environmental conditions: Account for temperature and humidity levels in the working environment and adjust cure times accordingly.
- Err on the side of caution: If in doubt, allow extra time for curing to avoid compromising the integrity and longevity of your tile installation.
In conclusion, while rapid-set adhesives may permit light foot traffic after six hours, it is generally safer to wait at least 24 hours before walking on your newly installed tiles. This waiting period will ensure the optimal bond strength between the tile adhesive and grout, reducing the risk of tile movement, cracks, or bond failure.
By adhering to these guidelines and monitoring environmental conditions, you can set yourself and your tile project up for success.